
If you’re not using Outreach or Salesloft—where UserGems has direct integrations—but still want to use Gem-E messaging in your Sales Engagement Platform (SEP), don’t worry! It only requires one extra step to set up.
Instead of pushing Gem-E messaging directly into your SEP, we’ll push it to the lead/contact level in your CRM. From there, you can map these fields to your SEP and use them as variables/merge fields in your Gem-E sequence.
1. Create Fields/Properties in Your CRM
Create the following fields/properties on your contacts/leads. It's important to create all Subject fields listed below, though you will notice that some are not referenced in the table in Step 5 below.
Note: These fields should not be displayed on page layouts—they are only meant to store information in your CRM before passing it to your SEP.
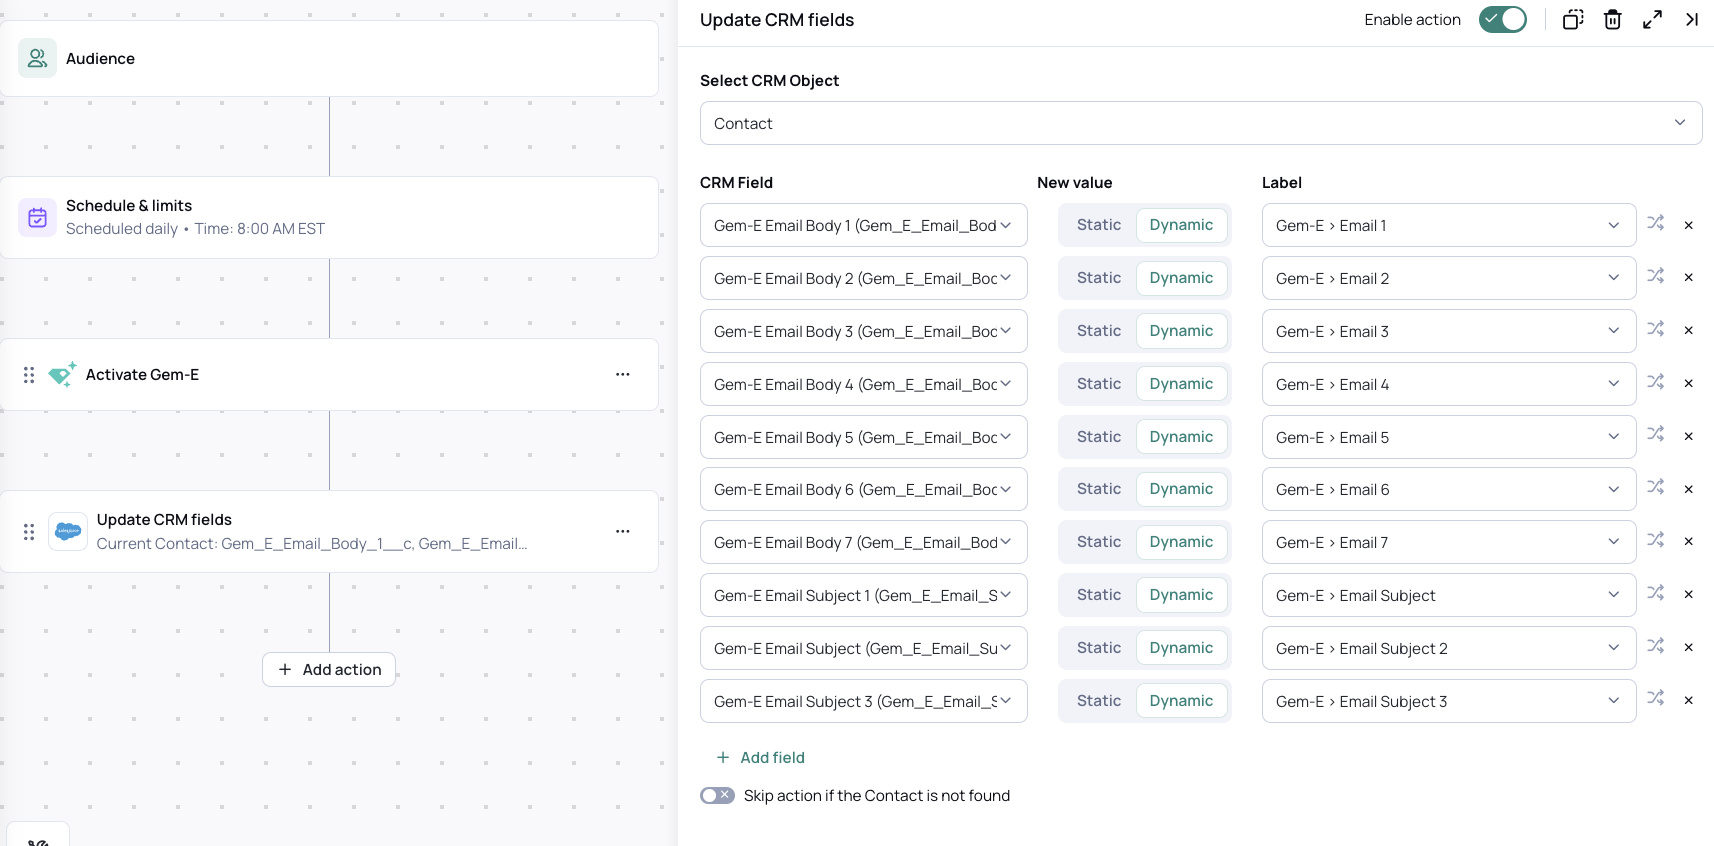
2. Add a Workflow Action to Update CRM Fields
For campaigns where you want to use Gem-E messaging, add a workflow action to Update CRM Fields.
- In the Update CRM Fields action, select the object you’re updating (either contacts or leads, depending on how you’ve configured UserGems to create new records).
- Add all Gem-E fields/properties under the CRM field section. (You can add more fields by clicking "+ Add Field.")
- For each field row, select New Value = "Dynamic".
- Map each CRM field to the dynamic Gem-E value by clicking the Label dropdown.
Your final setup should look something like this:
If everything looks correct, save the action.
3. Map CRM Fields to SEP
Next, map the Gem-E fields from your CRM as custom variable fields in your SEP.
- If you’re using HubSpot or Salesforce for sequences, you can skip this step.
4. Create Sequences/Cadences Using Custom Variable Fields
Now, create a new sequence using custom variables that will dynamically populate with Gem-E messaging when a prospect enters the sequence.
Your sequence structure should look like this:
5. Set Up a Trigger to Add Contacts to the Sequence
Each SEP handles workflows/triggers differently, but in general, you need to create a trigger that:
- IF {{Gem-E Email Body1}} is not blank,
- THEN add the prospect to the Gem-E sequence you just created.
If you’re using multiple Gem-E sequences (e.g., different sequences for different campaigns), you may need to add additional criteria to your UserGems workflow.
For example, you could set the trigger to:
- {{Gem-E Email Body 1}} is not blank AND Campaign = UserGems Account w/ Funding Swarm.
If you need assistance with this step, reach out to your UserGems rep.