^ Sample dynamic layout for a job changer at their new company (right panel)
Background:
Video Walkthrough of this Configuration (< 5 mins)
These dynamic tiles allow your users to quickly and easily see all relevant information about a job change, directly on the Lead or Contact.
- The great thing about this feature is that we can choose to only display the tiles if there was a job change on the lead/contact being viewed.
For each job change that we recognize, we insert a record under our custom object “UserGems”
- This junction record connects the Past Contact with the New Contact and stores all of the data that we have on the job change and their new company
- To set up these custom tiles, we are reading out of the UserGems record that is linked to both the Past & New Contacts
Level of Effort:The instructions below typically take between 5-10 minutes
Permission Requirement: End users will need EDIT access on the UserGems object to see these dynamic layouts (READ access required for the fields on this object)
Package Required: 2.26+
Tile for New Lead and/or Contact page:
This tile will only show up for net-new job change leads/contacts, giving reps context that it is a job change and showing them data about your prior relationship with the person.
If you have configured UserGems to create both Leads & Contacts, we recommend adding this component to both the Lead & Contact lightning pages. You can re-use the same Action for both objects.
1) Go to the lightning layout on the Lead/Contact object that is assigned to your reps
- If you have never created one for this object, the easiest way is to go to any lead/contact record and click “Edit Page”

2) Once in the lightning page editor, search for “Related Record” on the left, and drag the component to where you want it on the page
Give this component an appropriate label (ex. “UserGems - Job Change Info”)
Lookup Field:
- First Lookup = “UG - Infos”
- Second Lookup = “Use This UserGem__UserGems__c”

Update Action = “UG Tile for New Contact”
Create Action = Blank
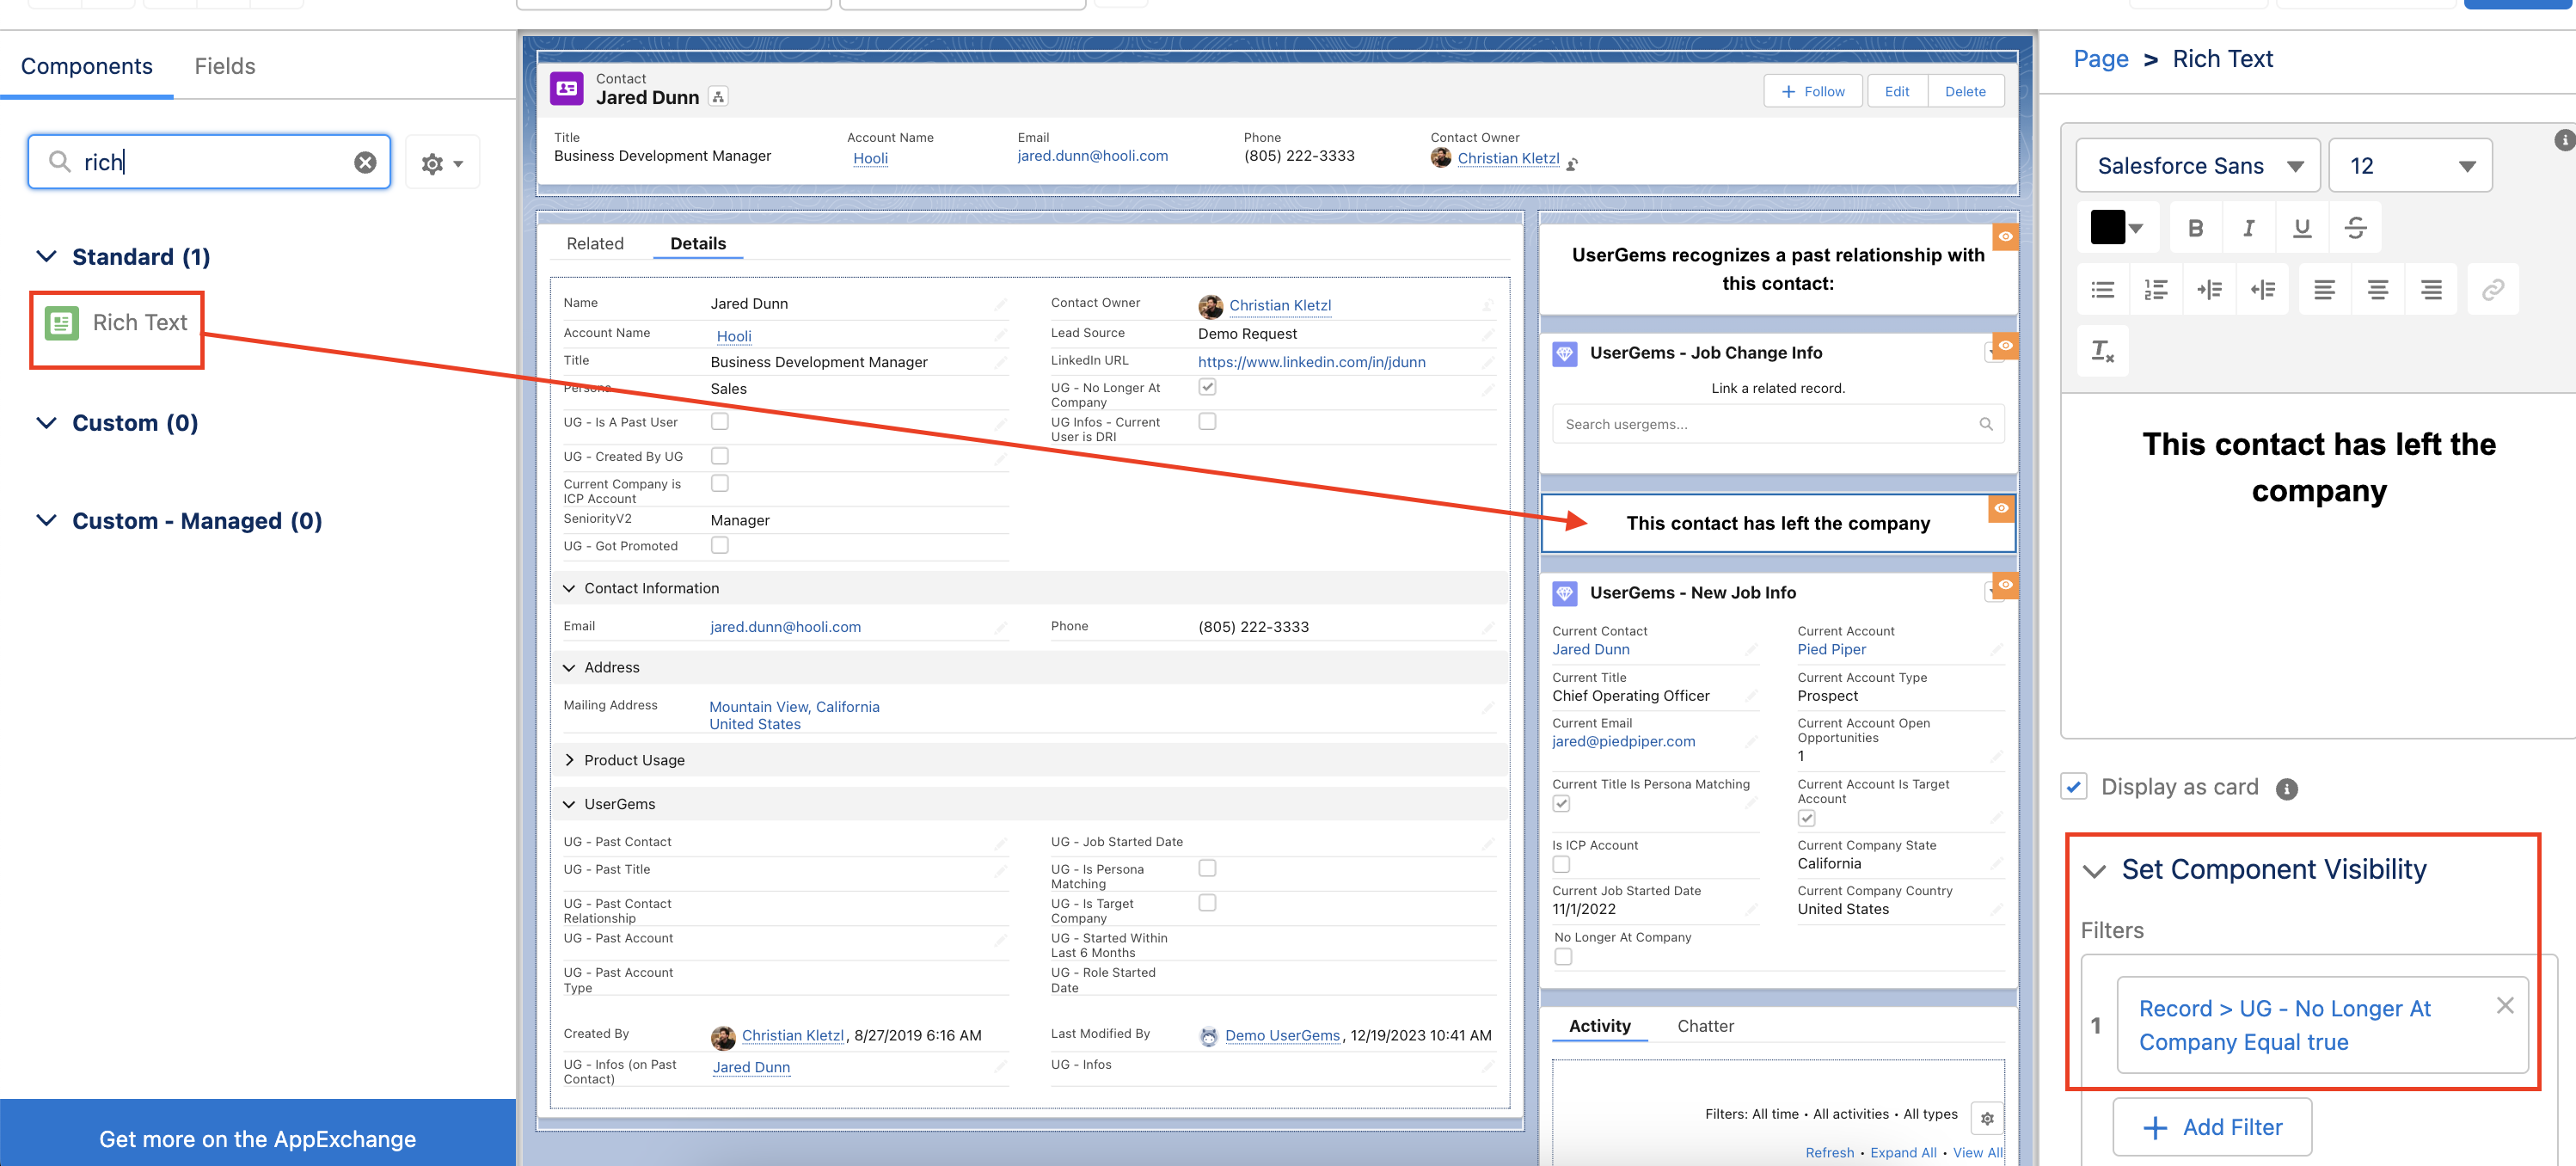
Lastly, within this side panel, scroll down to see Component Visibility and click ADD FILTER
- Filter Type = “Advanced”
- Field = "Record" -> “UG Infos" -> "Name"
- Operator = “Not Equal”
- Value = Blank (if a value is required in your SFDC, you can use two apostrophes to denote "null")

3) Customize your layout (optional)
- Navigate to the custom action "UG Tile for New Contact" (on UserGems object) and click "Edit Layout" to customize which UserGems object fields are displayed on the layout

If you want to pull any custom data from past contact or account into this tile, simply create a formula field on the UserGems object to pull it in - then you can add to the layout
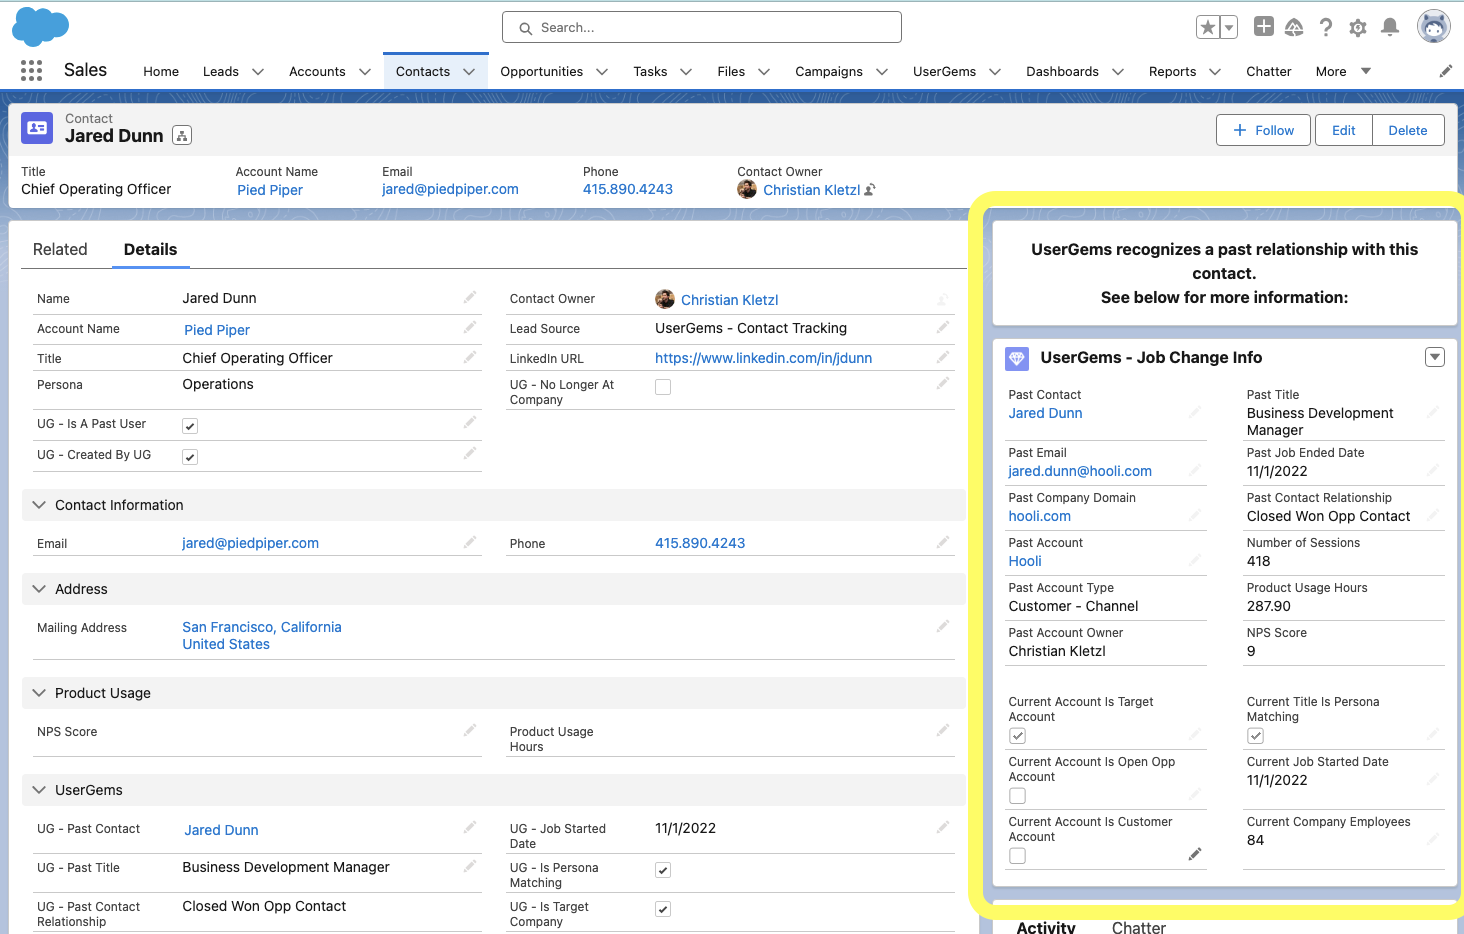
Tile for Past Contact page:

Typically UserGems customers only track Contacts for job changes, which is why we only recommend adding this tile to the Contact and not Lead page.
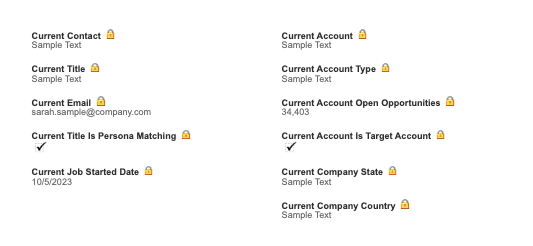
This tile will only show up for someone who UserGems has determined is no longer at their company. Our goal is to make it clear that this contact info is no longer up to date and to link users to the Current Contact which you can see in the screenshot above.
1) Go to the lightning layout on the Contact object that is assigned to your reps
- If you have never created one for this object, the easiest way is to go to any contact record and click “Edit Page”
2) Once in the lightning page editor, search for “Related Record” on the left, and drag the component to where you want it on the page
Give this component an appropriate label (ex. “UserGems - New Job Info)
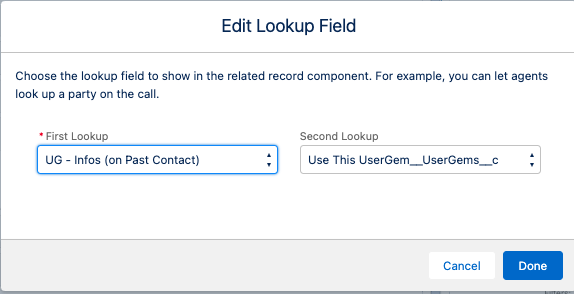
Lookup Field:
- First Lookup = “UG - Infos (on Past Contact)”
- Second Lookup = “Use This UserGem__UserGems__c”
Update Action = “Past Contact Tile for UG Record”
Create Action = Blank
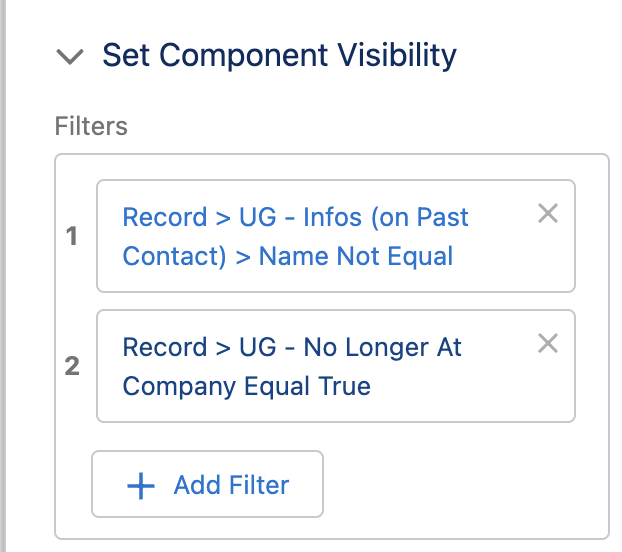
Lastly, within this side panel, scroll down to see Component Visibility and click ADD FILTER (we will be adding 2):
Filter 1:
- Filter Type = “Advanced”
- Field = "Record" -> “UG Infos (on Past Contact)" -> "Name"
- Operator = “Not Equal”
- Value = Blank (if a value is required in your SFDC, you can use two apostrophes to denote "null")
Filter 2:
- Filter Type = “Record Field”
- Field = "UG - No Longer at Company"
- Operator = “Equals”
- Value = TRUE
3) Customize your layout (optional)
- Navigate to the custom action "UG Tile for Past Contact" (on UserGems object) and click "Edit Layout" to customize which UserGems object fields are displayed on the layout
To add a "This contact has left the company" banner to the layout as well, simply drag a “Rich Text” component onto the page with the component visibility shown in the screenshot below.