

^ Sample dynamic layout for a job changer at their new company (right panel)
Background:
These dynamic tiles allow your users to quickly and easily see some relevant information about a job change, directly on the Lead or Contact.
- The great thing about this feature is that we can choose to only display the tiles if there was a job change on the lead/contact being viewed.
Level of Effort:The instructions below typically take between 5-10 minutes
Tile for New Lead and/or Contact page:
This tile will only show up for net-new job change leads/contacts, giving reps context that it is a job change and showing them data about your prior relationship with the person.
If you have configured UserGems to create both Leads & Contacts, we recommend adding this to both the Lead & Contact lightning pages.
1) Create a Custom Action to control the fields displayed in the dynamic tile
Go to the Object Manager -> Contact (or Lead) -> Buttons, Links and Actions -> New Action
- Action Type = "Update a Record"
- Standard Label Type = "none"
- Label = "UserGems Layout for New Contact"
- Name will auto-populate
- Save
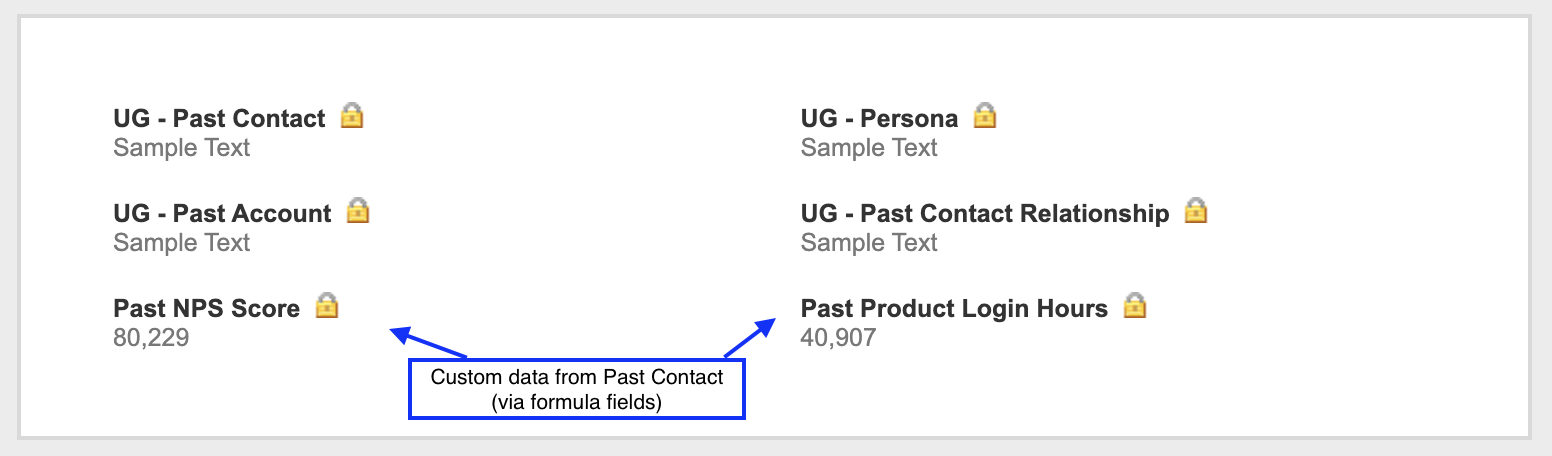
Now within the new action, click "Edit Layout" --- we recommend the following UG fields but you can certainly add more at your preference:
If you want to pull any custom data from past contact or account into this tile, simply create a formula field to pull via either of the UG lookup fields - then you can add to the layout
Remember, if you utilize Leads, you will also need to replicate this action for that object.
2) Go to the lightning layout on the Lead/Contact object that is assigned to your reps
- If you have never created one for this object, the easiest way is to go to any lead/contact record and click “Edit Page”

3) Once in the lightning page editor, search for “Related Record” on the left, and drag the component to where you want it on the page
Give this component an appropriate label (ex. “UserGems - Job Change Info”)
- Lookup Field = Use this Contact
- Update Action = "UserGems Layout for New Contact"
- Create Action = Blank
Lastly, within this side panel, scroll down to see Component Visibility and click ADD FILTER
- Filter Type = “Record Field”
- Field = "UG - Past Contact Relationship"
- Operator = “Not Equal”
- Value = Blank
4) Add Rich Text above the Related Record tile
Simply drag a Rich Text area above the "Related Record" component and...
- Add relevant text like "UserGems recognizes a Past Relationship with this Contact"
- Mimic the Component Visibility applied to the Related Record tile
- Filter Type = “Record Field”
- Field = "UG - Past Contact Relationship"
- Operator = “Not Equal”
- Value = Blank

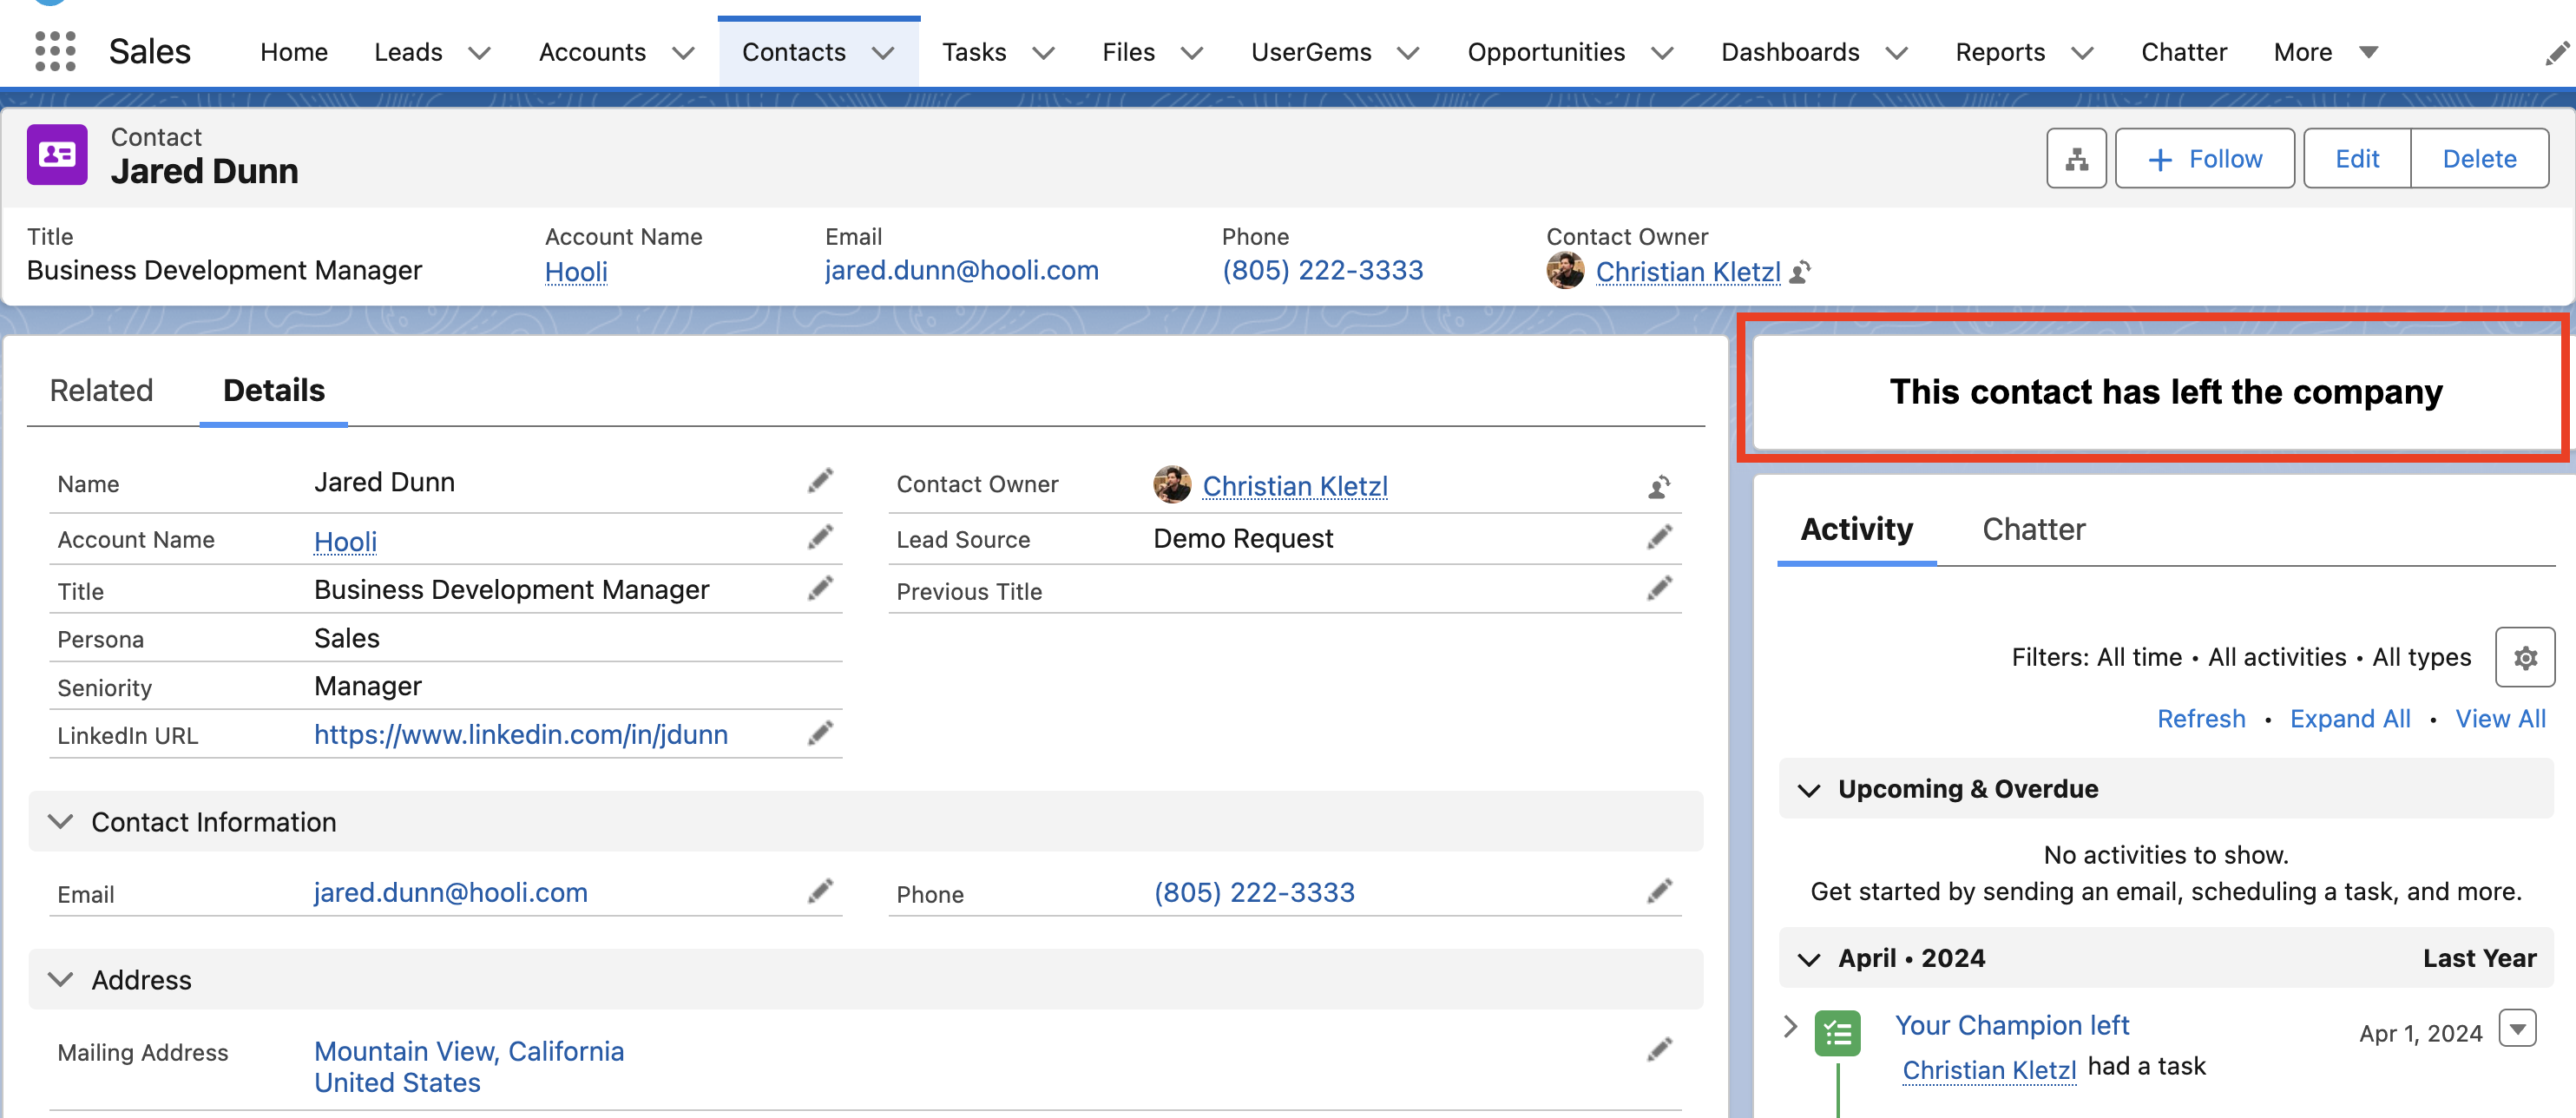
(Optional) Rich Text 'job departure' flag for Past Contact page:
This text will only show up for someone who UserGems has determined is no longer at their company. Our goal is to make it clear that this contact info is no longer up to date.
1) Create a new formula field to use for Layout Visibility Filtering
- Type = Formula (checkbox)
- Label = "UG - Job Departure?"
- Formula template: IF( ISBLANK(UG - No Longer at Company), FALSE, TRUE
- ^^Be sure to use the API name of your "UG - No Longer at Company" field
- Essentially, if "UG - No Longer at Company" is filled in, the formula box is checked
2) Go to the lightning layout on the Contact object that is assigned to your reps
- If you have never created one for this object, the easiest way is to go to any contact record and click “Edit Page”
3) Once in the lightning page editor, search for “Rich Text” on the left, and drag the component to where you want it on the page
Give this component some appropriate verbiage: "This contact has left the company"
Lastly, within this side panel, scroll down to see Component Visibility and click ADD FILTER:
Component Visibility Filter:
- Filter Type = “Record Field”
- Field = "UG - Job Departure" (new formula field created above)
- Operator = “Equal”
- Value = True