

Overview
UserGems campaigns can send signal data — job changes, intent, and other triggers — straight into a Google Sheet using a webhook action. This is useful when your team works out of a spreadsheet rather than a CRM, or when you want a running record of signals outside of UserGems.
The setup has two halves: a small script that lives in your Google Sheet and receives the data, and a webhook action in your UserGems campaign that sends it.
📝 Each Google Sheet needs its own script and its own URL. If you want signals going to more than one sheet, repeat this setup for each one.
Step 1 — Set up your Google Sheet
- Open your Google Sheet.
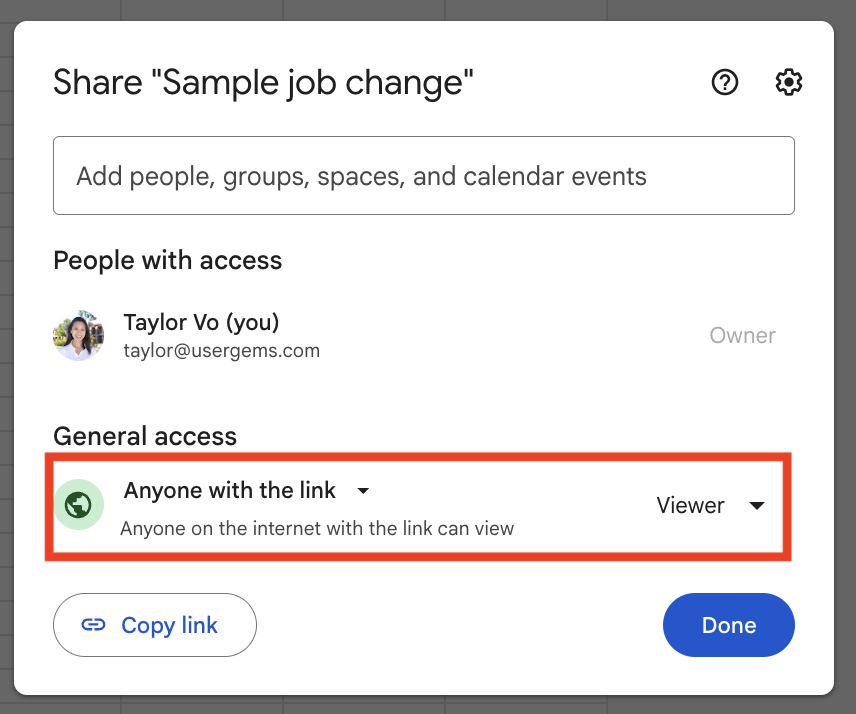
- Set access to Anyone with the link.
- Save the URL somewhere — this is where the job changes will appear.
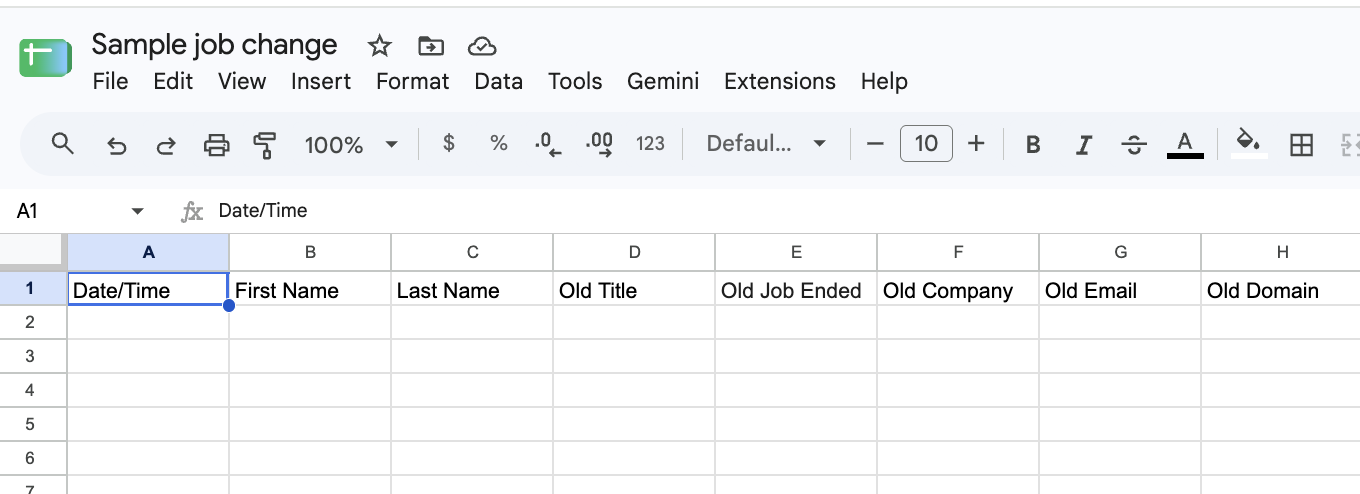
In row 1, add the column headers for the data you're about to send.
The script also writes a timestamp into the first column of every row, recording when that signal arrived. Add a header for it — something like Date Added — as your first column.
Step 2 — Add the Apps Script
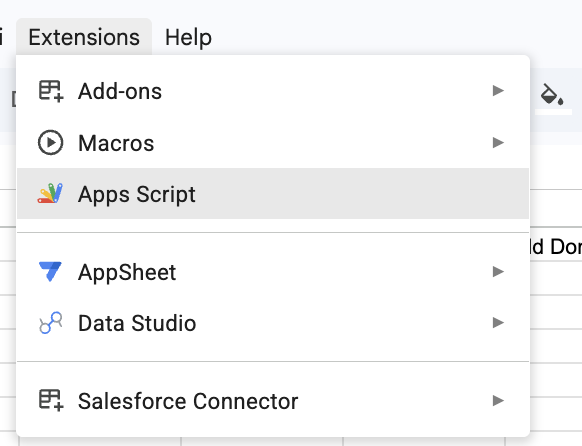
Click Extensions → Apps Script.
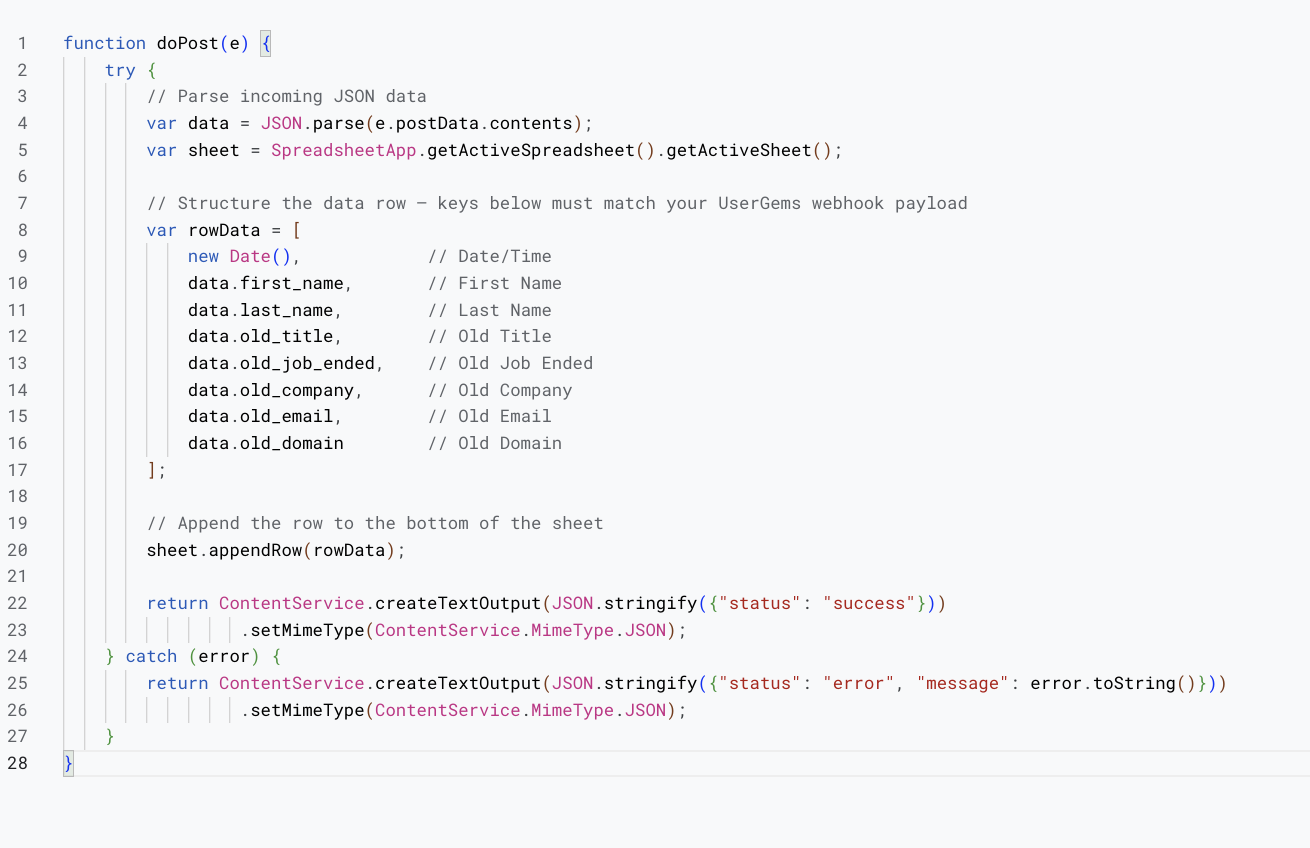
Delete any default code and paste the following:
function doPost(e) {
  try {
    // Parse incoming JSON data
    var data = JSON.parse(e.postData.contents);
    var sheet = SpreadsheetApp.getActiveSpreadsheet().getActiveSheet();

    // Structure the data row (modify keys to match your incoming JSON payload)
    // Example payload: {"name": "John Doe", "email": "john@example.com"}
    var rowData = [
      new Date(), // Optional: adds a timestamp
      data.name,
      data.email
    ];

    // Append the row to the bottom of the sheet
    sheet.appendRow(rowData);

    return ContentService.createTextOutput(JSON.stringify({"status": "success"}))
      .setMimeType(ContentService.MimeType.JSON);
  } catch (error) {
    return ContentService.createTextOutput(JSON.stringify({"status": "error", "message": error.toString()}))
      .setMimeType(ContentService.MimeType.JSON);
  }
}
⚠️ TherowDatablock is a template.data.nameanddata.emailare examples, not the fields you'll actually be sending. Replace them with the keys from your own payload, listed in the same order as your column headers in row 1. If the order doesn't match, your data will land in the wrong columns.
For example, if you're sending first_name, last_name, and company, your rowData becomes:
var rowData = [
  new Date(),
  data.first_name,
  data.last_name,
  data.company
];
Step 3 — Deploy the script as a web app
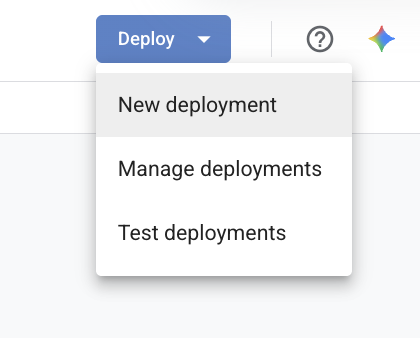
- In the upper-right corner of the Apps Script editor, click Deploy → New deployment.
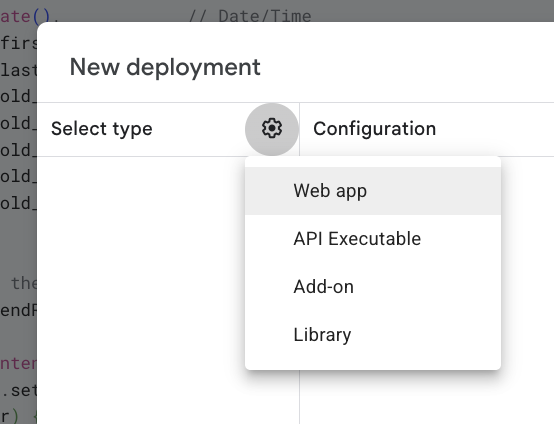
- Click the gear icon (Select type) and choose Web app.
- Configure the deployment settings:
- Execute as: Me (your email address)
- Who has access: Anyone
- Click Deploy.
- Copy the provided Web app URL — this is the URL the webhook needs to send the data to.
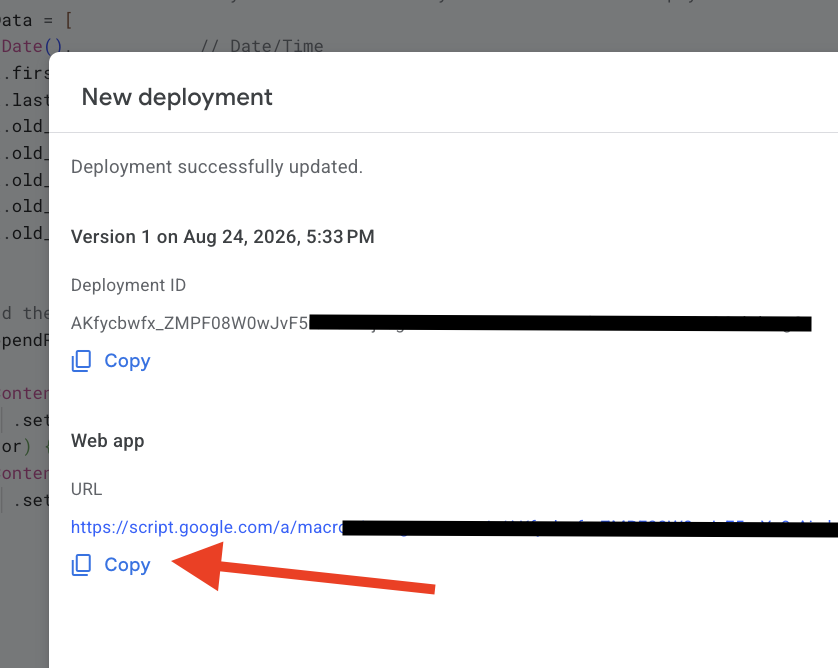
⚠️ Who has access: Anyone is required — it's what lets UserGems reach the endpoint without a login step. It also means anyone who has the Web app URL can append rows to your sheet. Treat the URL like a secret: don't post it in shared docs or channels.
Authorize the script on first deploy
The first time you deploy, Google will ask you to authorize the script before it will run. This is expected — you're granting your own script permission to write to your own sheet.
- Click Authorize access and choose your Google account.
- On the "Google hasn't verified this app" screen, click Advanced.
- Click Go to [your project name] (unsafe).
- Click Allow.
You'll be returned to the deployment screen with your Web app URL. Keep that URL handy — it's what you'll paste into UserGems in the next step.
📝 If you edit the script later, you'll need to deploy a new version for the changes to take effect. See Deploy a new version below.
Step 4 — Configure the webhook in UserGems
- In the campaign you want to export from, add a Webhook action.
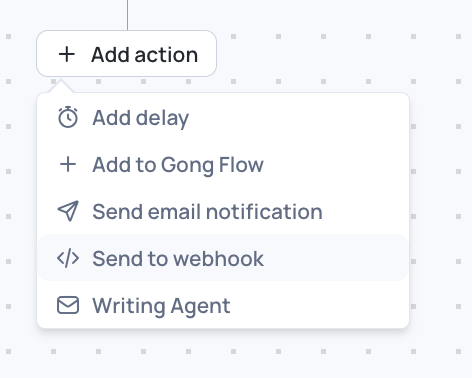
- Paste your Web app URL into the webhook URL field.
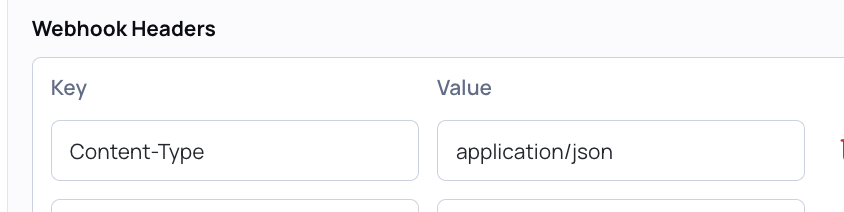
- In the headers, add
Content-Type: application/json.
- Build the JSON payload with the fields you want to send. Use the forward slash (
/) to trigger the variable picker.
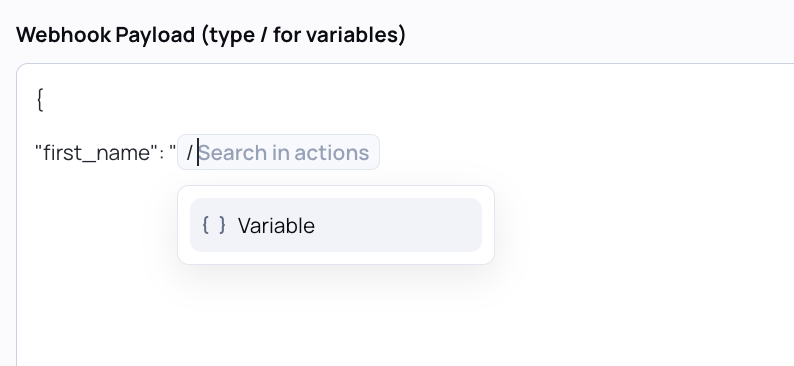

Each time the campaign fires, UserGems posts that JSON to your script, and the script appends a new row to your sheet.
Mapping fields to your columns
The keys in your JSON payload need to match three things: the variable names you select in UserGems, the keys referenced in your rowData block, and the order of your headers in row 1. Get one out of sync and the data still lands — just in the wrong place.
| Where | What has to match |
|---|---|
| UserGems webhook payload | The JSON key you type, e.g. first_name |
Apps Script rowData | The same key, referenced as data.first_name |
| Sheet row 1 | A header in the same position as that key in rowData |
Known field notes
works atis not an available variable. Company Type returns nearly equivalent information and is the recommended substitute.
Troubleshooting
No rows are appearing in the sheet
- Confirm the sheet's sharing is set to Anyone with the link.
- Confirm the deployment type is Web app, not another type.
- Confirm you're using the Web app URL from the deployment, not the URL of the Apps Script editor.
- Confirm you completed the authorization prompt on first deploy.
Data is landing in the wrong columns
- Your
rowDataorder doesn't match your header row. Compare the two and reorderrowDatato match.
Some rows are missing fields
- A key in
rowDatadoesn't match a key in the payload UserGems is sending. Check spelling and casing — they must match exactly.
My script changes aren't taking effect
- You saved the script but didn't deploy a new version. See Deploy a new version.
Deploy a new version
- Open your Google Sheet.
- Go to Extensions → Apps Script. This opens the Apps Script editor.
- Make your changes to the code.
- Save the project.
- In the Apps Script editor, click Deploy → Manage deployments.
- Find the existing deployment you want to update.
- Click the ✏️ pencil / edit icon next to that deployment.
- Under Version, select New version.
- Optionally add a description, such as Updated LinkedIn filtering logic.
- Click Deploy.
Google specifically recommends updating the existing deployment this way: create a new version and point the existing deployment to it. This keeps the existing deployment/URL rather than creating an entirely separate deployment.
⚠️ Important: Don't click "New deployment".