UserGems offers SAML 2.0 authentication for Enterprise and Elite customers. This authentication is not limited to specific providers; all providers that support SAML 2.0 are supported. SSO allows customers to have complete control over access to UserGems from their authentication provider (IdP). If you add users to the UserGems application within your SSO provider, they will be able to login directly to UserGems. The same applies to disabling users; when users are deactivated in your SSO provider, they will lose access to UserGems.
We'll go through the setup process with Microsoft as an example (the same concept works for Google, Okta and other providers). We also provide Okta configuration instructions below.
Configuration using Microsoft
If you're using Microsoft as your IdP, follow the directions below.
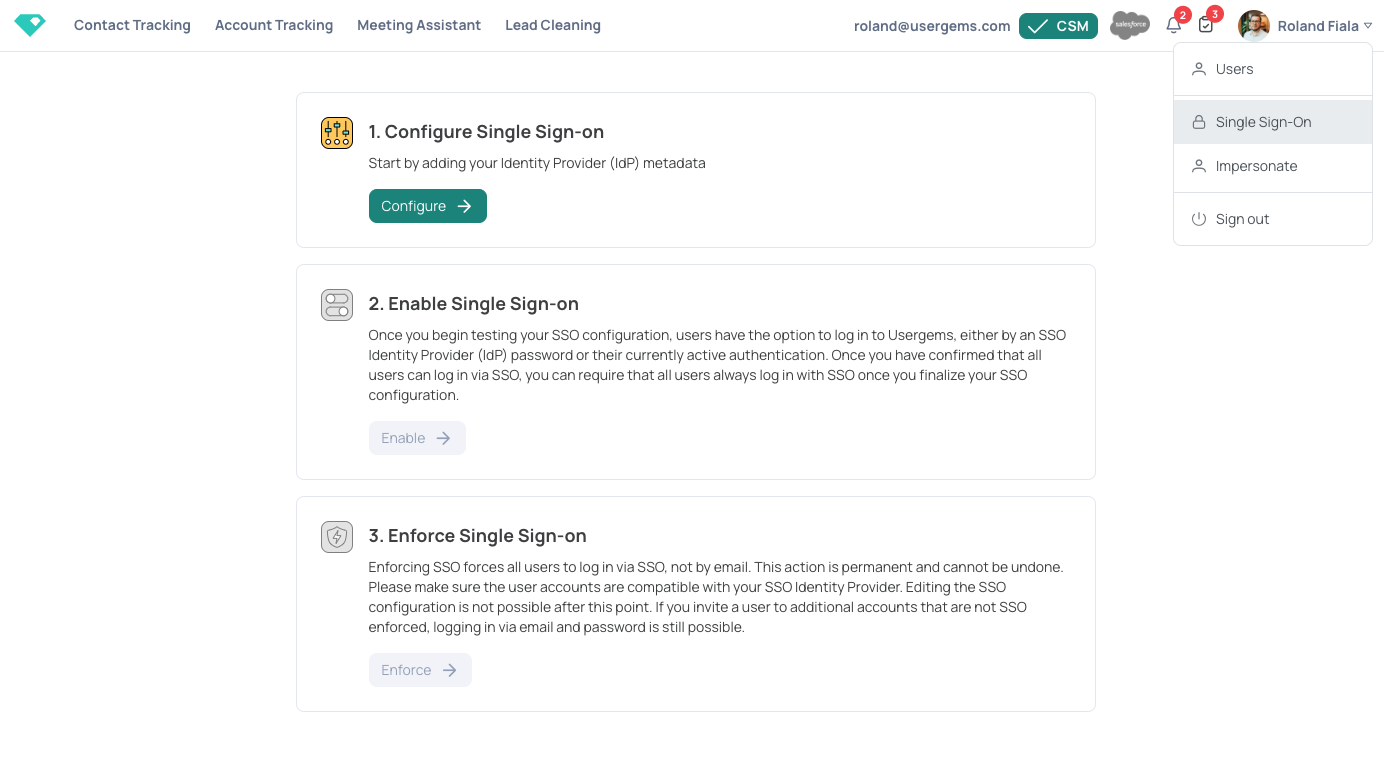
Once you have access to the Single Sign-On feature (available in our Elite and Enterprise packages) you can access it via the navigation in the top right of your UserGems account:
- The first step is to configure certificates and metadata. To begin, make sure you are an Administrator in your company and have access to the SSO configuration from your Identity Provider (IdP). Let's choose the IdP first (Microsoft Azure in our case):

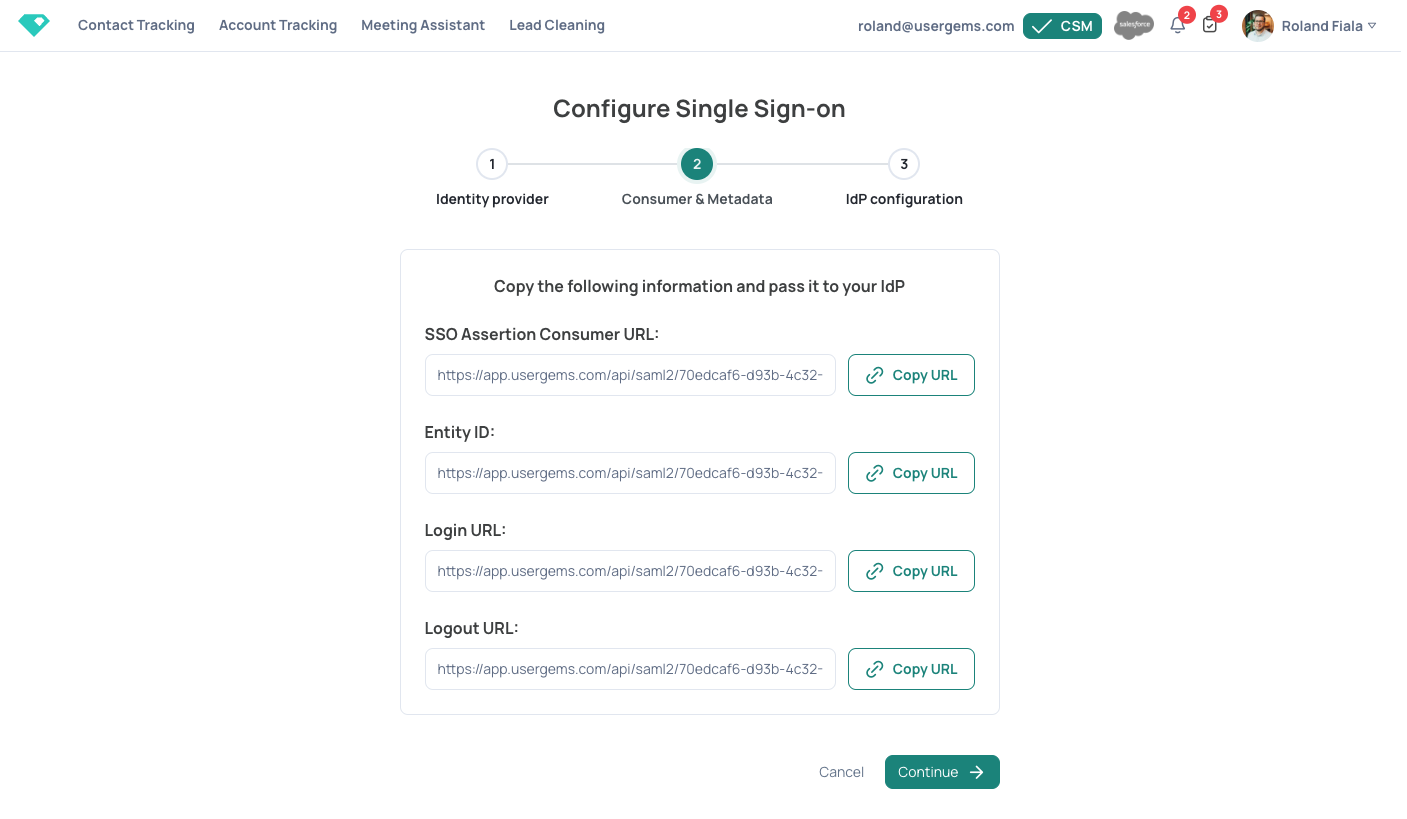
- Once we click “Continue” we will get all the required information that needs to be added to Microsoft:
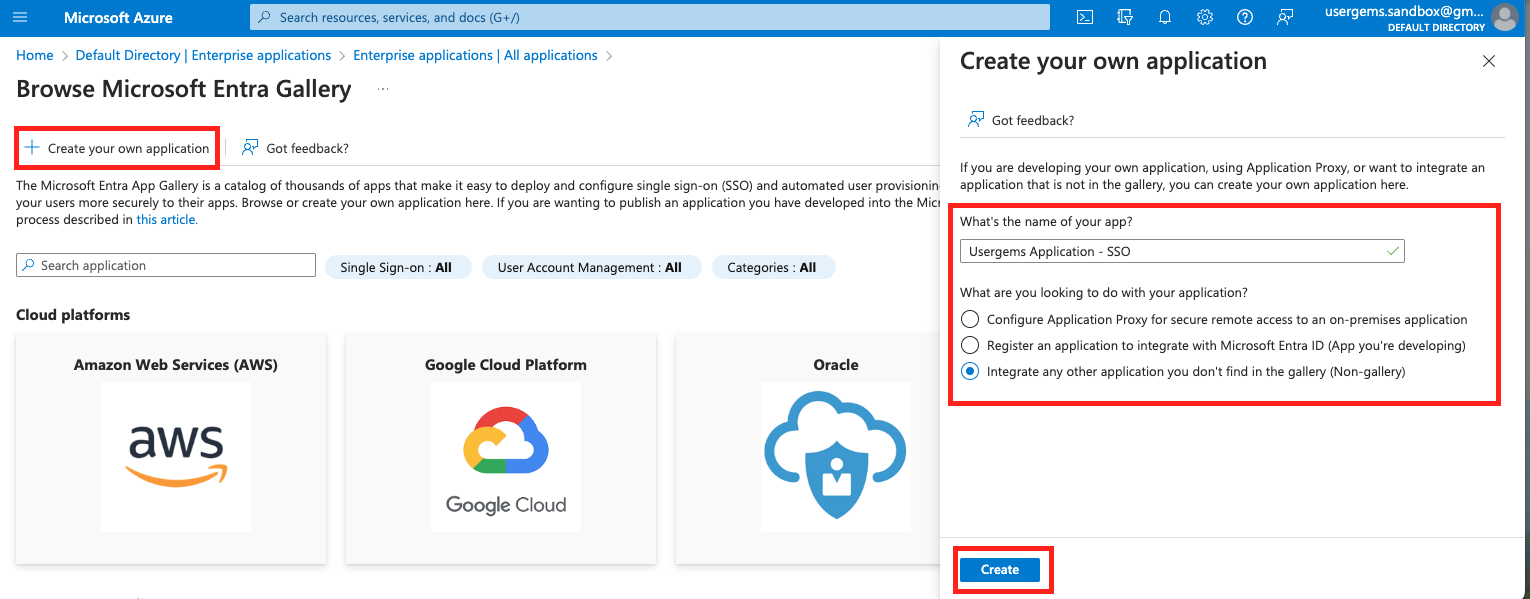
- Within Microsoft, navigate to Microsoft Entra ID, select Enterprise applications, and click “New application”:

- On the next screen, select “Create your own application.” Give it a meaningful name such as “UserGems Application - SSO” and click “Create”:
- As soon as your new application is created, you will be able to add all the details from Step 2 (URLs which were shown within the UserGems platform). To enter the URLs, go to “Single sign-on” in the navigation and select SAML as the method:
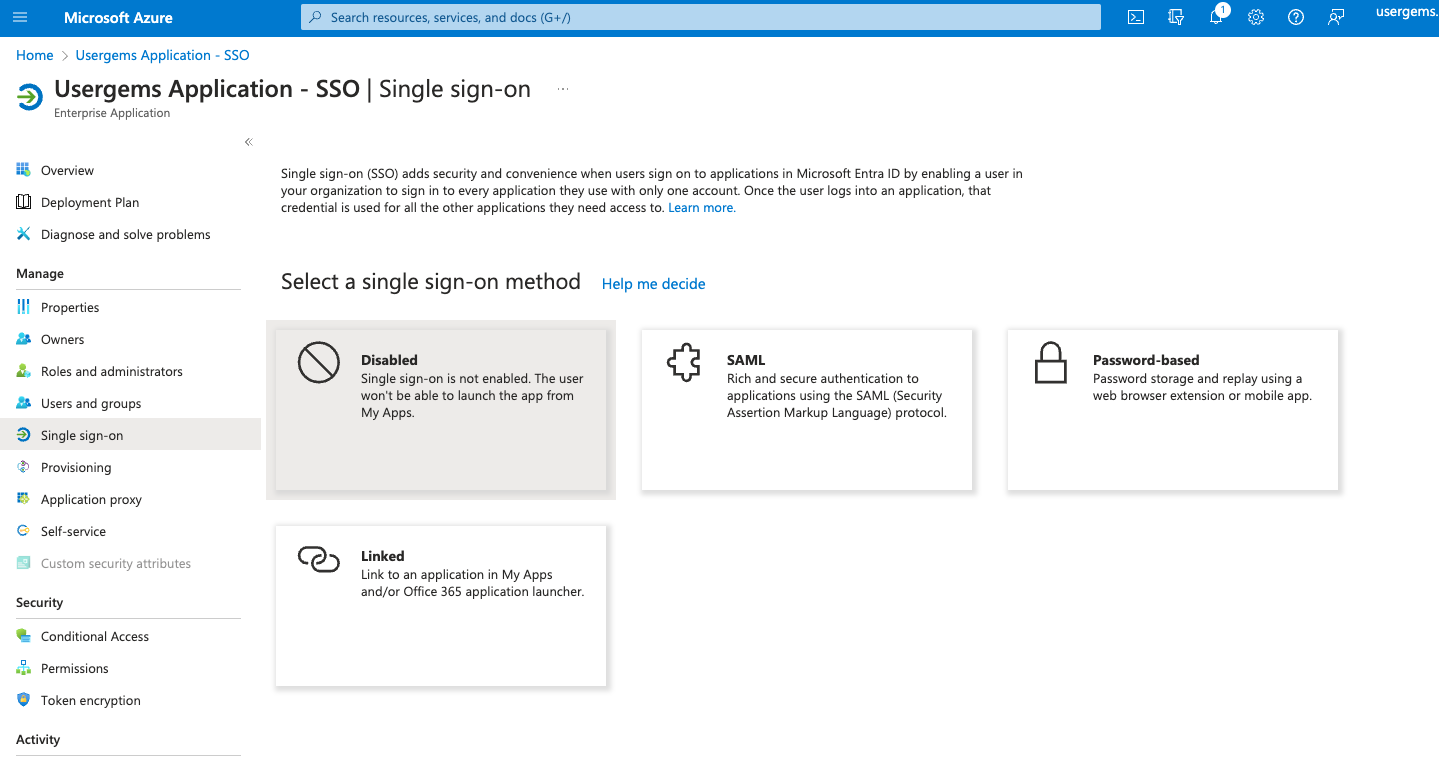
- This will open up the following screen where you can edit the Basic SAML configuration and add the URLs:


- By default, your SSO application will not allow any users to login to UserGems. Therefore you have to either add specific users or groups (which should be able to login to UserGems) to the application, typically members of your Go-to-Market team (Sales, Marketing, Customer Success, & Operations). This is done under “Assign users and groups”:
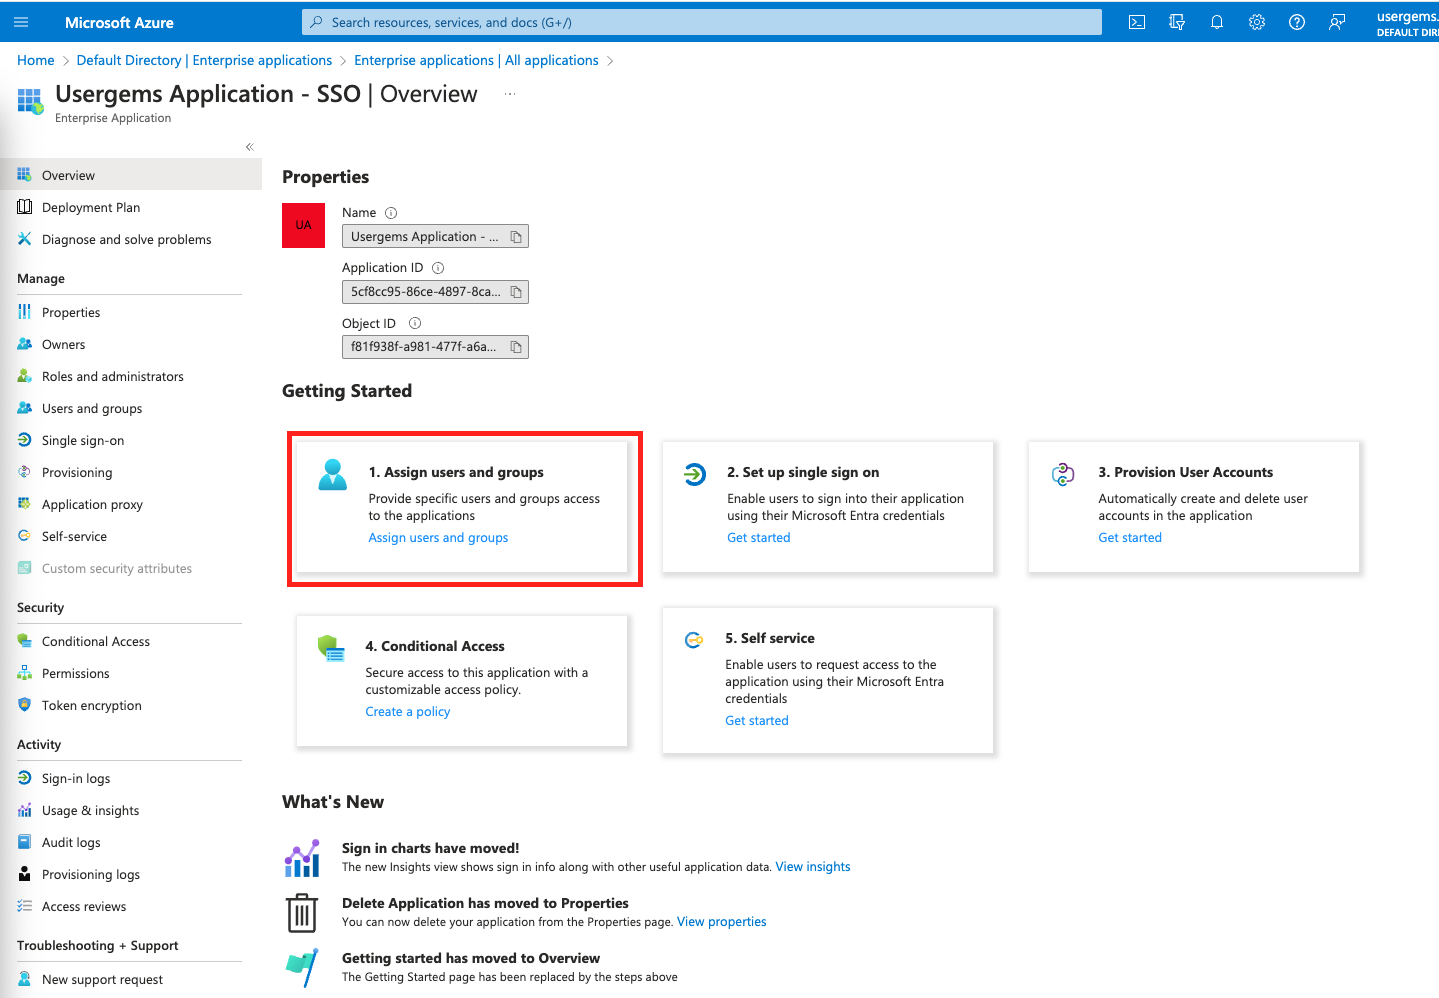
- This will lead to a screen where you can see all users/groups that are allowed to login via UserGems. You can add more users or groups with “Add user/group”. We have added a user called “Access” which is allowed to login to UserGems in the example below.

- You can now continue with setup within UserGems. Download the metadata.xml file from Microsoft and upload it to UserGems.
- All fields on the screen will automatically be populated with the correct values if you upload the correct file.
- If values are not automatically populating, please create a support ticket and include your metadata.xml as well as the provider you are using.
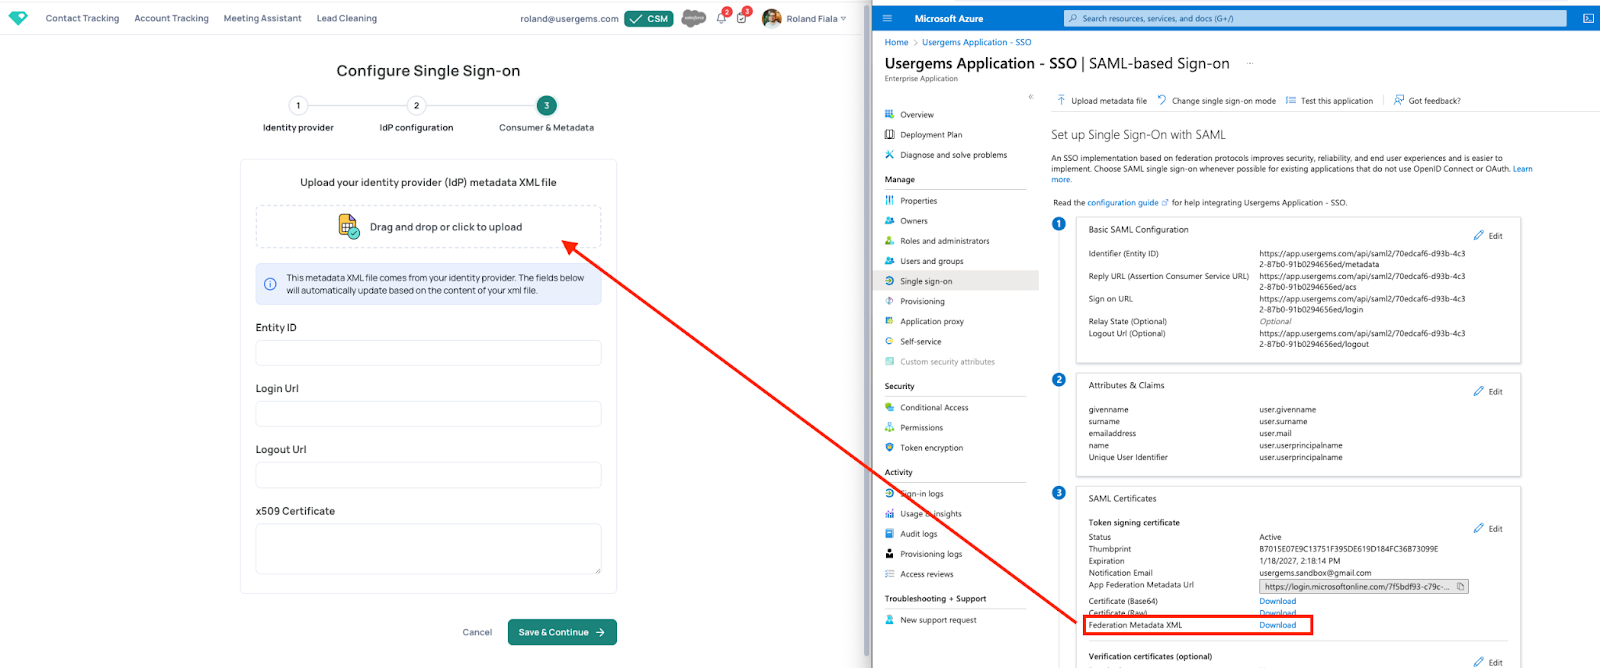
- Click “Save & Continue” to get to the next screen.

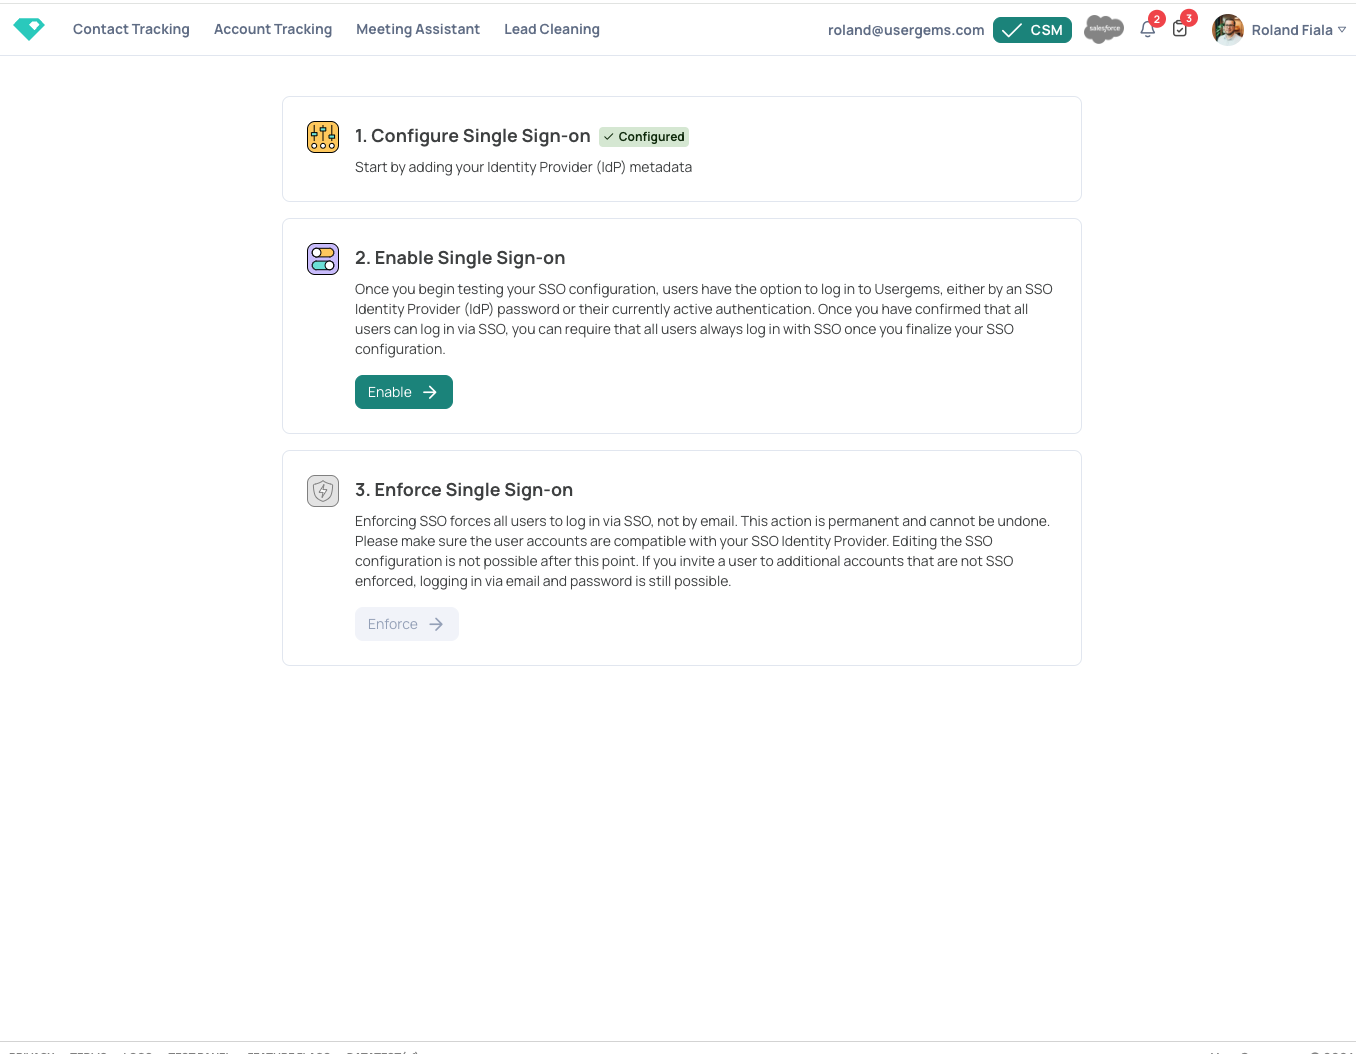
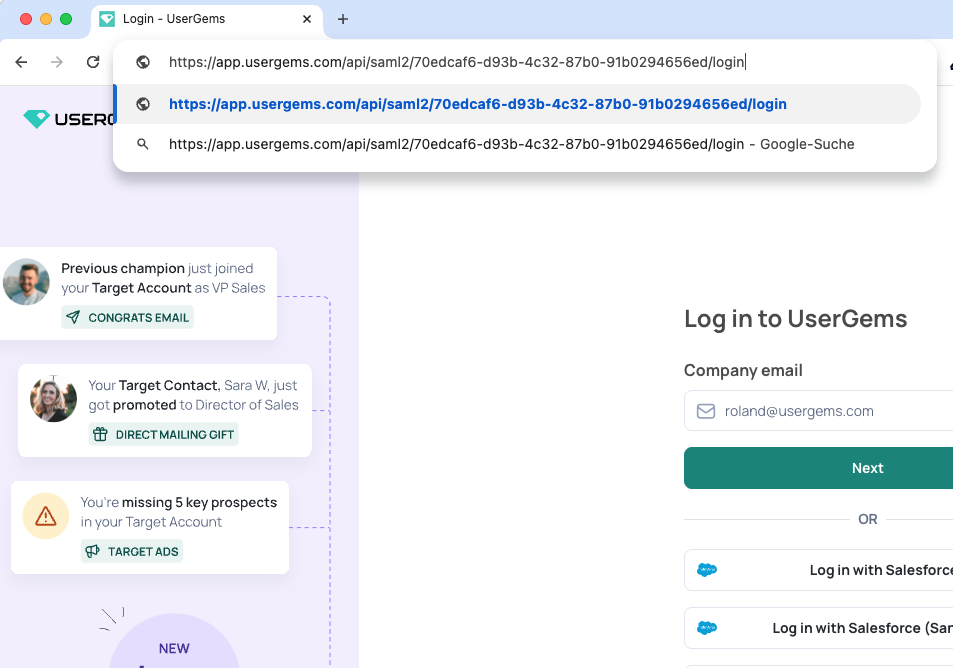
- Now that you have setup the configuration for SSO, you can test it by clicking "Enable". This will create a company specific test URL to let you test the new authentication with your IdP. Enter the provided URL into a new tab in your browser.
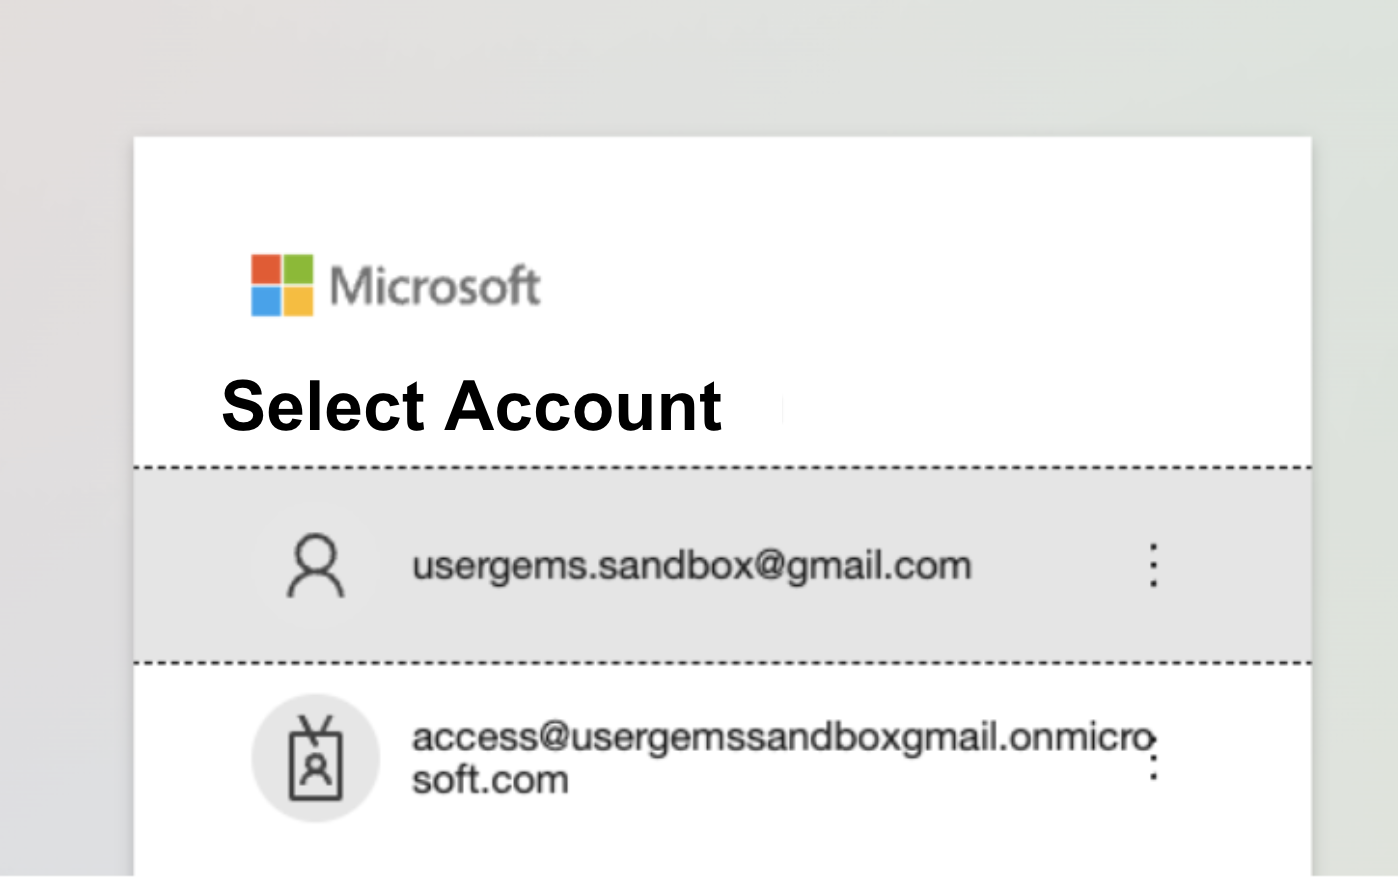
- You should be automatically redirected to the authentication provider (in our case Microsoft).
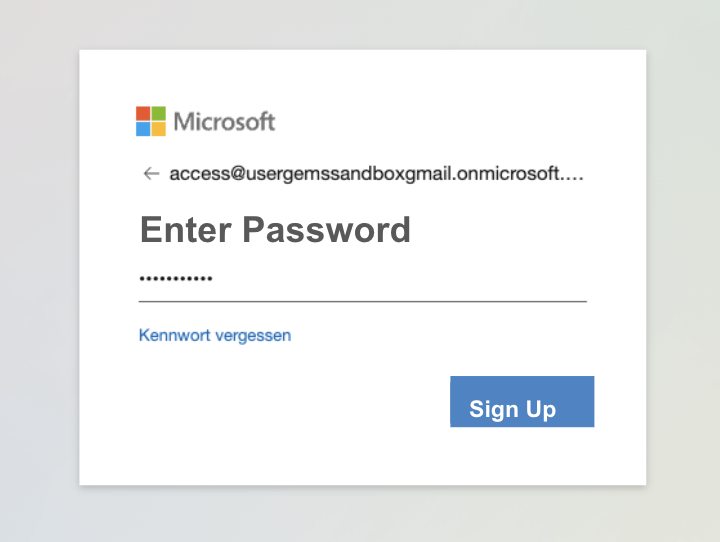
- Log in with your username and password and you will be automatically signed up (if you don't have an account yet) or logged in (if there is already an account matching your email address).
- Landing here means that a UserGems user was properly created and is now able to login to your UserGems account.

Configuration using OKTA
If you're using Okta as your IdP, follow the directions below.
- Once you have access to the Single Sign-On feature (available in our Elite and Enterprise packages) you can access it via the navigation in the top right of your UserGems account:
- The first step is to configure certificates and metadata. To begin, make sure you are an Administrator in your company and have access to the SSO configuration from your Identity Provider (IdP). Let's choose the IdP first (Okta in our case).
- Once we click “Continue” we will get all the required information that needs to be added to Okta:
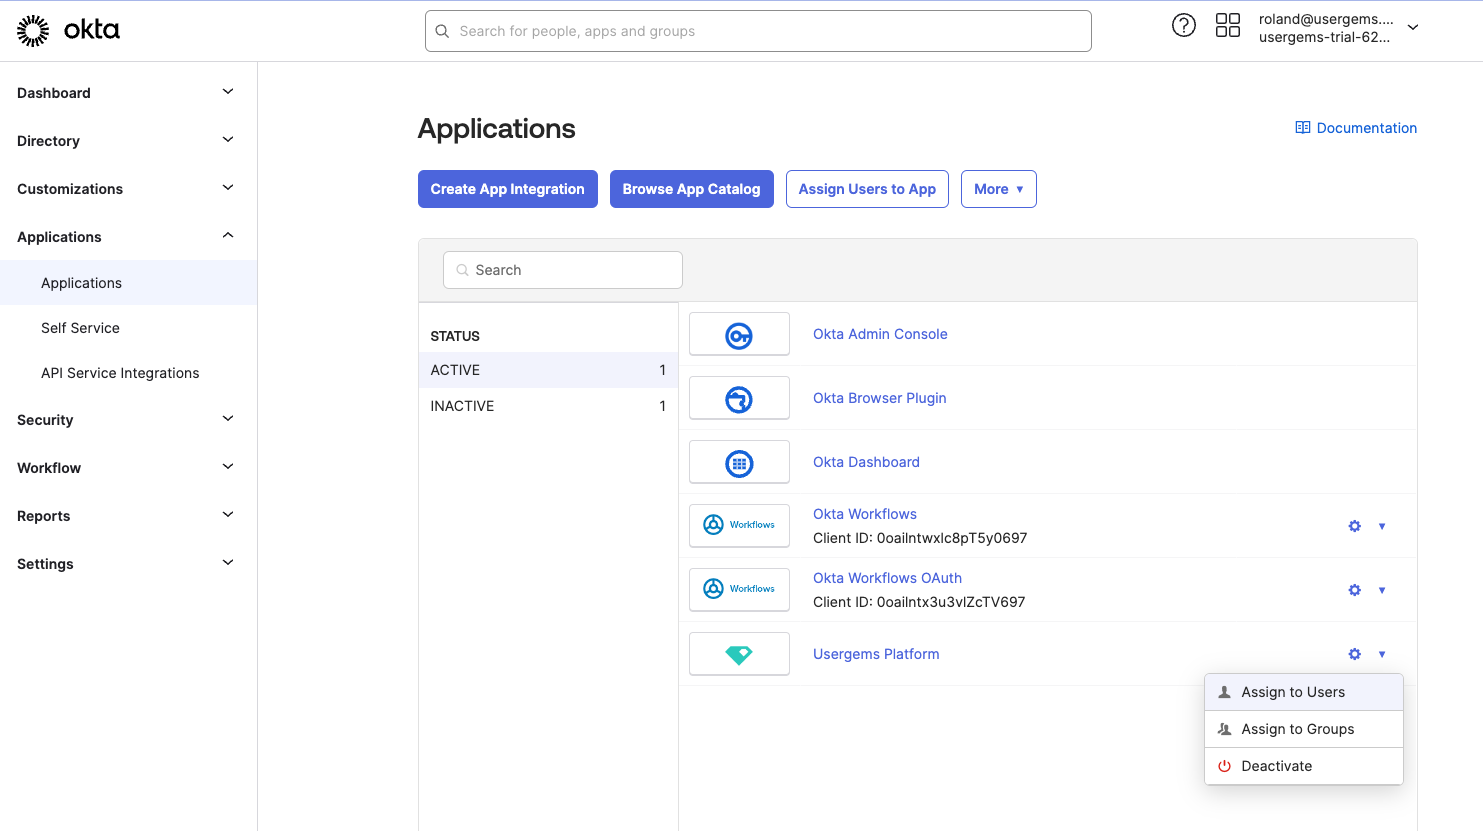
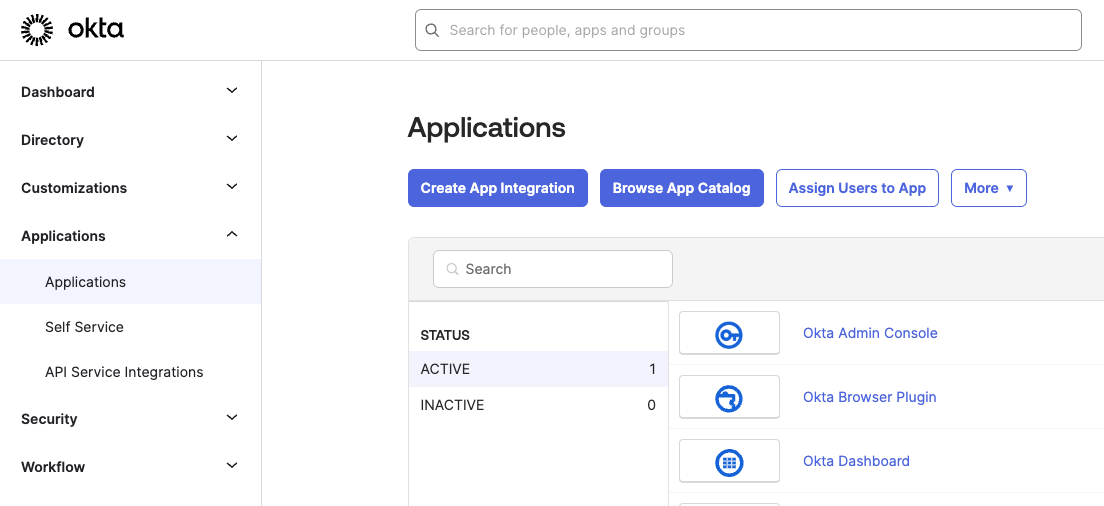
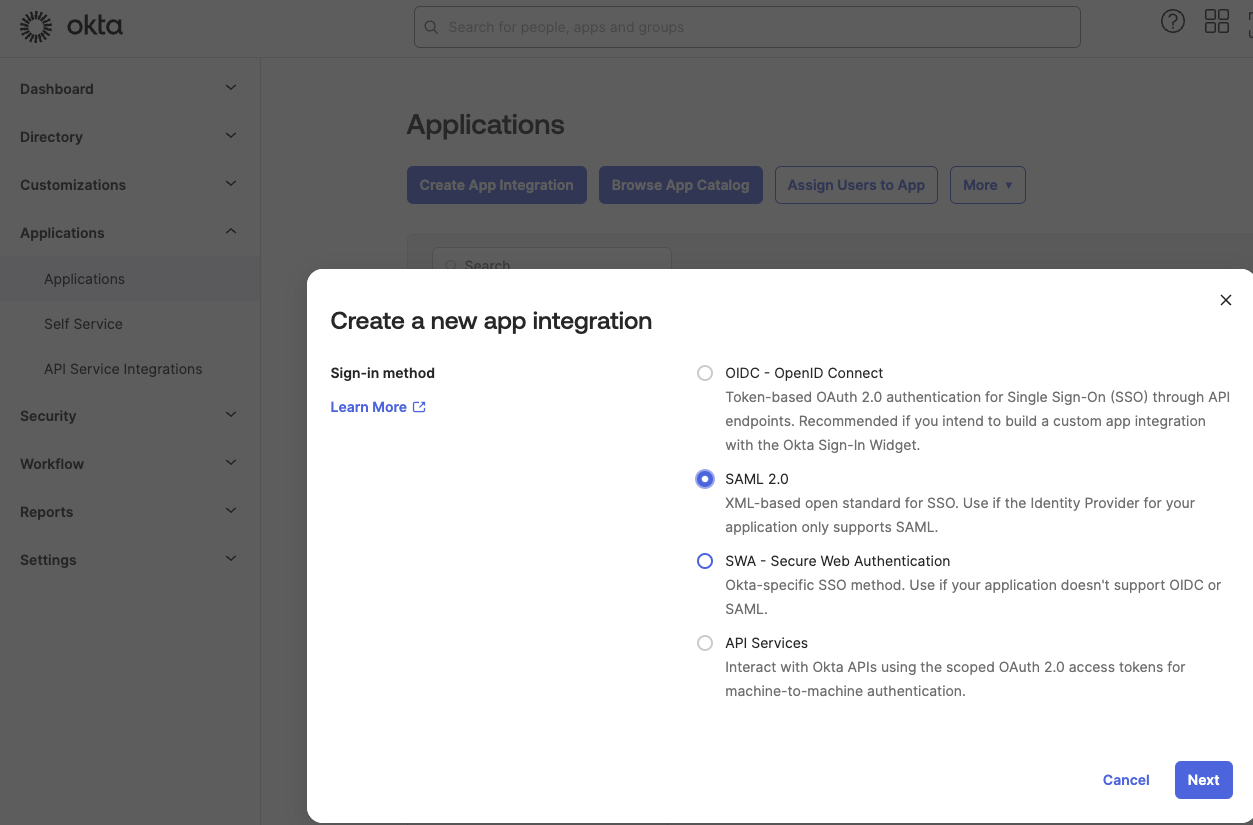
- Within Okta, navigate to Applications > Create App Integration.
- Select “SAML 2.0” for your application.
- On the next screen, give your app a meaningful name like “UserGems Platform - SSO”, upload the UserGems logo (download it here) and click “Next”.

- On the next screen, you’ll need to configure your SSO application. To make sure that your users show up with their names in UserGems, you’ll need to add two attribute statements. Use the following values:
- firstName:
urn:oid:2.5.4.42 - lastName:
urn:oid:2.5.4.4
- firstName:
These replace the old schema URLs (http://schemas.xmlsoap.org/ws/2005/05/identity/claims/givennameandhttp://schemas.xmlsoap.org/ws/2005/05/identity/claims/surname).
- Once this is done, just finish up the process. You should now be able to see the Application in your Overview. Two more steps before your users can log in.
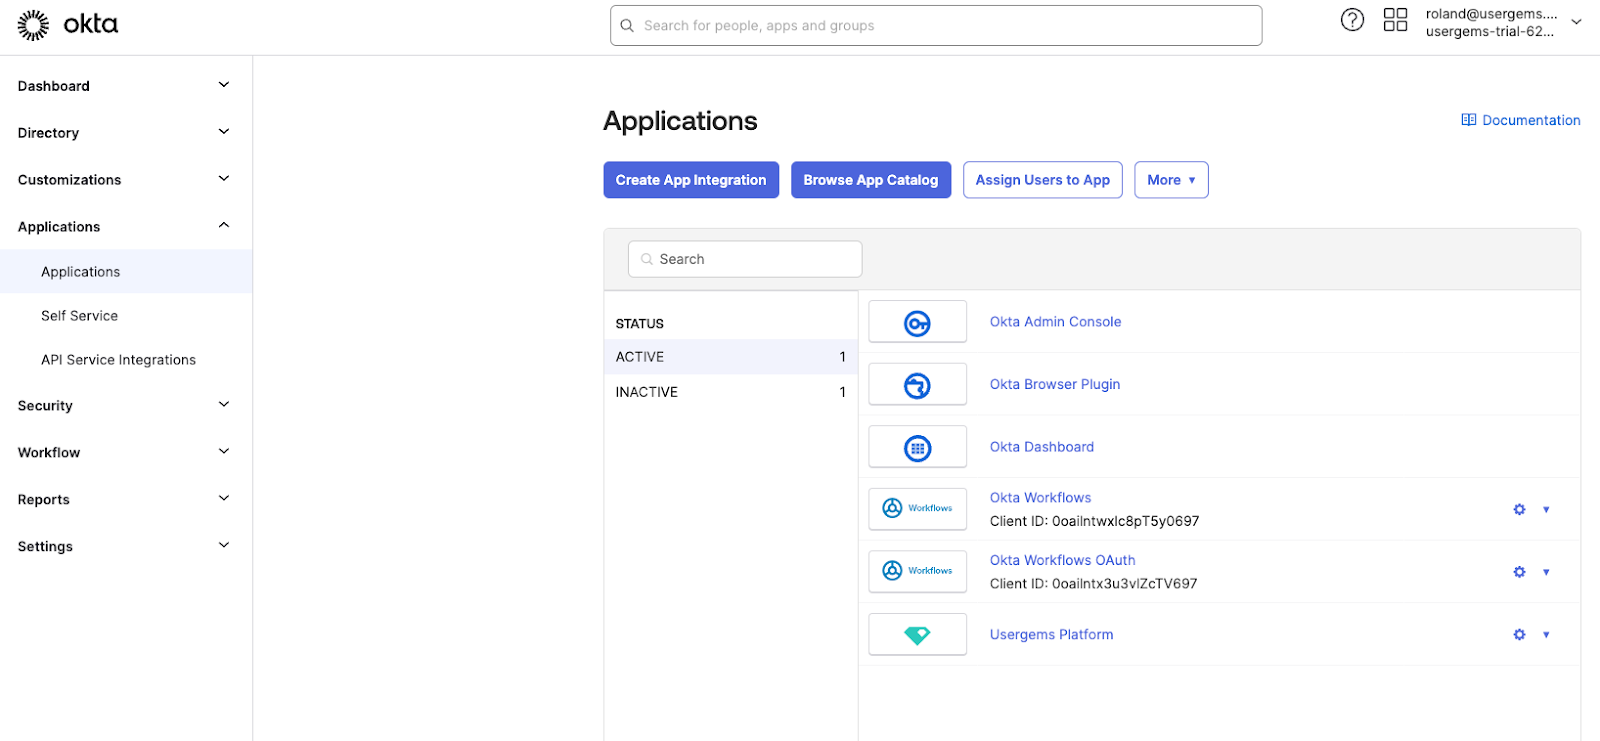
- Click into the App and go to “Sign-On"
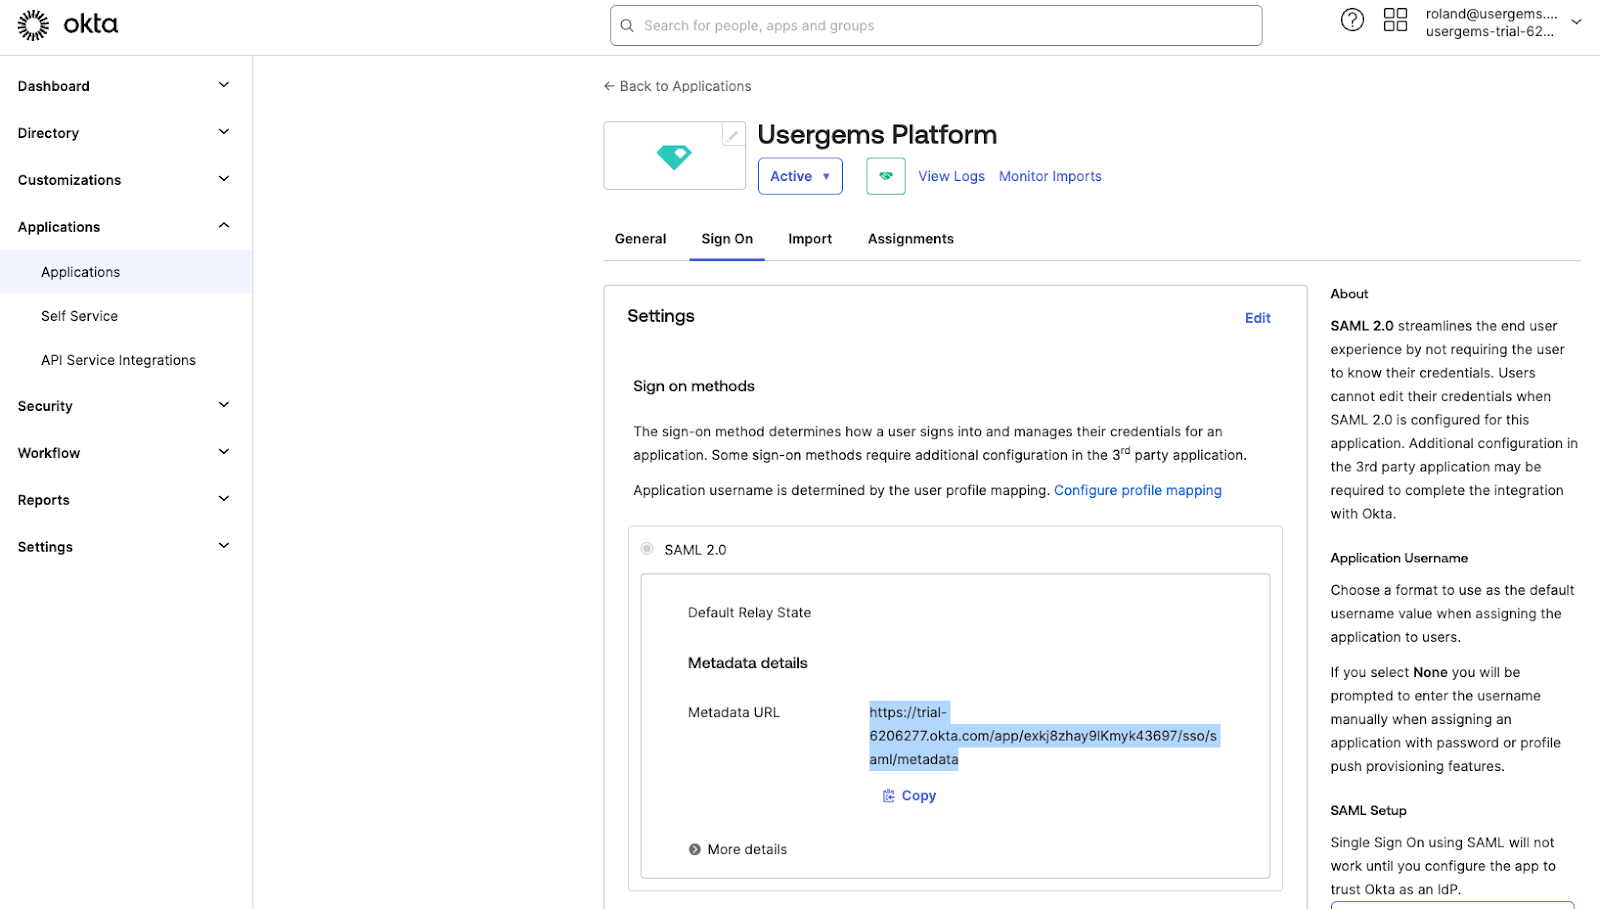
- Copy the Metadata URL and open it in the browser. Then save the content as metadata.xml on your local machine. Go to the UserGems platform and upload the metadata.xml to the last step of the process:

- Click “Save & Continue” and we are finished in the UserGems Platform. Now you need to activate the application for your users.
- To do this, go back to the application overview in OKTA. You can now assign individual users or groups to your application.