
UserGems has a native integration with Gong Engage that has two important benefits:
- It allows UserGems to push Gem-E powered AI messaging or templated emails directly into your Gong flows, so you don’t need to build them and messaging from scratch
- It allows for UserGems to automatically add Leads/Contacts directly to the right flow
Steps
1. Create Gem-E fields in CRM
- Set up custom fields on CRM contact or lead (based on the desired object that you will use for Gong variables / use when enrolling in your Gong Flow) for UserGems to write the emails written by Gem-E
- Hide these fields on the page layout so it doesn't' crowd the page (unless you want reps to see them)
- Note: It's important to create all Subject fields listed below, though you will notice that some are not referenced in the table in Step 3 below.
Sample field label
Sample API name
Type
Gem-E Subject 1
Gem_E_Subject_1__c
Text (255)
Gem-E Subject 2
Gem_E_Subject_2__c
Text (255)
Gem-E Subject 3
Gem_E_Subject_3__c
Text (255)
Gem-E Subject 4
Gem_E_Subject_4__c
Text (255)
Gem-E Subject 5
Gem_E_Subject_5__c
Text (255)
Gem-E Subject 6
Gem_E_Subject_6__c
Text (255)
Gem-E Subject 7
Gem_E_Subject_7__c
Text (255)
Gem-E Content 1
Gem_E_Content_1__c
Rich text
Gem-E Content 2
Gem_E_Content_2__c
Rich text
Gem-E Content 3
Gem_E_Content_3__c
Rich text
Gem-E Content 4
Gem_E_Content_4__c
Rich text
Gem-E Content 5
Gem_E_Content_5__c
Rich text
Gem-E Content 6
Gem_E_Content_6__c
Rich text
Gem-E Content 7
Gem_E_Content_7__c
Rich text
2. Sync Gem-E fields to Gong Engage and create variables
To make the Gem-E fields you just created in your CRM available to use in Gong Engage Flows:
- Go to Company Settings > CRM > Salesforce/HubSpot
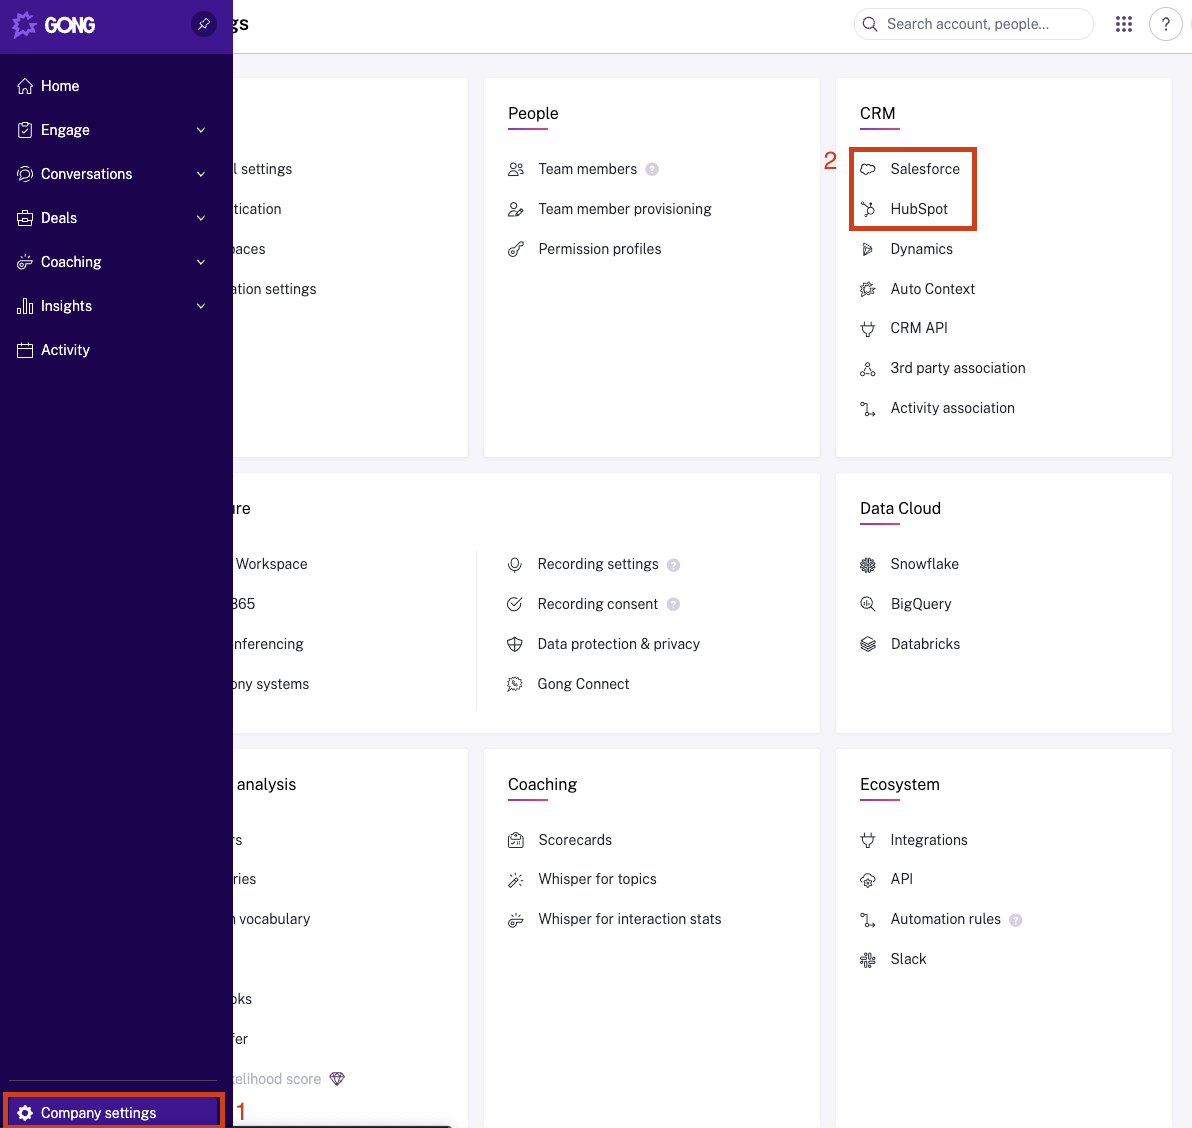
- In the Import from Salesforce/HubSpot area, click Manage Fields
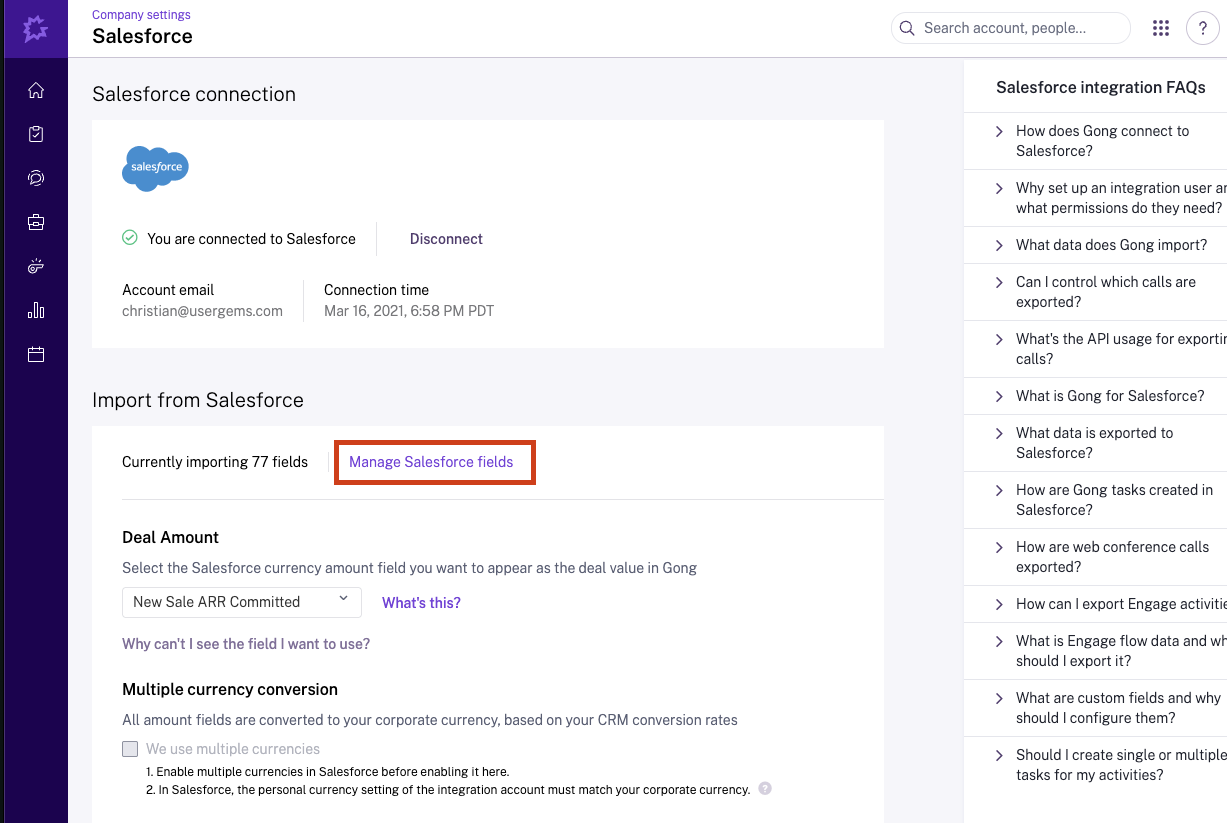
- Choose the Contact Object and search "Gem-E"
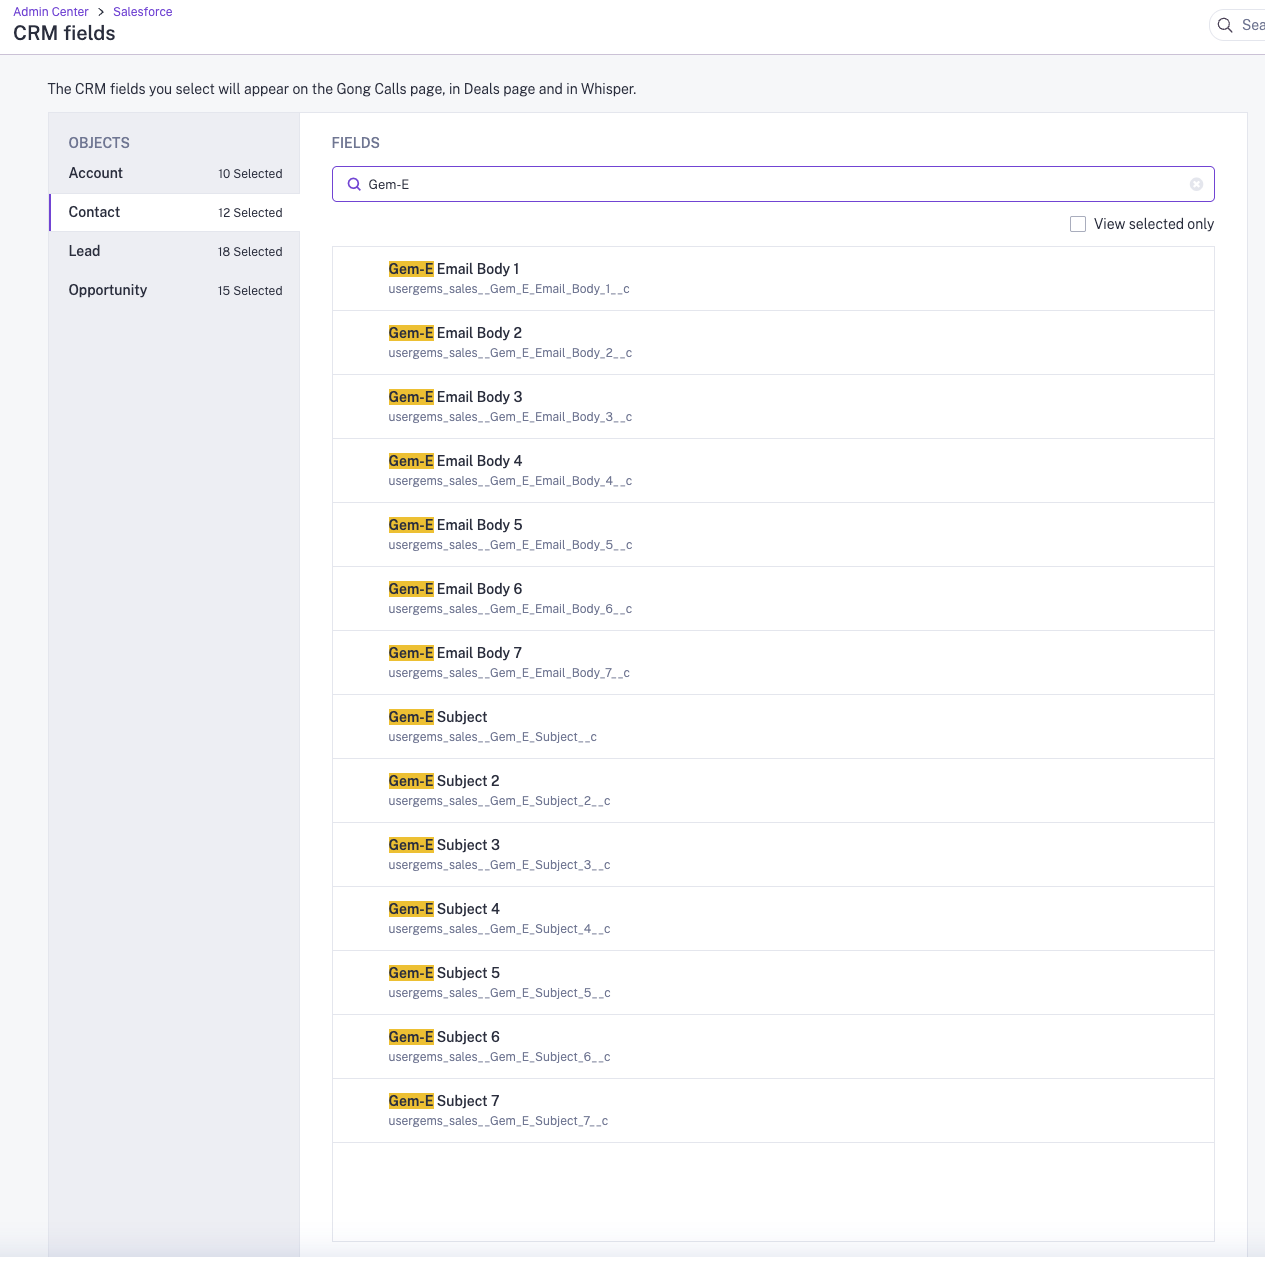
- Select all of the Gem-E fields from the table in Step 1and then check "Create Variable" next to each field
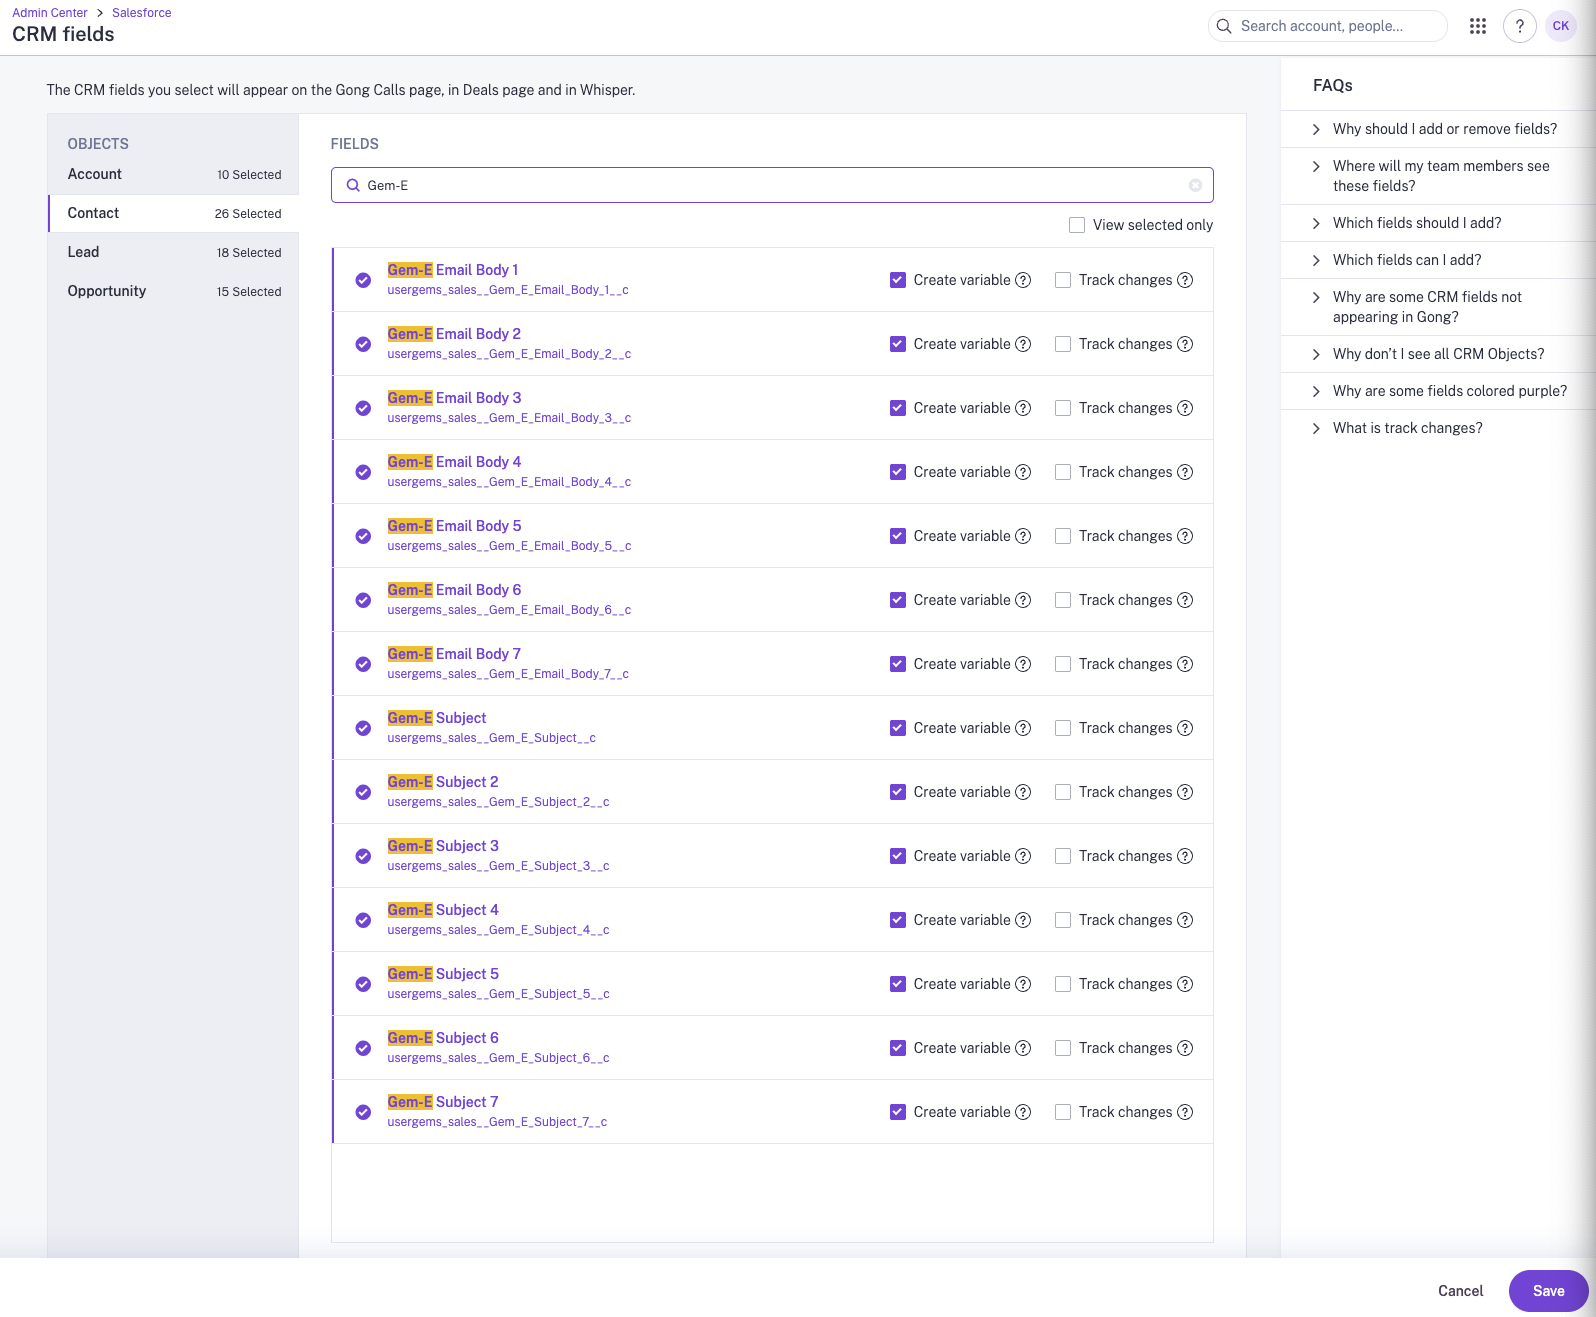
- Click Save
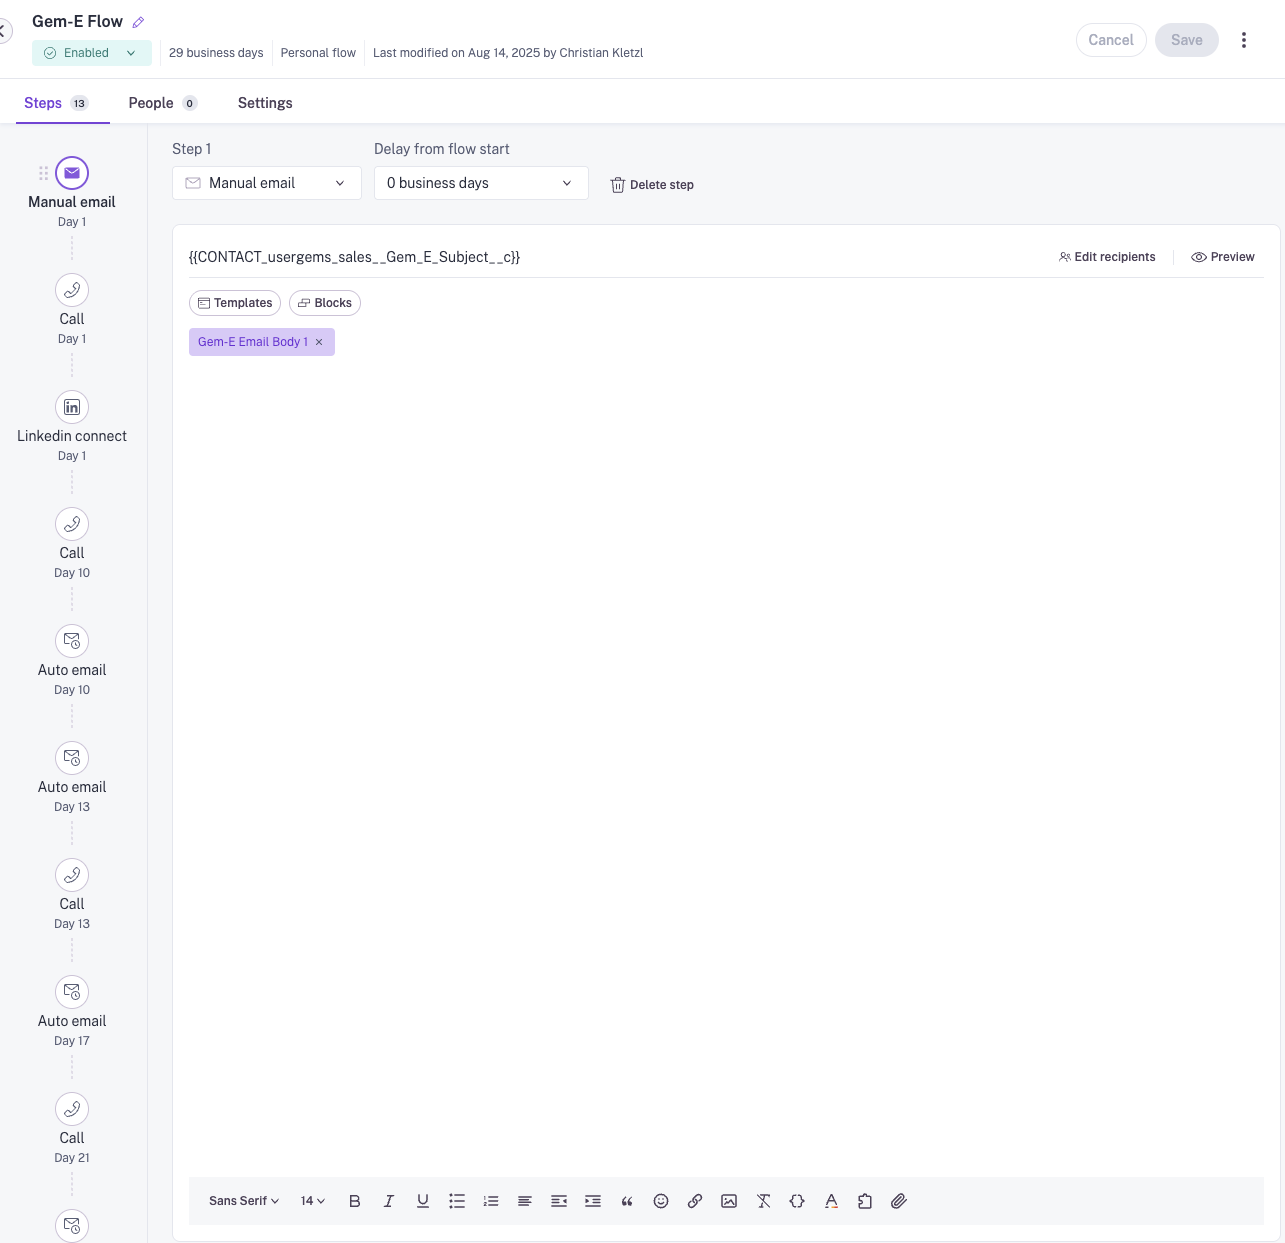
3. Create Gem-E Flow(s) Using Gem-E Variables
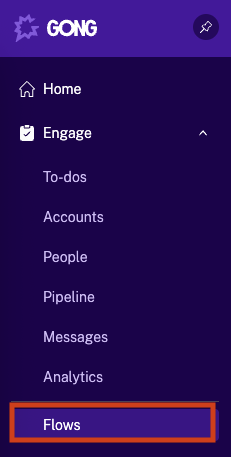
- Within Gong, navigate to Engage > Flows
- Navigate to the Company Flows folder
- Note: This step is important in order to make sure that Gem-E flows can be utilized in Automations in Step 4
- Company flows can only be created/edited by people who are authorized to do so in the Engage section of their Permission Profile (see this Gong article for details)
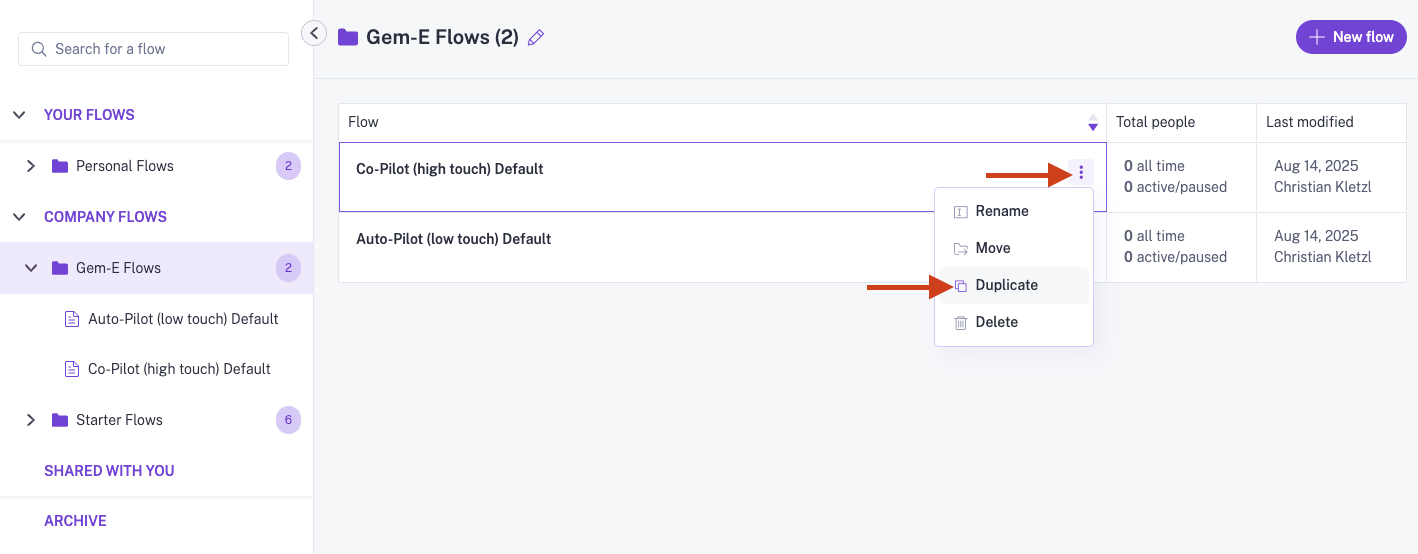
- Optionally, create a folder for UserGems/Gem-E Flows as shown in our screenshots
- Click New Flow or edit an existing flow

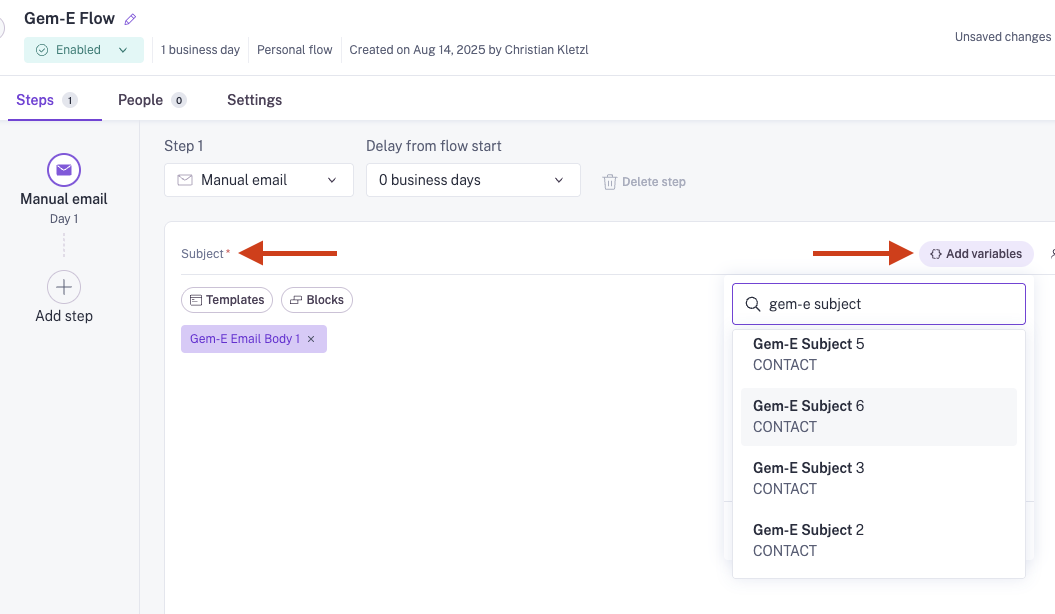
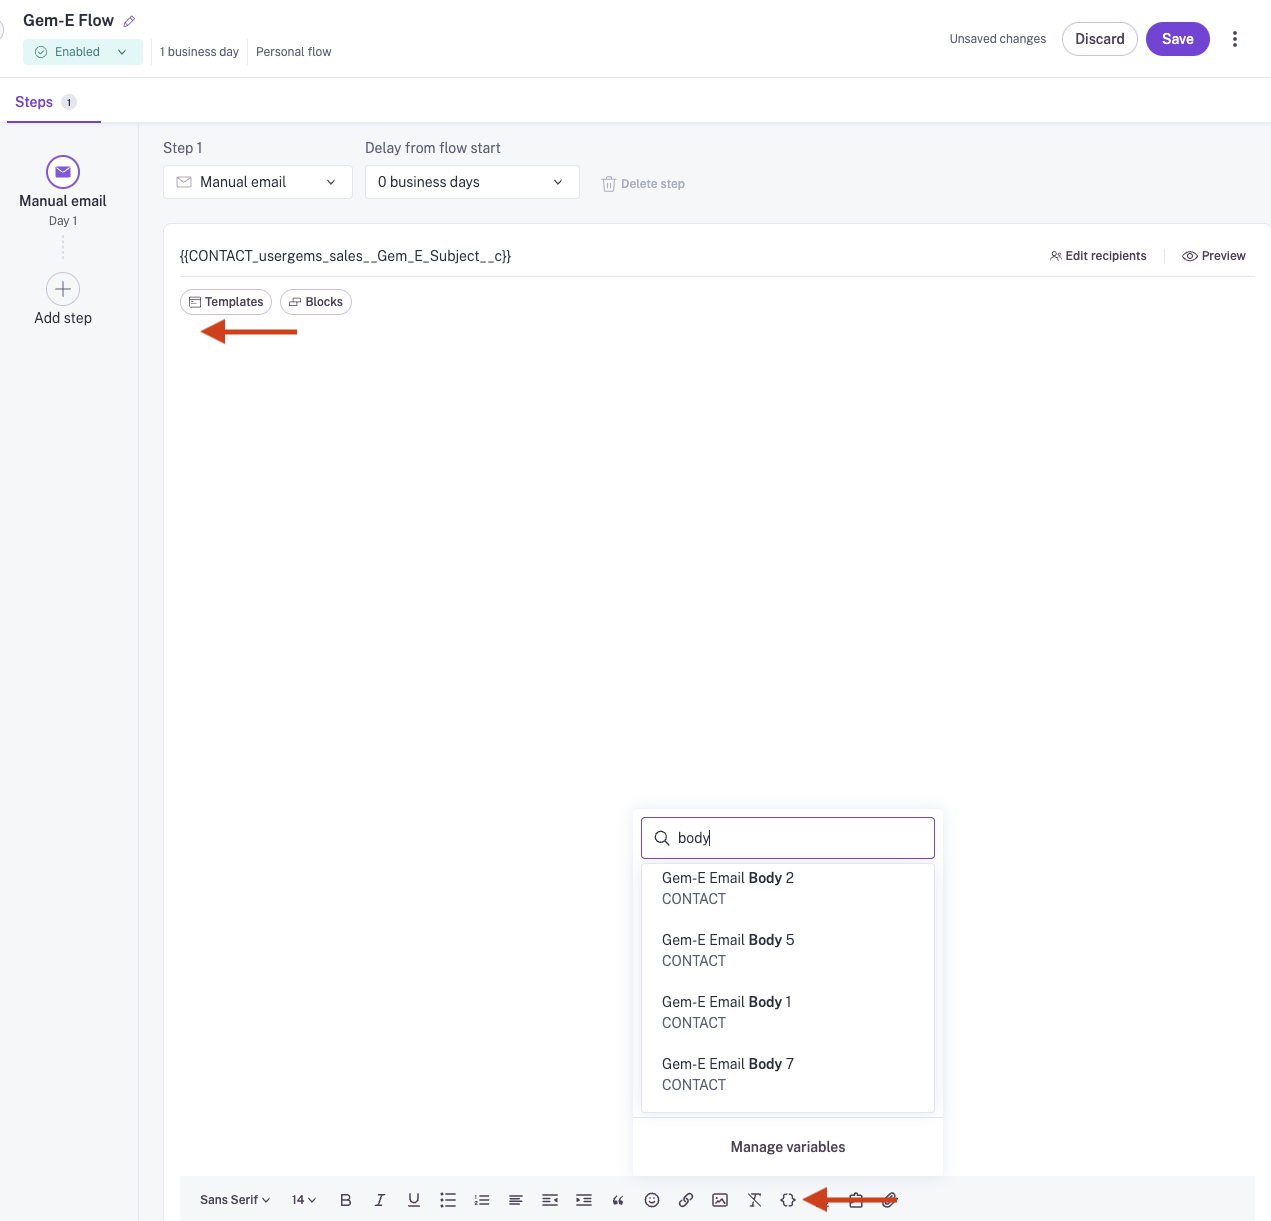
- Use the variables set up in Step 2 for the subject and body of each email step.
- Depending on campaign, this flow can then just be duplicated & fine-tuned going forward.
Example sequence structures are included below:
#### Co-pilot (High Touch) template for past champions:
Body: {{custom variable}} that corresponds to Gem-E Body 1Day 1CallAnswer Brief:
Reference the email in Step 1 and the key signals it mentions. Name drop:
• Previous company
• Past champion
• Compelling signal like hiring/funding
Voicemail Example:
“Hey [First Name], it’s [Your Name] at [Company]. Just sent you a quick note — saw [Past Champion] just joined your team. Congrats on the hire! Thought it might be worth a quick chat if you’re exploring [Signal] right now.”Day 1LinkedIn Connection Request-Day 10CallAnswer Brief:
Same structure as Day 1.
Voicemail Example:
“Hey [First Name], following up on my last note. If you or [Past Champion] think this might be worth revisiting, happy to chat or send more detail.”Day 10Automated e-mail (Reply)Body: {{custom variable}} that corresponds to Gem-E Body 2Day 13Automated e-mail
(New Thread)Subject: {{custom variable}} that corresponds to Gem-E Subject 3
Body: {{custom variable}} that corresponds to Gem-E Body 3Day 13CallAnswer Brief:
Same structure as Day 1.
Voicemail Example:
“Hi [First Name], just wanted to check in again in case you’re thinking about [Signal] in the near future. Let me know if helpful.”Day 17Automated e-mail (Reply)Body: {{custom variable}} that corresponds to Gem-E Body 4Day 21CallAnswer Brief:
Same structure as Day 1.
Voicemail Example:
“Hey [First Name], [Your Name] again — figured I’d check back one last time. If you or someone on the team thinks this might be relevant now, I’m happy to share more.”Day 21Automated e-mail (Reply)Body: {{custom variable}} that corresponds to Gem-E Body 5Day 25Automated e-mail
(New Thread)Subject: {{custom variable}} that corresponds to Gem-E Subject 6
Body: {{custom variable}} that corresponds to Gem-E Body 6Day 29CallAnswer Brief:
Same structure as Day 1.
Voicemail Example:
“Hey [First Name], totally understand if this isn’t a fit right now. If it makes sense to revisit down the line, feel free to reach out anytime.”Day 29Automated e-mail
(New Thread)Subject: {{custom variable}} that corresponds to Gem-E Subject 7
Body: {{custom variable}} that corresponds to Gem-E Body 7
Co-pilot (High Touch) template for everyone besides past champions:
Body: {{custom variable}} that corresponds to Gem-E Body 1Day 1LinkedIn Connection Request-Day 2CallAnswer Brief:
Reference the email in Step 1 and the key signals it mentions. Name drop:
• Previous company
• Past champion
• Compelling signal like hiring/funding
Voicemail Example:
“Hey [First Name], it’s [Your Name] at [Company]. Just sent you a quick note — saw [Past Champion] just joined your team. Congrats on the hire! Thought it might be worth a quick chat if you’re exploring [Signal] right now.”Day 5Automated e-mail
(Reply)Body: {{custom variable}} that corresponds to Gem-E Body 2Day 6LinkedIn message-Day 7CallAnswer Brief:
Same structure as Day 1.
Voicemail Example:
“Hey [First Name], following up on my last note. If you or [Past Champion] think this might be worth revisiting, happy to chat or send more detail.”Day 10Automated e-mail
(New Thread)Subject: {{custom variable}} that corresponds to Gem-E Subject 3
Body: {{custom variable}} that corresponds to Gem-E Body 3Day 13CallAnswer Brief:
Same structure as Day 1.
Voicemail Example:
“Hi [First Name], just wanted to check in again in case you’re thinking about [Signal] in the near future. Let me know if helpful.”Day 16Automated e-mail
(Reply)Body: {{custom variable}} that corresponds to Gem-E Body 4Day 16LinkedIn message-Day 19Automated e-mailSubject: {{custom variable}} that corresponds to Gem-E Subject 5
Body: {{custom variable}} that corresponds to Gem-E Body 5Day 19CallAnswer Brief:
Same structure as Day 1.
Voicemail Example:
“Hey [First Name], [Your Name] again — figured I’d check back one last time. If you or someone on the team thinks this might be relevant now, I’m happy to share more.”Day 22Automated e-mail
(New Thread)Subject: {{custom variable}} that corresponds to Gem-E Subject 6
Body: {{custom variable}} that corresponds to Gem-E Body 6Day 25Automated e-mail
(New Thread)Subject: {{custom variable}} that corresponds to Gem-E Subject 7
Body: {{custom variable}} that corresponds to Gem-E Body 7Day 25CallAnswer Brief:
Same structure as Day 1.
Voicemail Example:
“Hey [First Name], totally understand if this isn’t a fit right now. If it makes sense to revisit down the line, feel free to reach out anytime.”
Autopilot (low touch) template:
Body: {{custom variable}} that corresponds to Gem-E Body 1Day 6Automatic Email (Reply)Body: {{custom variable}} that corresponds to Gem-E Body 2Day 11Automatic Email (New Thread)Subject: {{custom variable}} that corresponds to Gem-E Subject 3
Body: {{custom variable}} that corresponds to Gem-E Body 3Day 15Automatic Email (Reply)Body: {{custom variable}} that corresponds to Gem-E Body 4Day 19Automatic Email (Reply)Body: {{custom variable}} that corresponds to Gem-E Body 5Day 24Automatic Email (New Thread)Subject: {{custom variable}} that corresponds to Gem-E Subject 6
Body: {{custom variable}} that corresponds to Gem-E Body 6Day 29Automatic Email (Reply)Body: {{custom variable}} that corresponds to Gem-E Body 7
If you're a Salesforce user using both Leads and Contacts, you'll need two separate flows - one for Leads and one for Contacts - as you can’t enroll both into the same Gong Engage flows. It's important to use the appropriate variables in each flow (i.e. the Lead variables in the Lead Flow and the Contact variables in the Contact Flow).
4. Create Automation(s) to enroll Leads/Contacts into a Gem-E Flow
Contacts (and leads if applicable) from your CRM are automatically synced into Gong so you can add them to flows. You can use an automation rule in Gong to auto-enroll the appropriate contacts/leads in a flow.
To configure a new Automation:
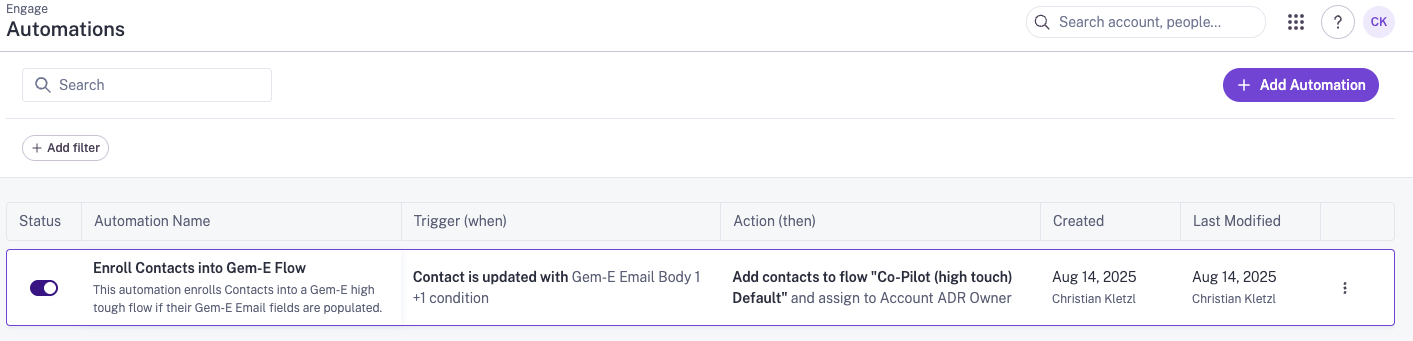
- In Gong, navigate to Engage >Automations
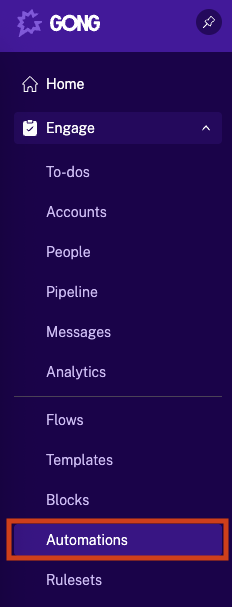
- Click Add automation
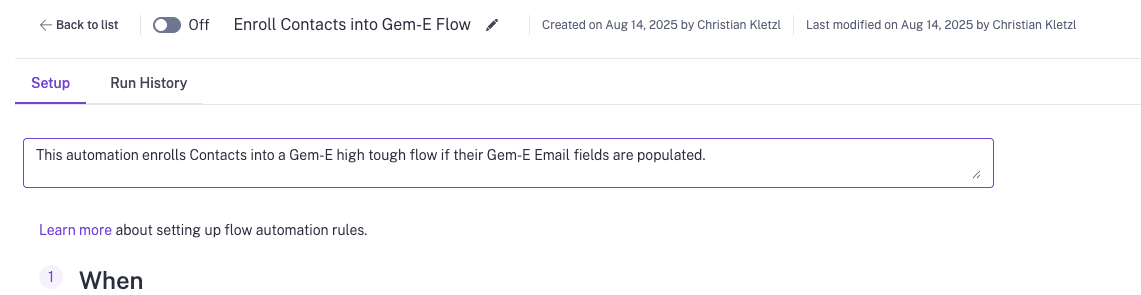
- Give the rule a name and description i.e. Enroll Contacts into Gem-E Flow
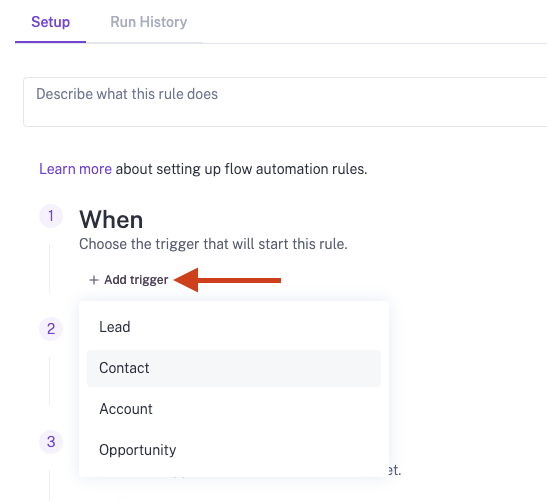
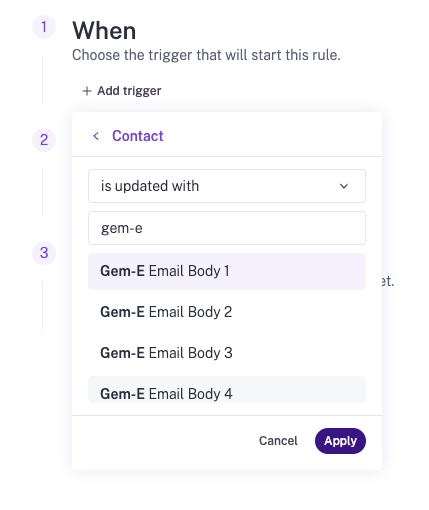
- Under When, click Add trigger to specify when the automation rule should fire and choose the CRM entity you want to trigger the flow
- If you use Salesforce you'll see Contact, Lead, Account, and Opportunity
- See the section above labeled "Separate Flows for Leads and Contacts" for instructions on building separate flows for Leads and Contacts
- If you use Hubspot you'll see Contact, Account, and Opportunity
- If you use Salesforce you'll see Contact, Lead, Account, and Opportunity
- Select that the trigger should be When a record of the Contact/Lead object is updated with, choose the Lead or Contact object if applicable, then the Gem-E Email Body or Content 1 variable and click Apply
- If you don't see the field you need, you can import the field(s) from your CRM - see Step 2 of this article
- It's ok if your fields are named slightly differently than ours (i.e. Content instead of Body) as long as they're named consistently
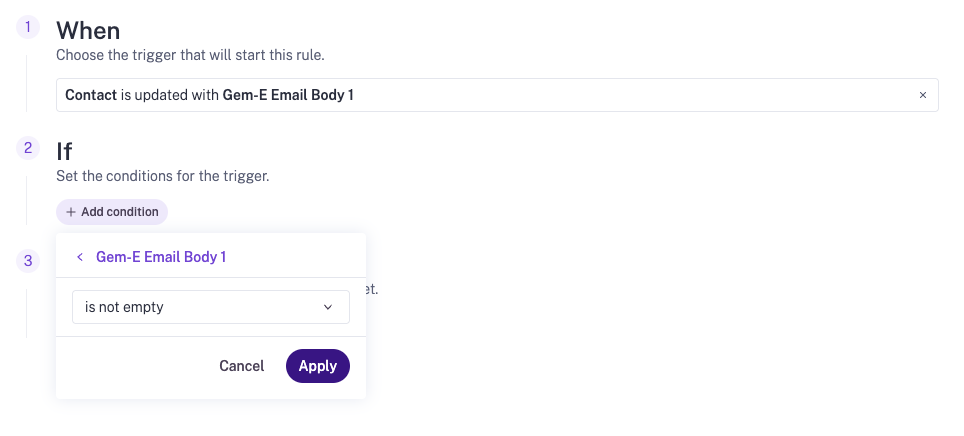
- Configure the next condition, If ‘Gem-E Email Body 1’ is not empty and click Apply
- Configure the Then action to add the prospect to the Gem-E flow and assign to the desired owner field
- Click Add action > Add contacts to flow or Add leads to flow to select which flow you want people to be added to
- Be mindful of who the "sender" will be for a given flow
- Adding user lookup or owner fields to the source report will allow you to dynamicaly set the "sender" based on who the prospect is
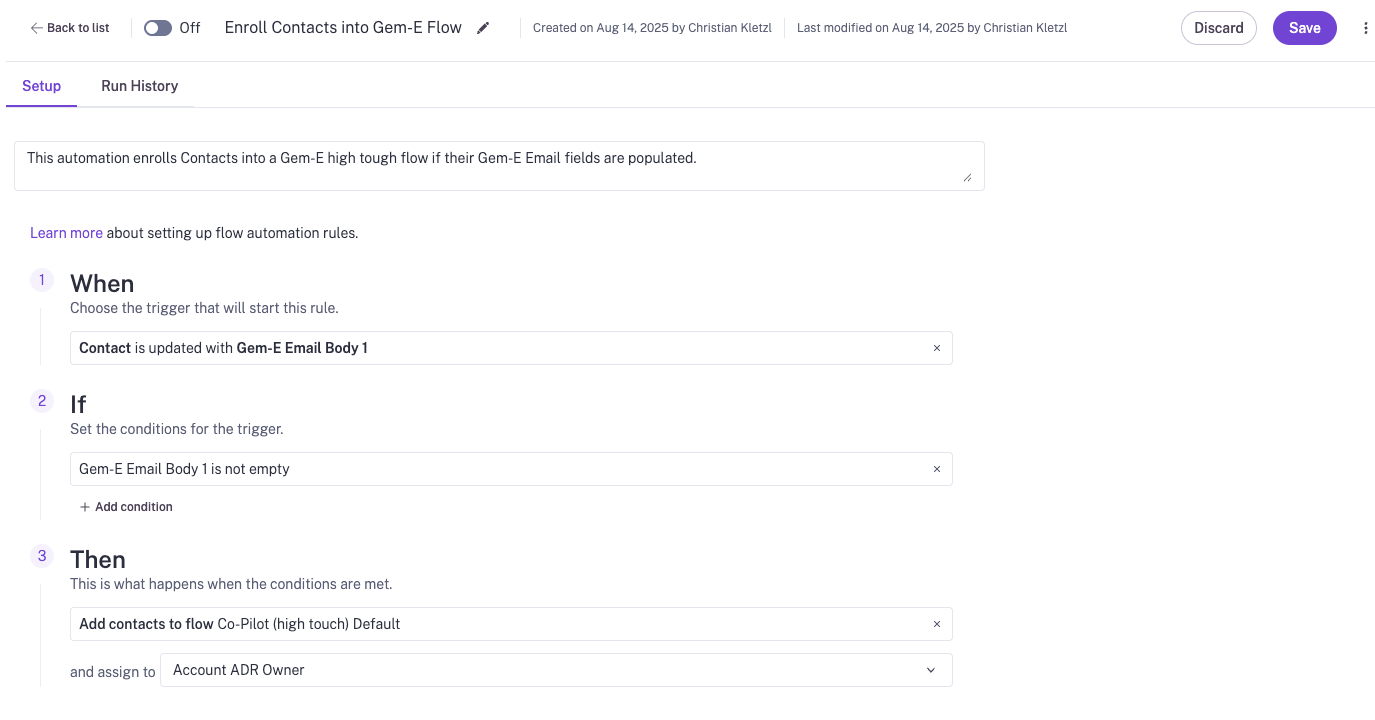
- Click Save
5. Activate Automation(s) 🚀
After adding the Gem-E variables and making any additional (optional) customizations to your flows, you're ready to activate them!
Use the toggle next to the Automation to activate it.
Troubleshooting
Gong Engage has a setting that allows Flows you configure to be set as exclusive to prevent people from being in multiple active flows at the same time. By default, Engage flows are exclusive, but can be configured to allow non-exclusivity.
Sometimes customers run into issues around flow exclusivity - i.e. 20 prospects should have been enrolled in a flow, but only 10 were added because the other 10 were in an exclusive flow already.
For UserGems purposes, we recommend configuring your flows so that any given prospect only enrolls in one UG flow at a time.
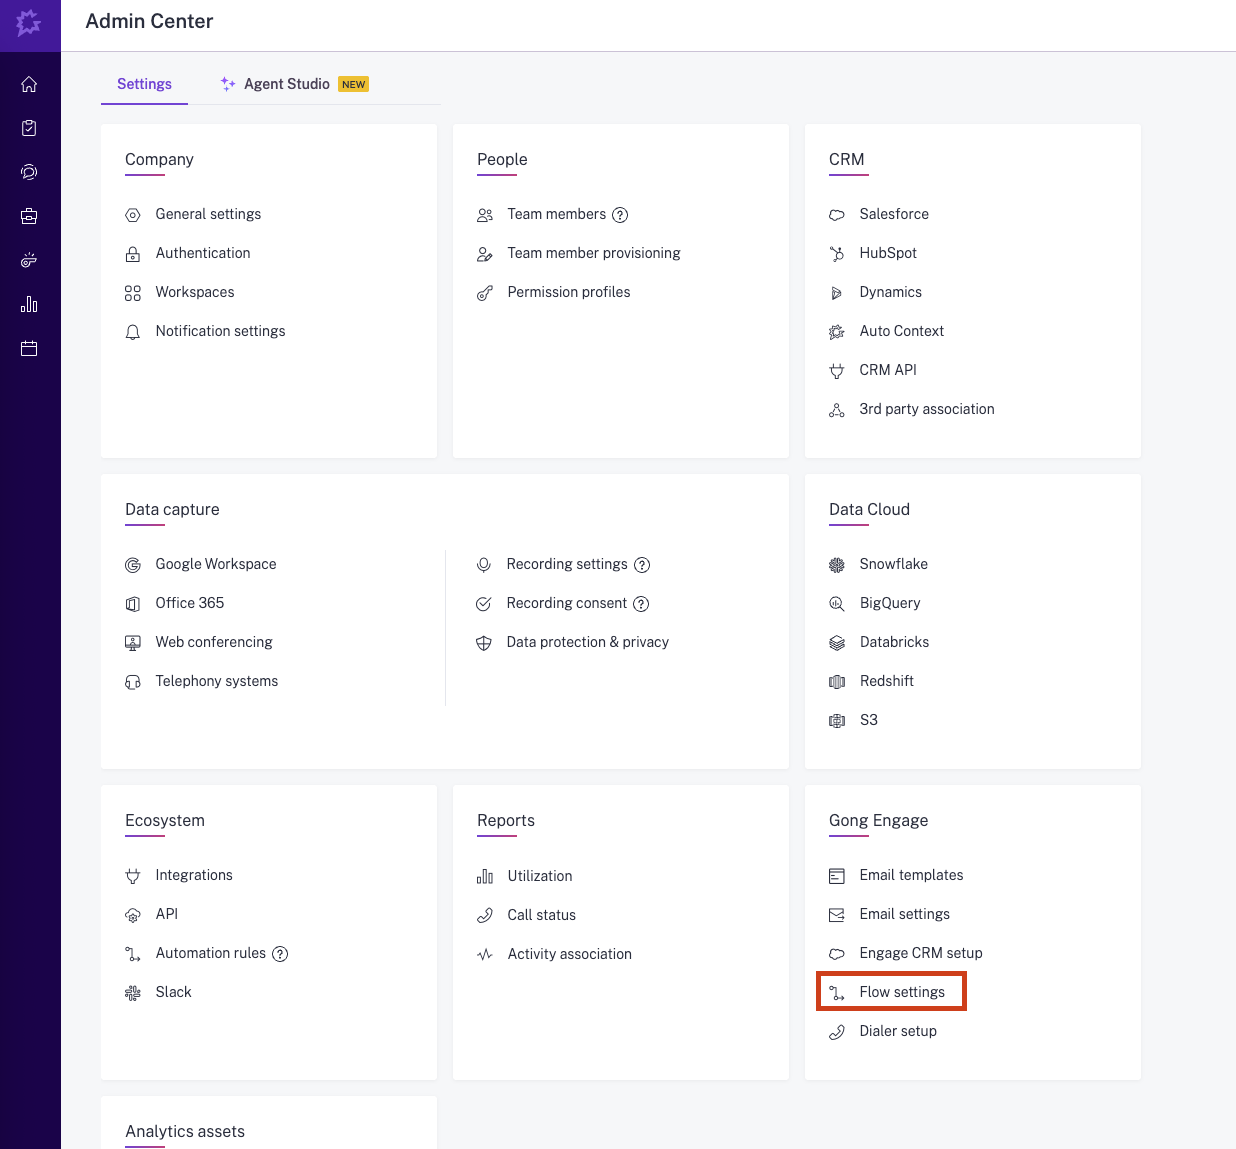
To view your Engage exclusivity settings, navigate to Settings > Gong Engage > Flow settings
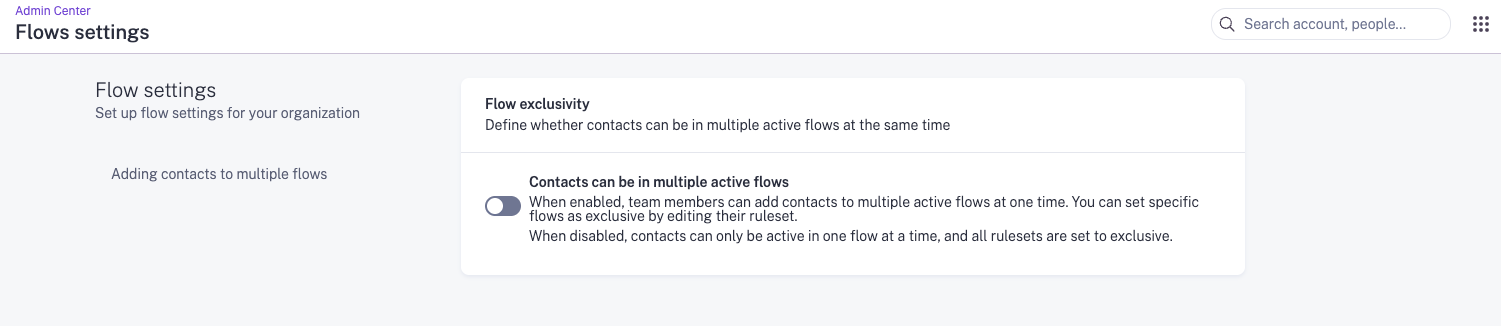
If your Engage account is configured with Flow Exclusivity turned OFF (i.e. the toggle above is ON so that contacts can be in multiple active flows), you can still make Gem-E Flows exclusive as recommended using the steps below:
- Navigate to Engage > Flows
- Select the Gem-E Flow you want to work on
- Either edit your default Ruleset or create a new Ruleset to make the flow exclusive

Setting a flow as exclusive won’t remove people from flows they’re already in. It only applies to future people that get added to the flow. See this Gong article for more information on flow exclusivity.