

UserGems integration with Salesloft enables:
- UserGems to push Gem-E powered AI messaging or templatized cadences directly into your Salesloft so you don’t need to build cadences and messaging from scratch
- UserGems to automatically add Contacts directly to the right cadence to reduce the manual work for your reps and ensure timely followup
Steps
1. Connect Admin Salesloft User
Connecting an Admin Salesloft user will give UserGems the API access we need to create cadences and add Leads/Contacts to cadences.
Visit the Engagement page in UserGems to connect to Salesloft (or navigate to "Settings" > "Engagement").
When you tap on "Connect to Salesloft", you will be prompted to sign in to Salesloft with your account credentials. Please sign-in to complete your connection.
2. Create Custom Fields in Salesloft
Create the following fields on your contacts/Leads.
Note: These fields do not have to be displayed on page layouts - they are only meant to store information for use in cadences. It can be helpful to display them for troubleshooting and preview purposes, but they are large fields that can clutter the layout for users.
- Click your initials or photo in the top right -> click "Settings" → click “Field Configuration” → click “+ Create Custom Field"
- Create/map the following for contacts, leads, or both (depending on what you’re using)
- Note: It's important to create all Subject fields listed below, though you will notice that some are not referenced in the table in Step below
3. Map Custom Fields to UserGems
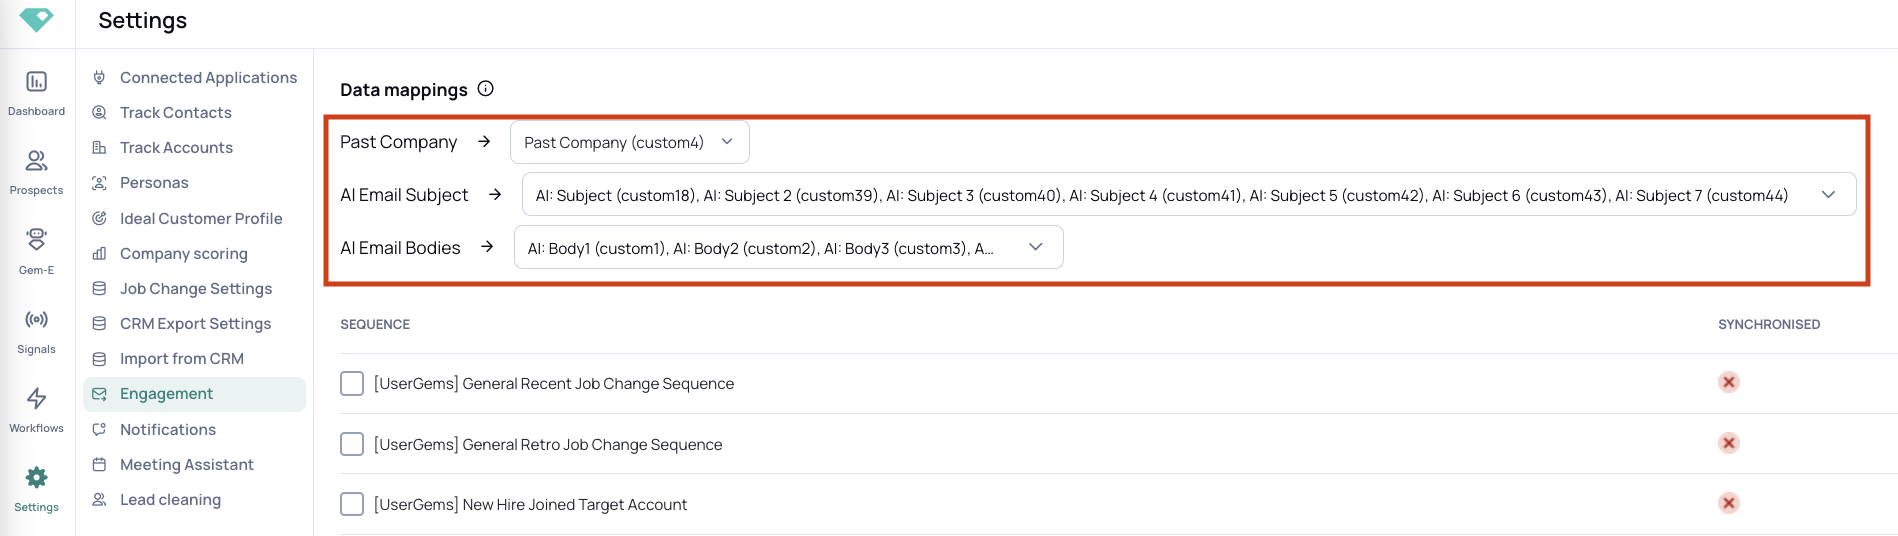
After connecting your Salesloft account, complete the field mappings from UserGems to Salesloft at the top of the Engagement page.
Map the fields below as applicable for your UserGems setup:
- Next to Past Company, map the UG - Past Company field you created in Salesloft
- Next to AI Email Subject, map the fields you created in Salesloft for AI Subjects generated by Gem-E to be used in cadences
- Next to AI Email bodies, map the fields you created in Salesloft for AI Email Bodies generated by Gem-E to be used in cadences
4. Ensure Salesforce & Salesloft Sync is Configured
Before activating Workflows in UserGems, please make sure you have enabled CRM Sync in Salesloft using the steps in this article to ensure your accounts, contacts and leads are automatically synced to Salesloft and can be added to cadences automatically.
To enable CRM sync within Salesloft:
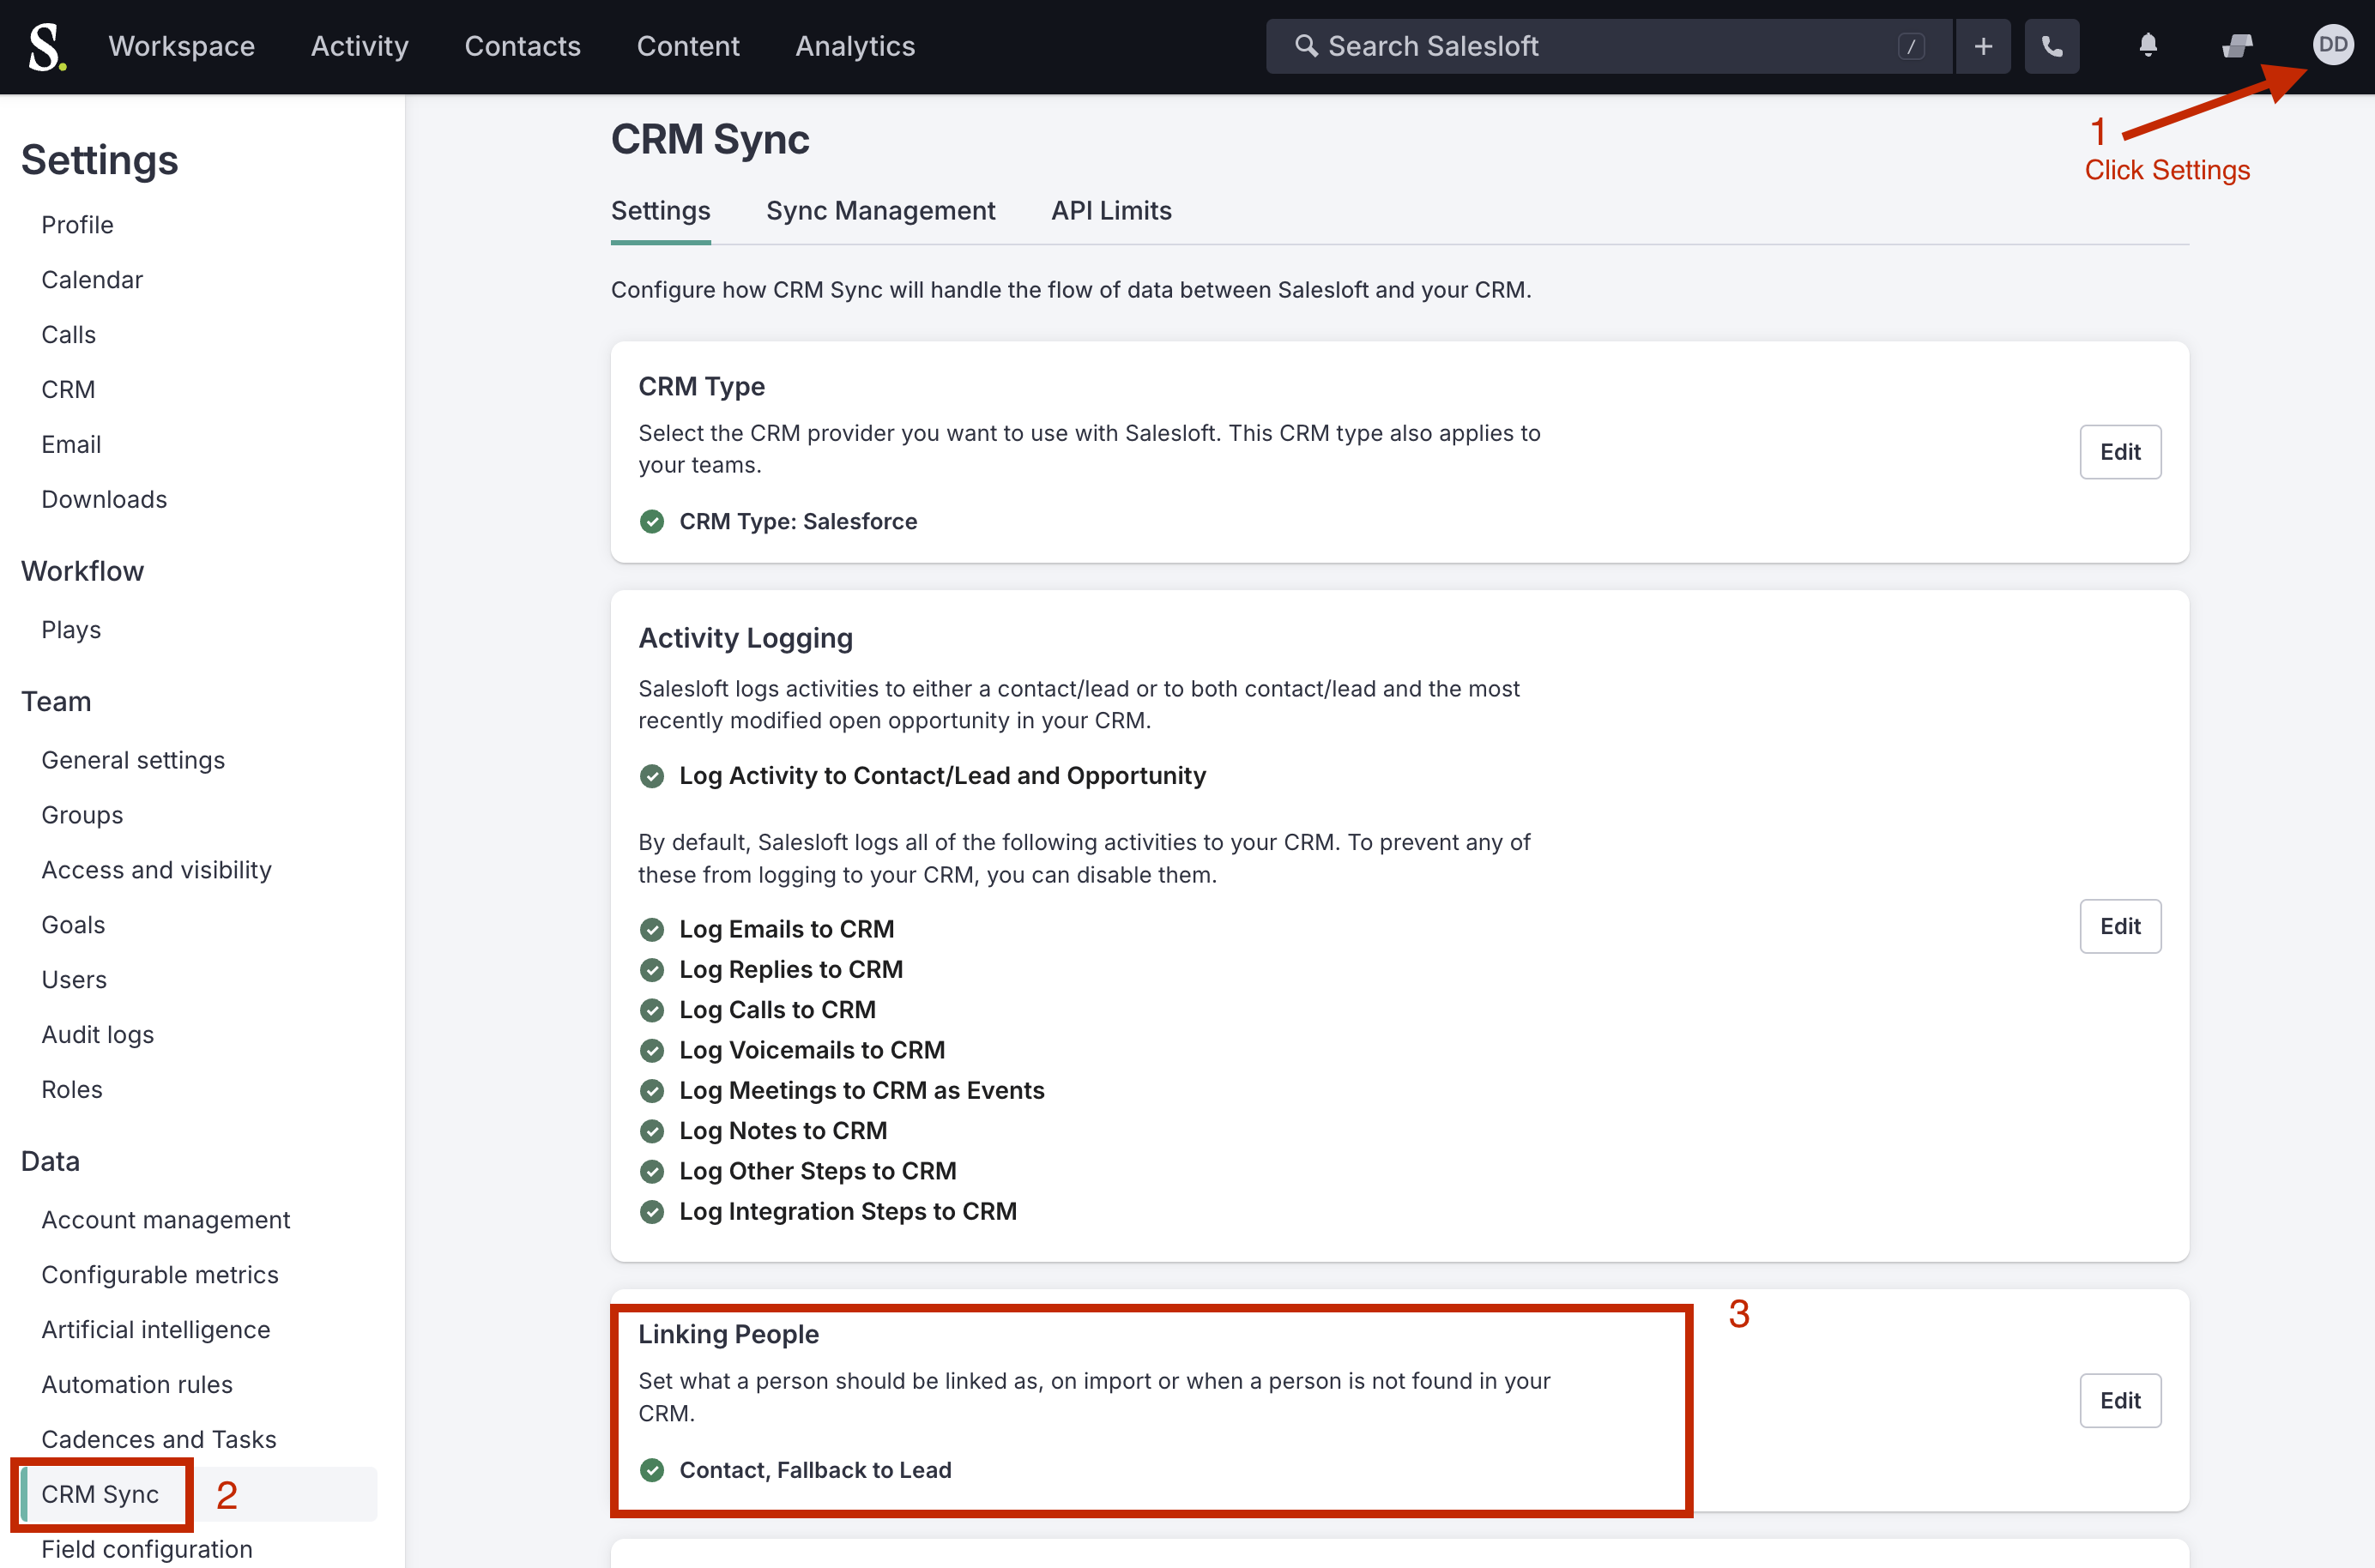
- Click your initials or photo in the top right -> click “Settings” → click “CRM Sync” → on the “Settings” page make sure the “Linking People” section is set to pull in leads/contacts
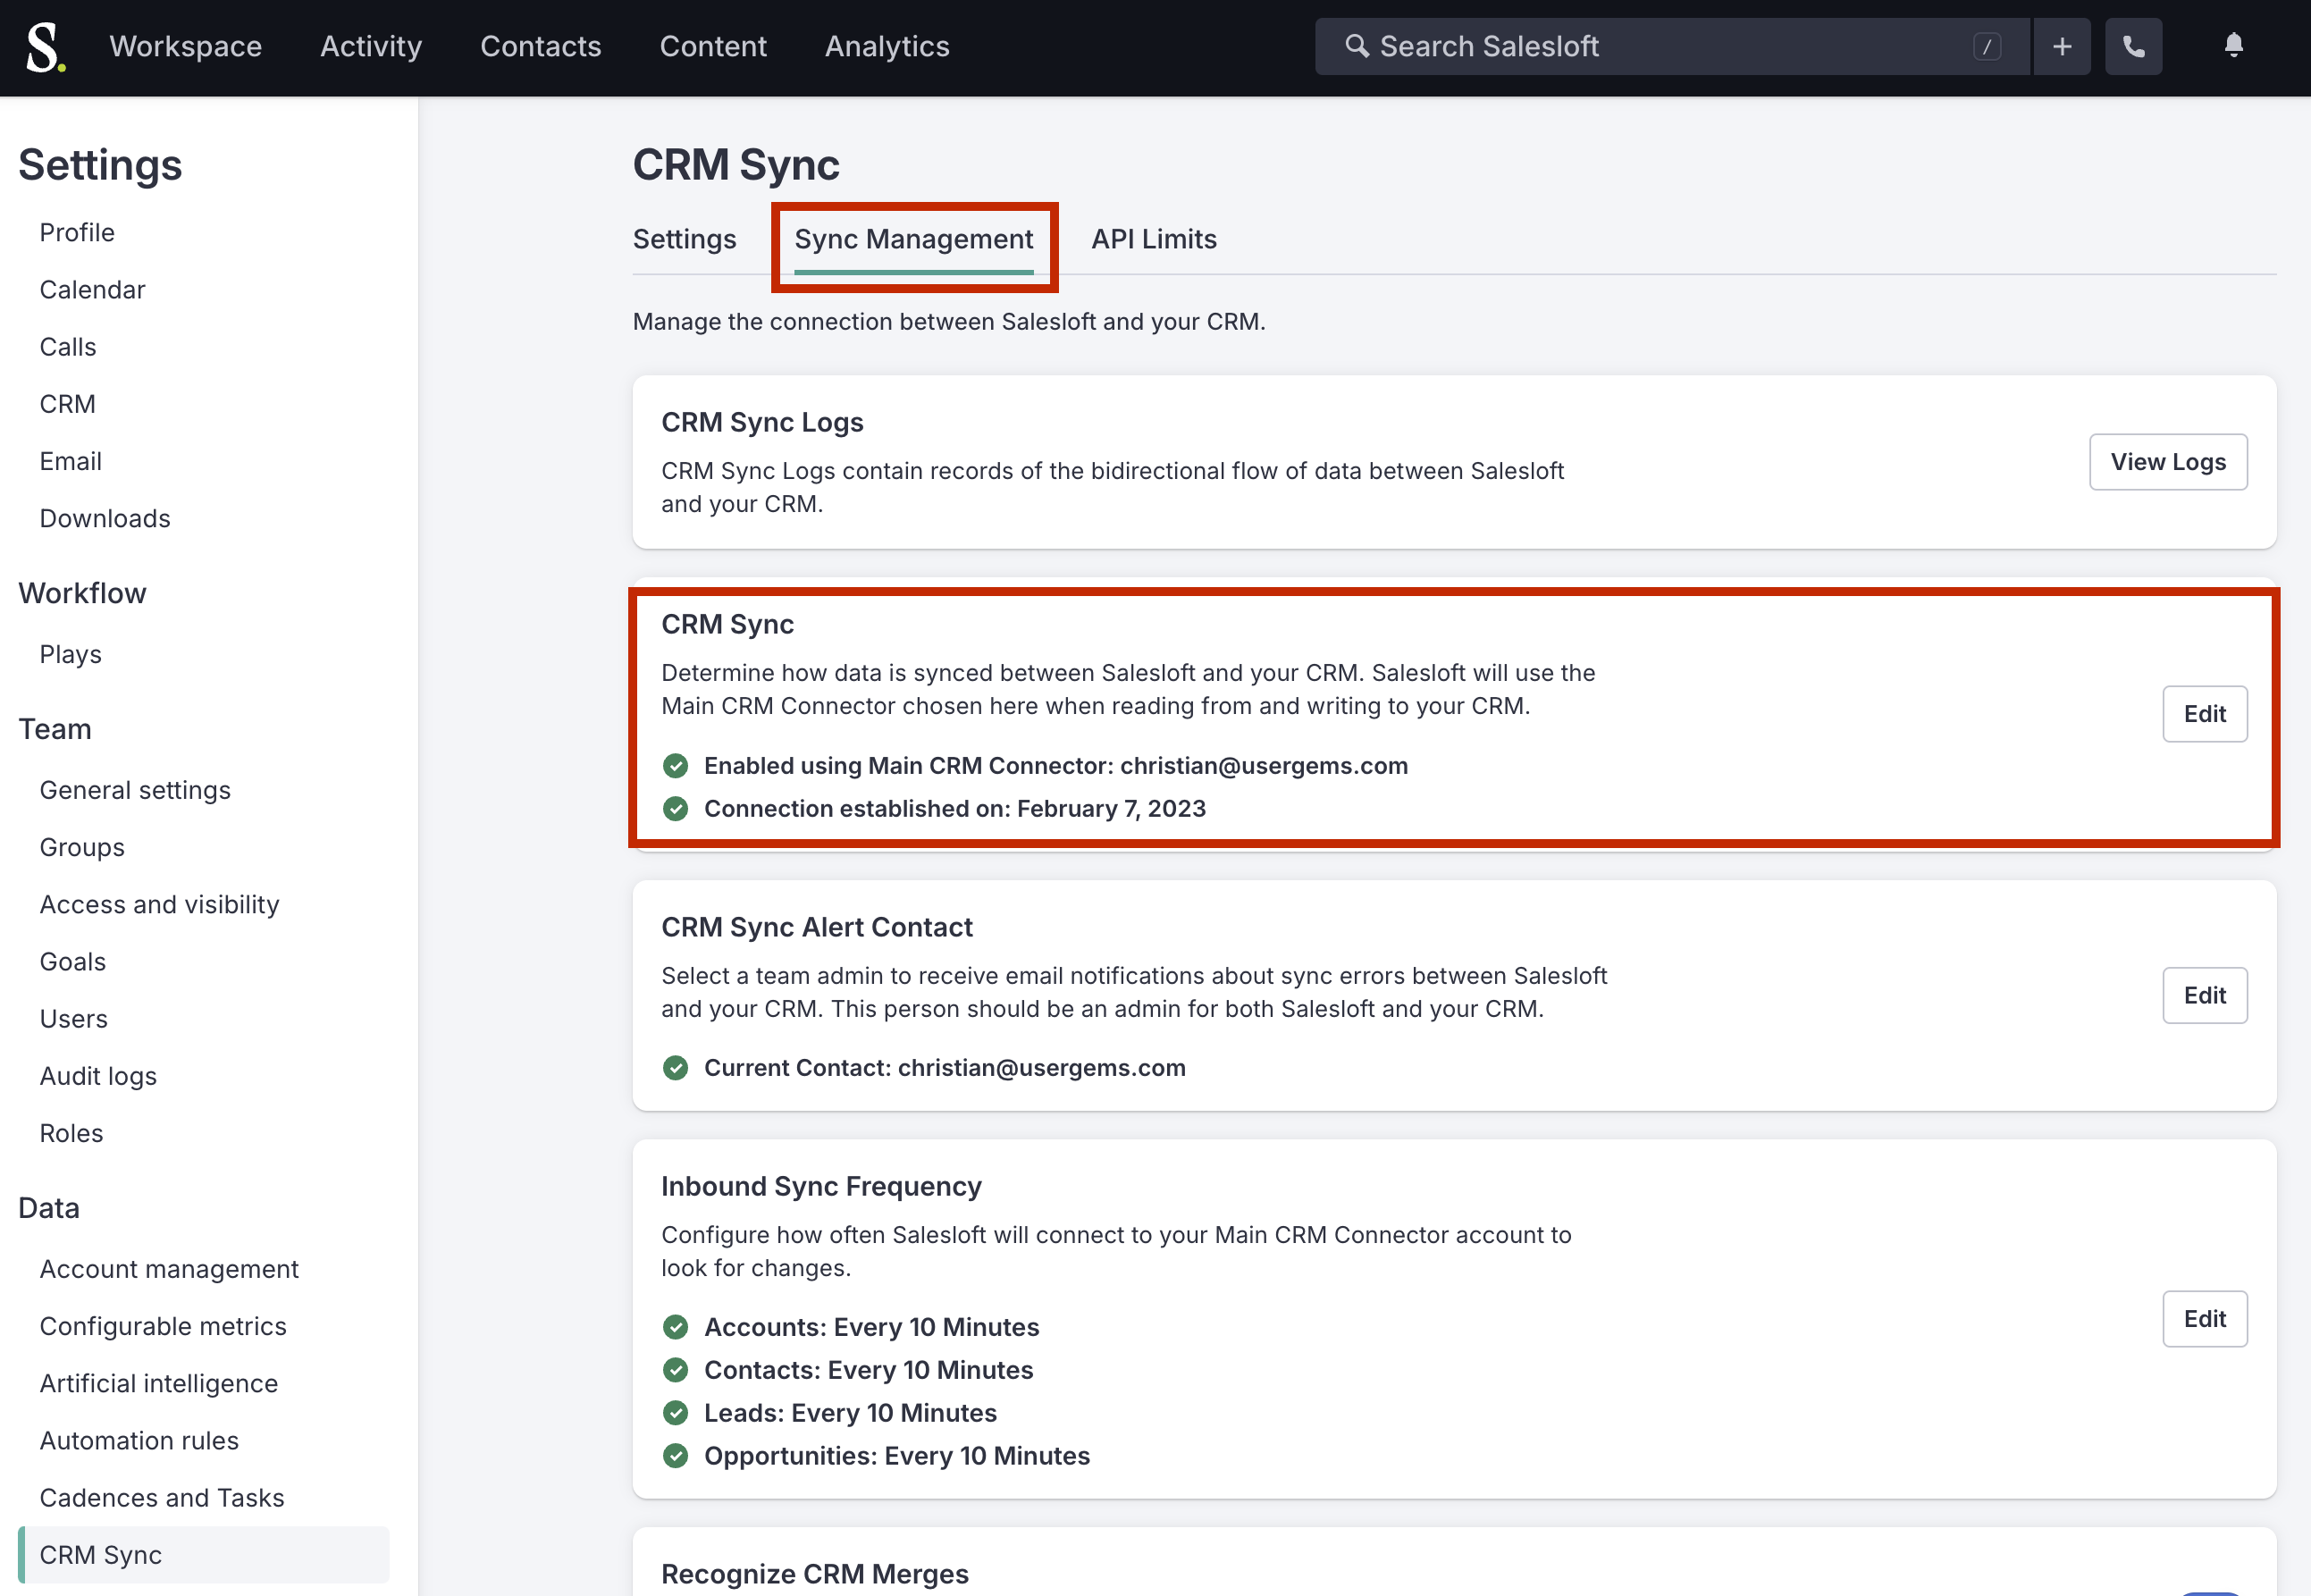
2. Click the “Sync Management” tab at the top of the page → make sure data is enabled to sync bi-directionally between Salesloft and your CRM.
3. Create an automation to add UserGems contacts in Salesforce to Salesloft. Salesloft doesn’t sync all contacts by default.
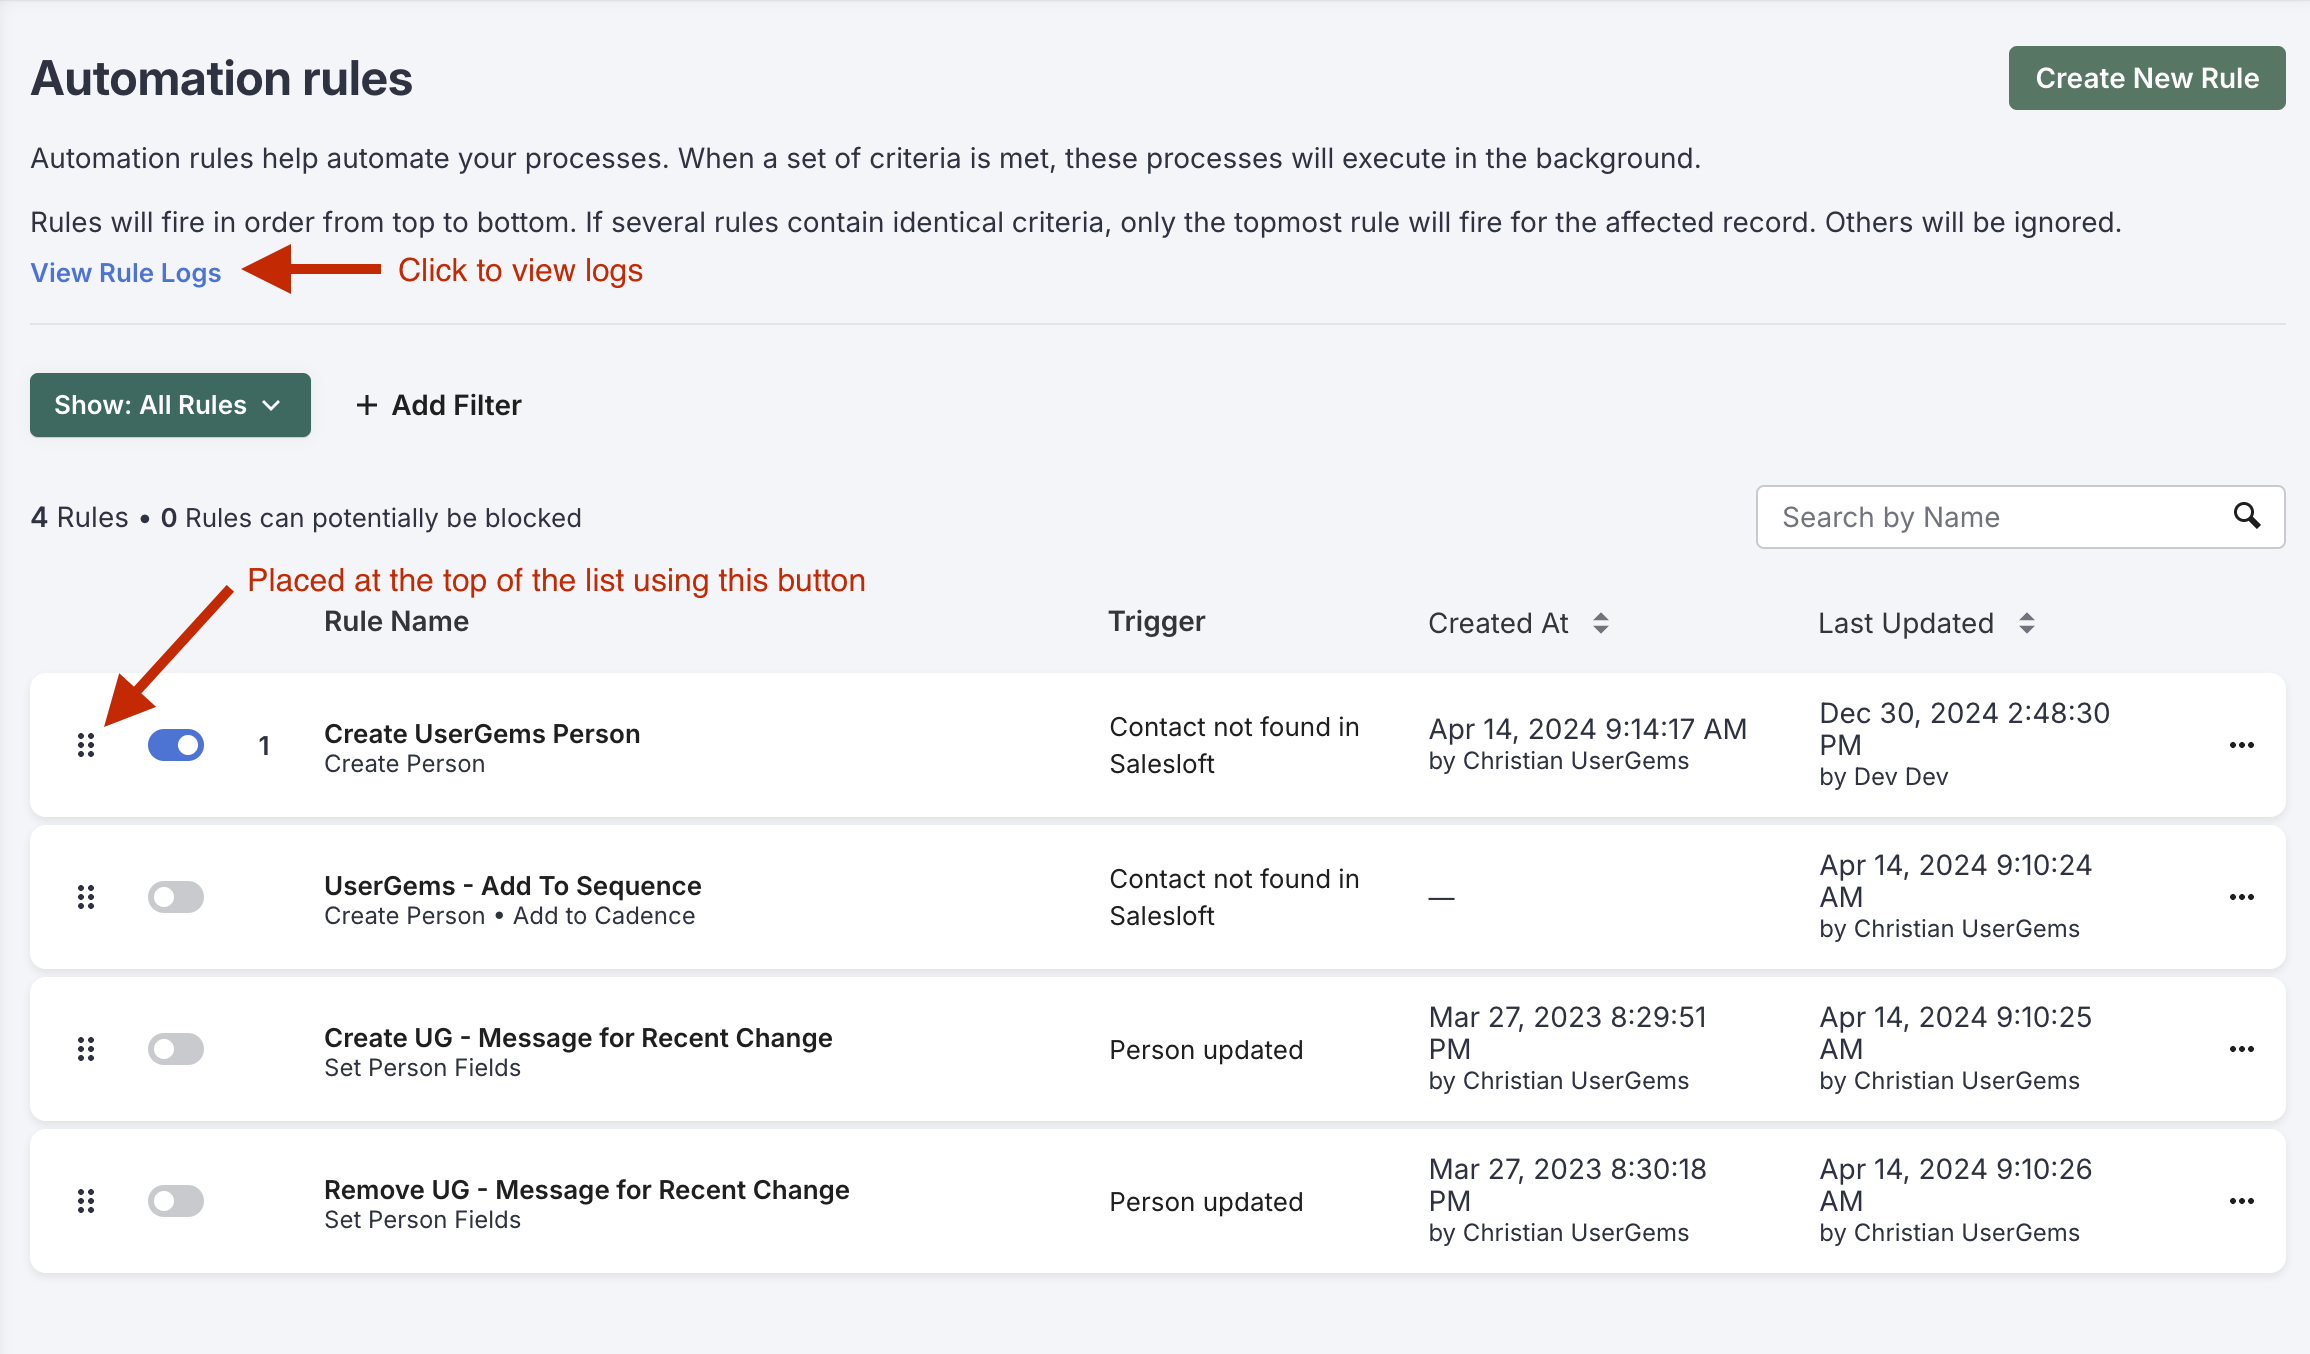
Select “Settings” → click "Automation Rules” → click “Create New Rules” then:
- Name = “Create UserGems Person”
- Trigger Category = CRM Data Sync
- Trigger = "When a contact is not found in Salesloft"
- Criteria = UG - Past Company = is not null
- Action = Create Person
- Toggle on "Enable Rule after saving"
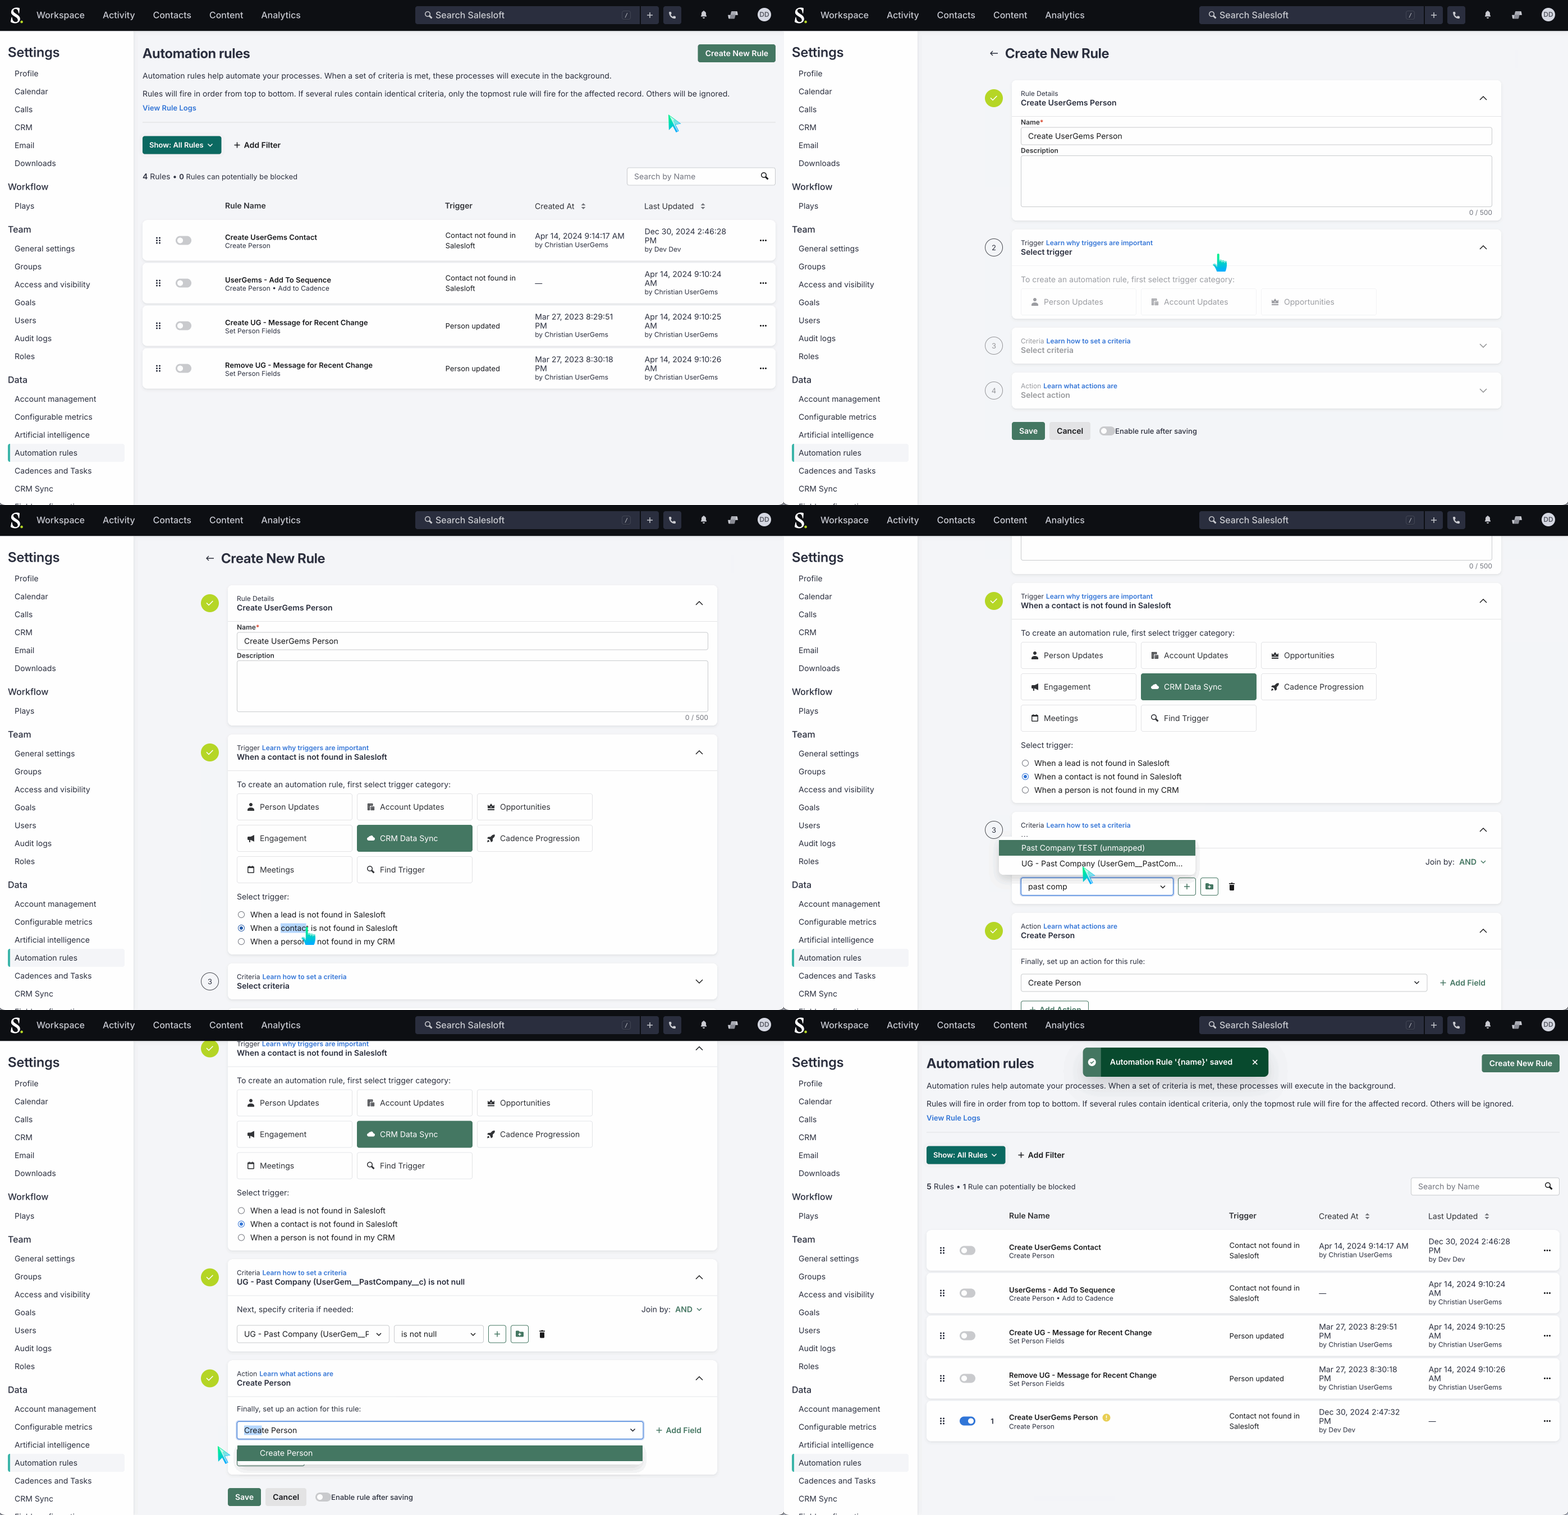
If adding UserGems Leads in addition to Contacts, repeat the steps above to create a separate automation rule with the Trigger = "When a lead is not found in Salesloft" (screenshot below) - this should be ordered AFTER the "create person" from Contact automation
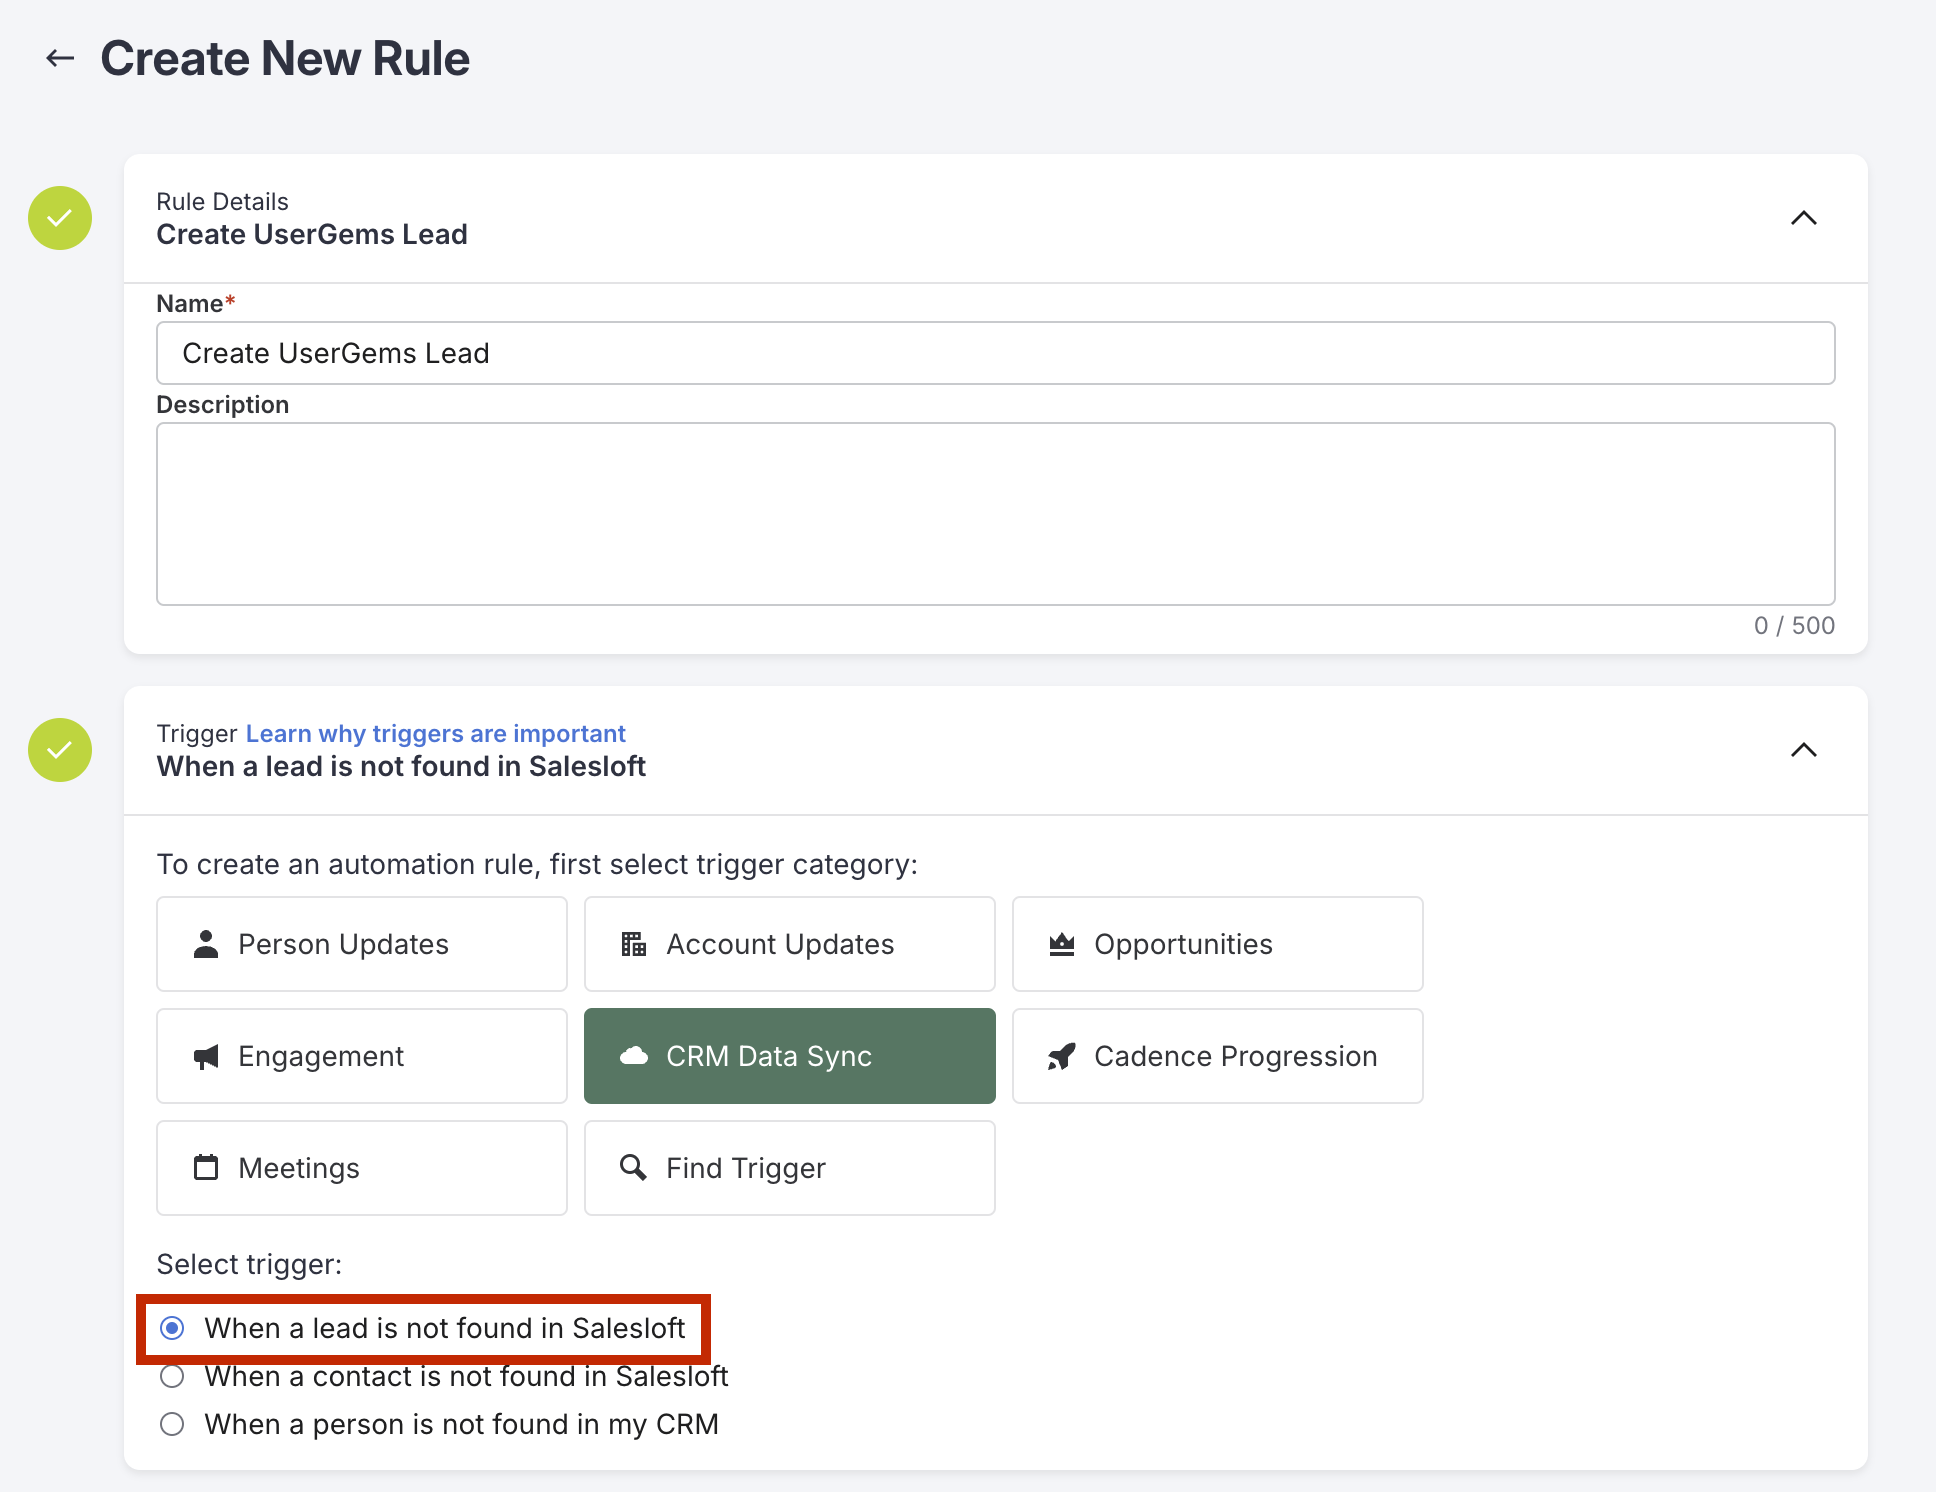
Some additional notes on these automations:
- Since automations run in order from top down, we recommend positioning these "Create person" automations at the top of your automation list to ensure that unintended automations don't override them
- Click "View Rule Logs" in Automation Rules to identify why automation rules failed to run
5. Create Cadences Using Custom Variable Fields
Now you'll create a new cadence (or a few) using the custom variables created in Step 2 that will dynamically populate with Gem-E messaging when a prospect enters the cadence.
Within Salesloft, navigate to Team Cadences. Click New Cadence.
Use the variables set up in Step 2 for the subject and body of each email step.
Example sequence structures are included below:
Start with a manual first step during testing and switch to automated later if desired.
#### Co-pilot (High Touch) template for past champions:
Co-pilot (High Touch) template for everyone besides past champions:
Autopilot (low touch) template:
6. Use your cadences!
After adding the custom UserGems variables and making any additional (optional) customizations to your cadences, you're ready to start using them!
Want to learn how to preview messages within Salesloft? Visit this article
Troubleshooting
Picklist configuration
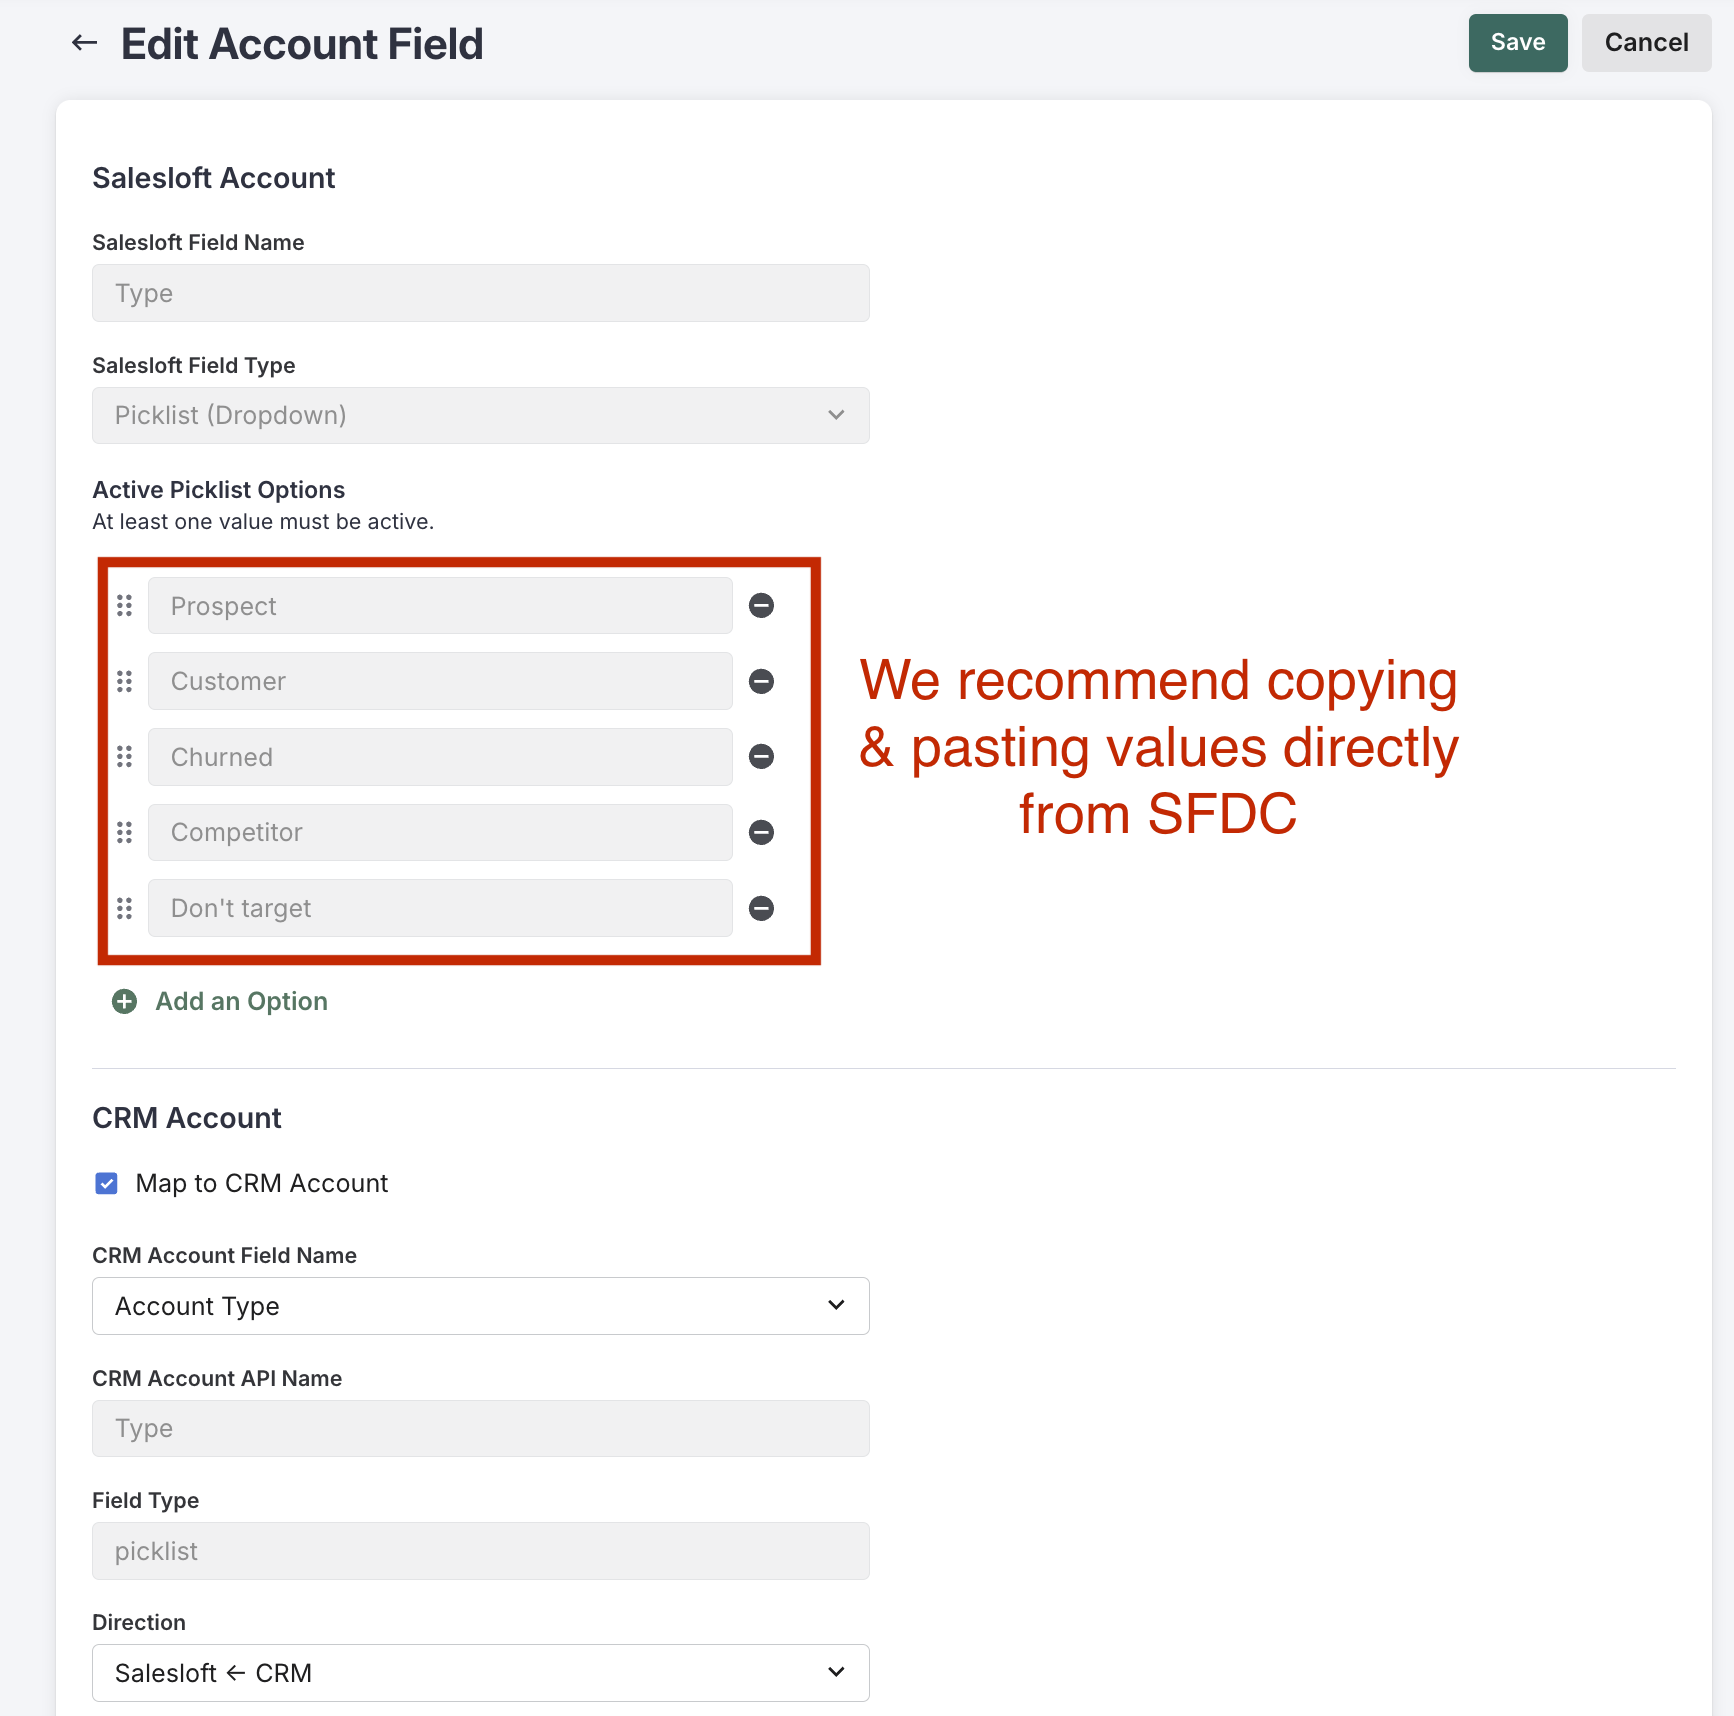
Picklist values must match exactly between Salesforce and Salesloft for records to be created
- Under "Settings" -> "Field Configuration" -> we'll use the example of the "Account Type" field but this applies to any picklist -> click the Dropdown arrow next to it -> click "Edit Field"
- Make sure that the Active Picklist Optionsexactly match the ones coming from Salesforce; mismatches here can prevent a lead or contact record from being created
Debugging
If you need to debug:
- Navigate to "Settings" -> Click "CRM Sync" -> click "Sync Management" -> under "CRM Sync log" click "View Logs". Check Status: Failed
- Automation Rules has a “View Rule Logs”. Check Status: Failed
- The individual Automation Rule has a “View Logs” (need to edit the rule to view)
