
UserGems has a native integration with Outreach that has two important benefits:
- It allows UserGems to push Gem-E powered AI messaging or templated sequences directly into your Outreach so you don’t need to build sequences and messaging from scratch
- It allows for UserGems to automatically add Leads/Contacts directly to the right sequence
Steps
1. Connect Admin Outreach User
Connecting an Admin Outreach user will give UserGems the API access we need to create sequences and add Leads/Contacts to sequences.
Visit the Engagement page in UserGems to connect to Outreach (or navigate to "Settings" > "Engagement").
See this article about required permissions for the integration user.
2. Create Custom Fields for Gem-E in Outreach
- Within Outreach, click the gear icon labeled Administration
- From Administration, click "Records" > click “Prospects’ > click "Fields configuration"
- Click "Add Configuration" and add new custom fields
- Repeat the above for the fields listed in the table below
- Note: It's important to create all Subject fields listed below, though you will notice that some are not referenced in the table in Step 5 below.
You'll need to scroll at first to find the first available custom field you have not yet configured. After clicking "Add Configuration," select that Custom Field (Custom field 39 in our video clip below) then give it a label and select the type "text field," then click "Add".
3. Map Custom Fields to UserGems
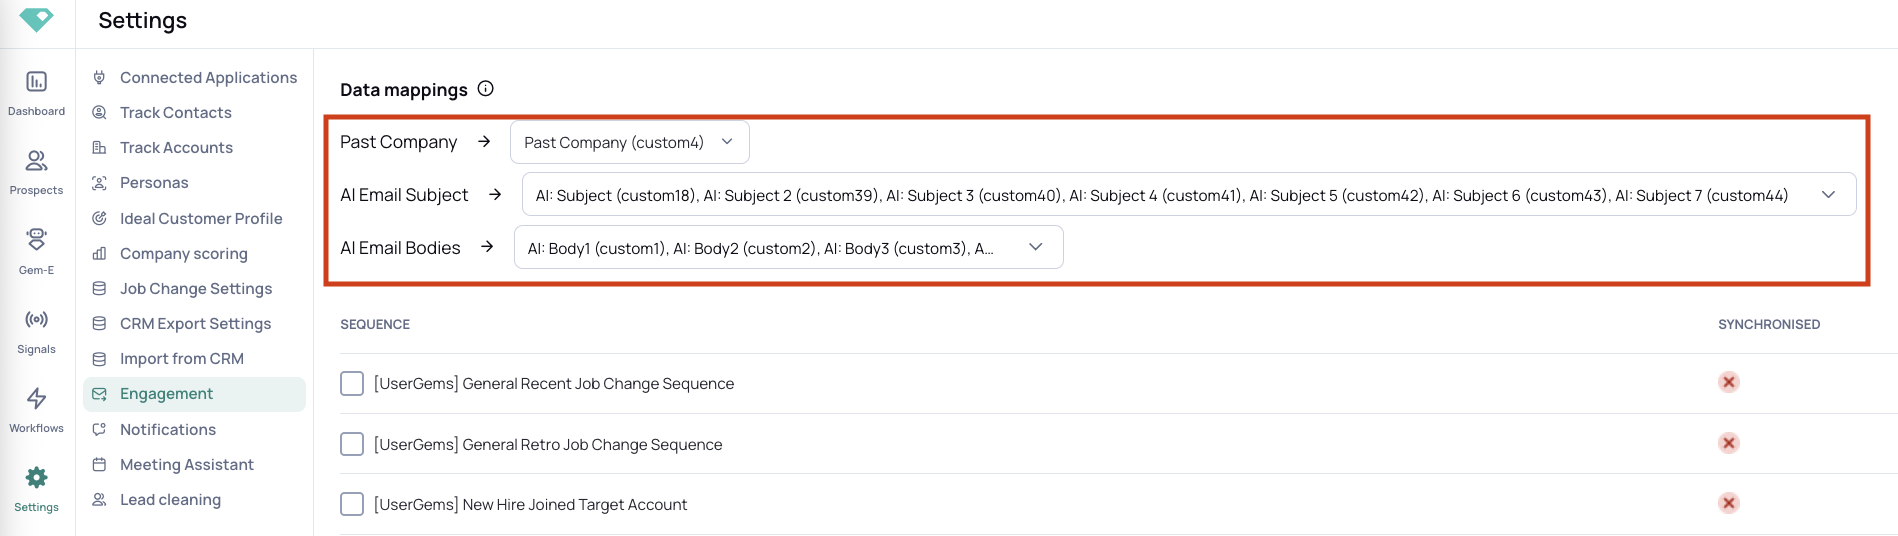
After connecting your Outreach account, complete the field mappings from UserGems to Outreach at the top of the Engagement page.
Map the fields below as applicable for your UserGems setup:
- Next to Past Company, map the UG - Past Company field you created in Outreach
- Next to AI Email Subject, map the fields you created in Outreach for AI Subjects generated by Gem-E to be used in sequences
- Next to AI Email bodies, map the fields you created in Outreach for AI Email Bodies generated by Gem-E to be used in sequences
4. Ensure Salesforce & Outreach Sync is Configured
Before activating Workflows in UserGems, please make sure you have enabled the sync between your CRM and Outreach to ensure your UserGems contacts/leads will be synced to Outreach and can be added to sequences.
To enable CRM sync within Outreach:
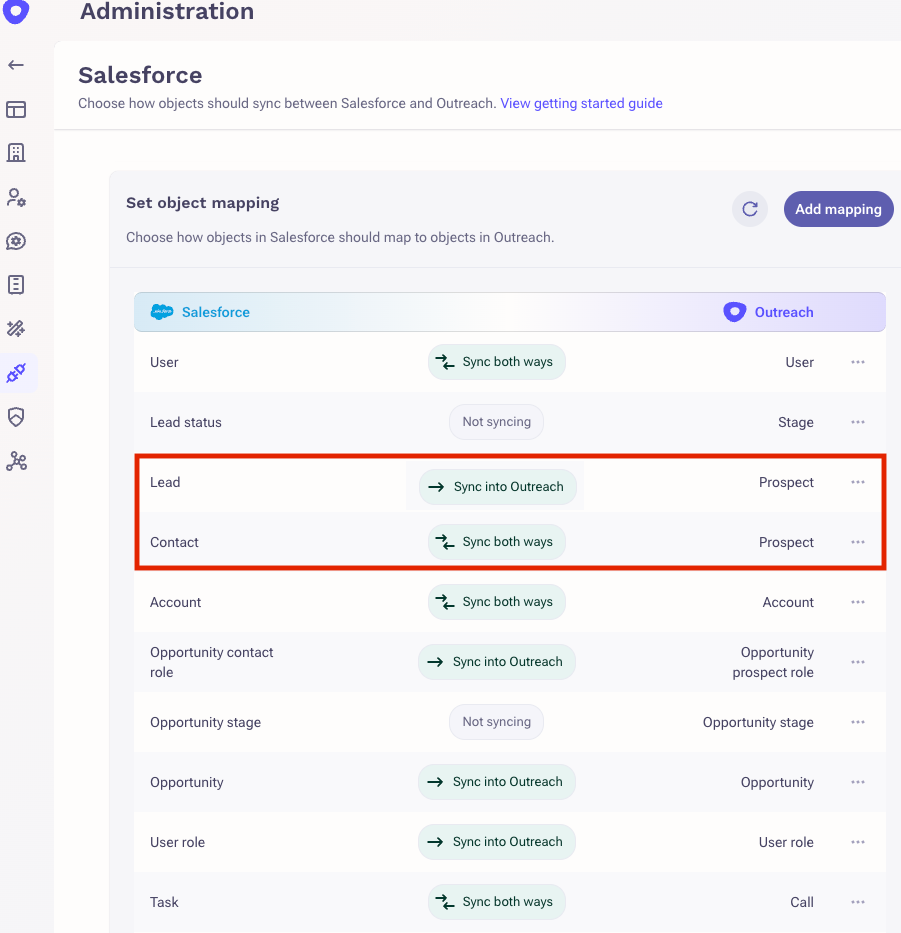
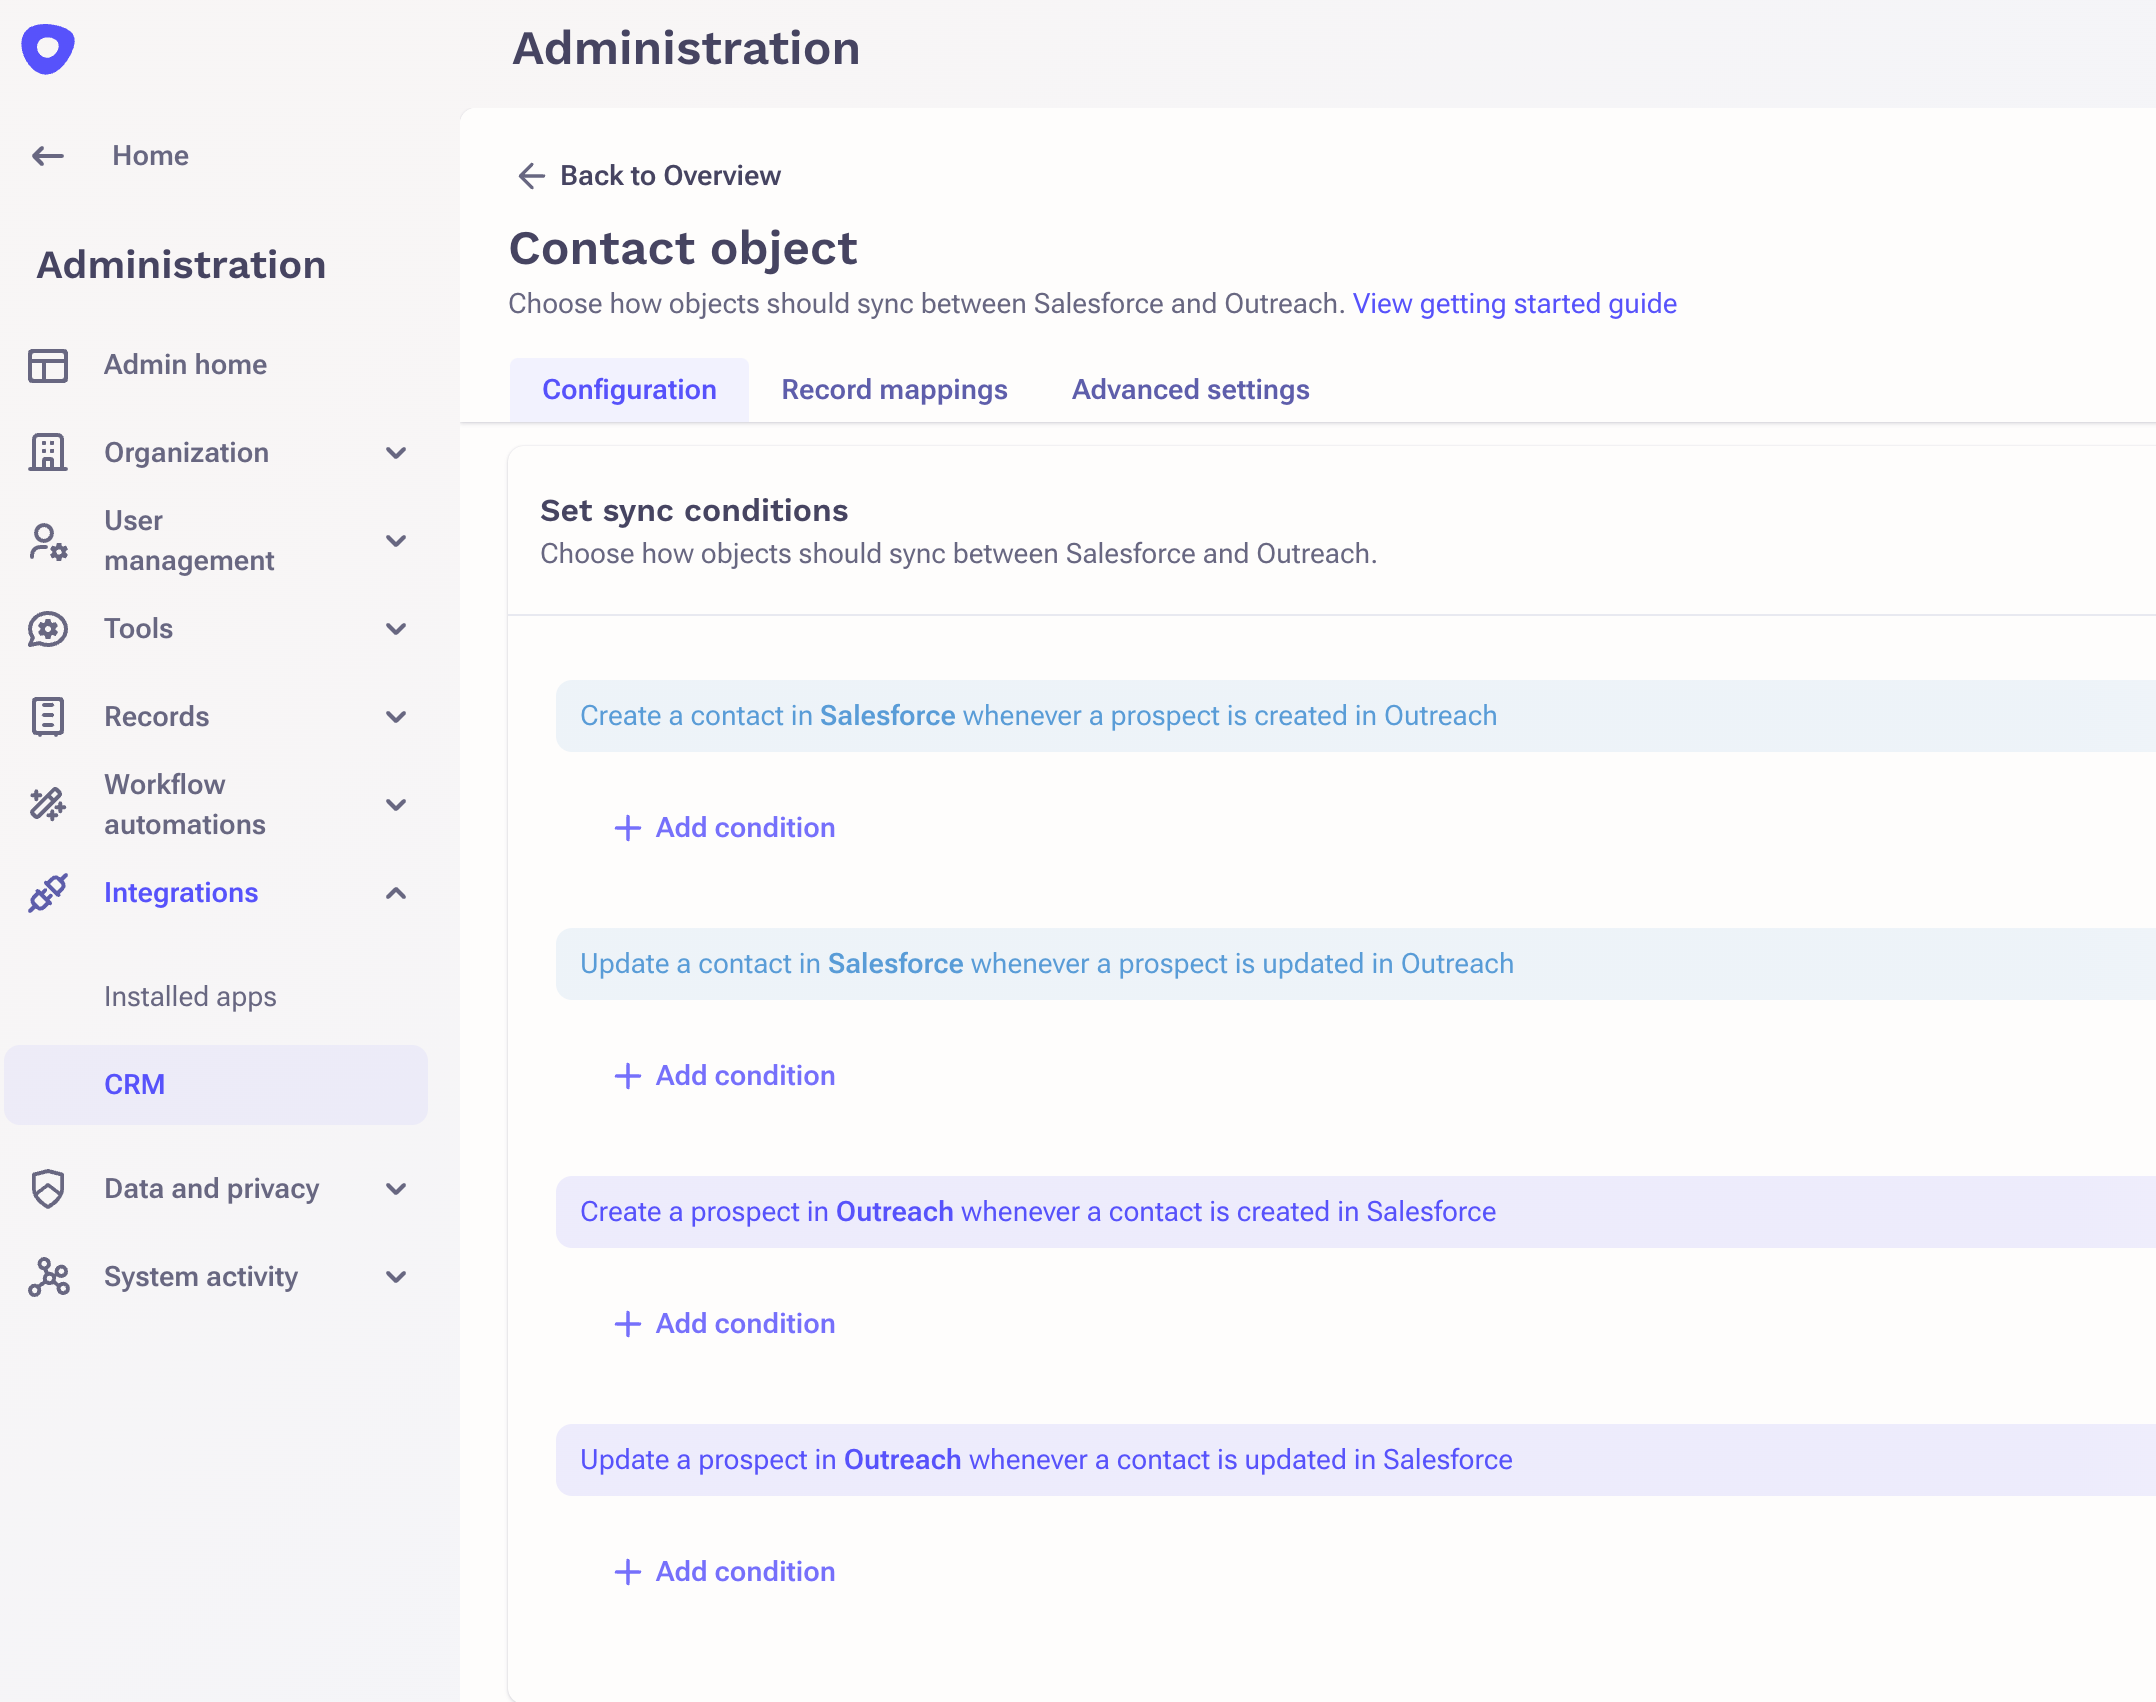
a. Click "Administration" -> click "Integrations" -> click "CRM" -> under "Set object mapping" ensure that Leads and/or Contacts (depending on which you're using) are syncing at least from your CRM into Outreach, if not both ways.
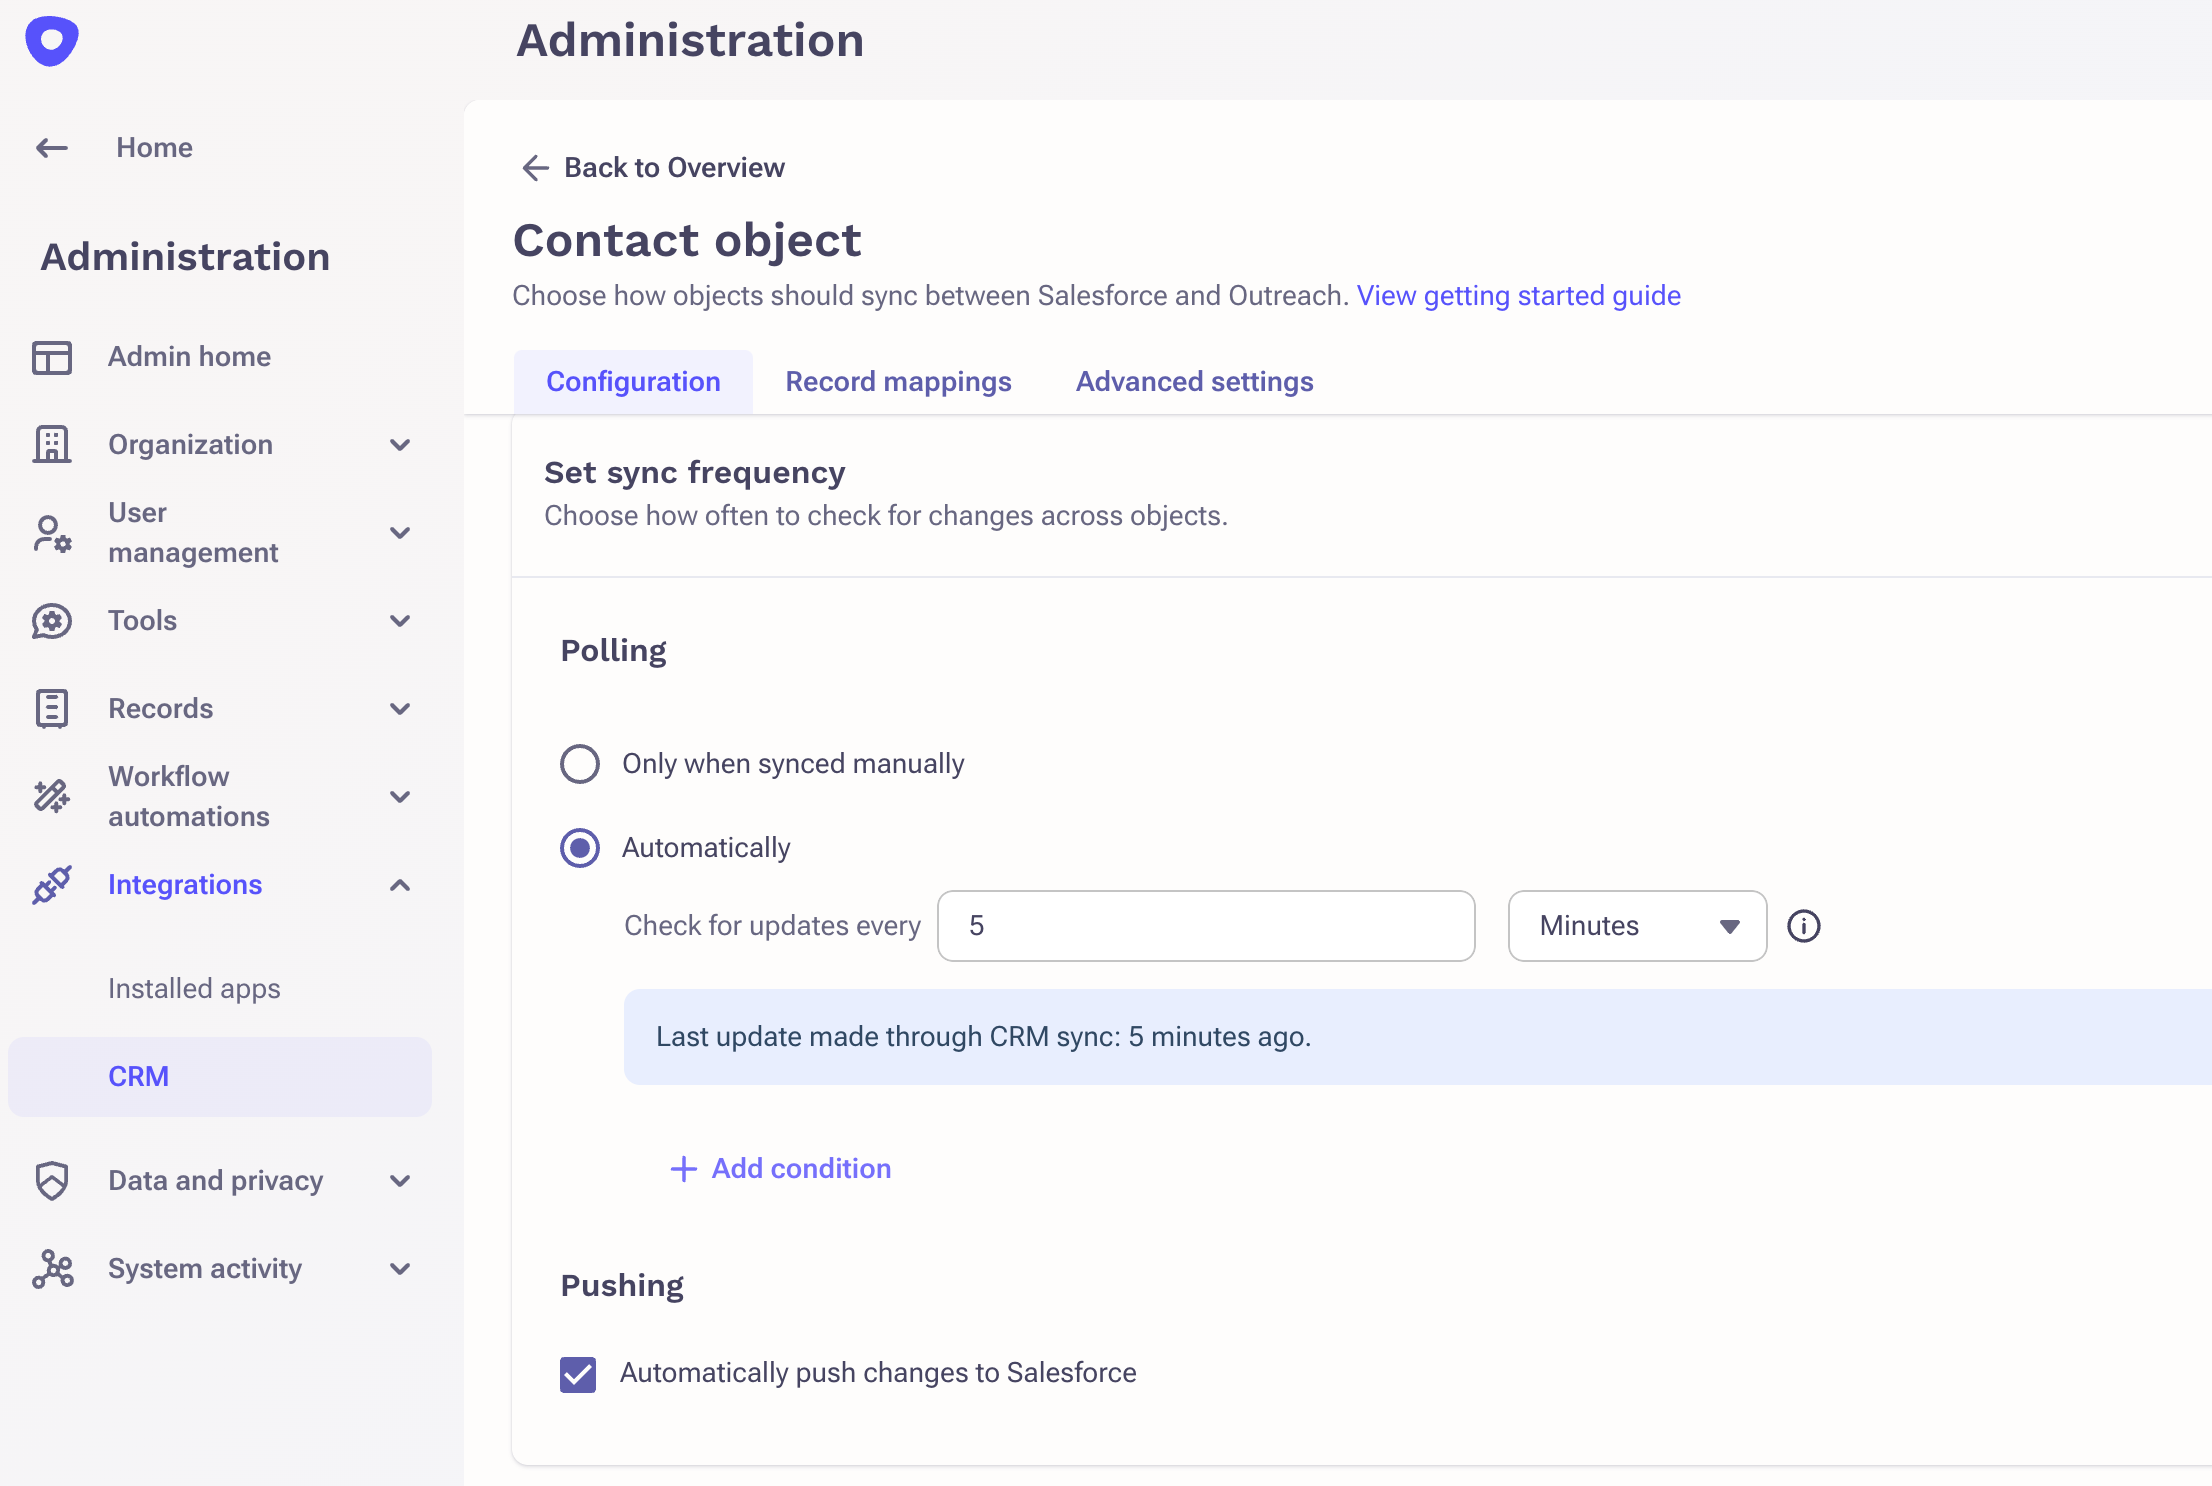
b. Within Leads and/or Contacts, check Sync Frequency & make sure it’s polling automatically every 5-10 minutes
c. Scroll down to “Set sync conditions”
Review under which conditions a prospect is created in Outreach - preferably none
d. Click on "Advanced Settings" and make sure that you are syncing messages sent outside Outreach

5. Create A Default Gem-E Sequence Using Custom Fields
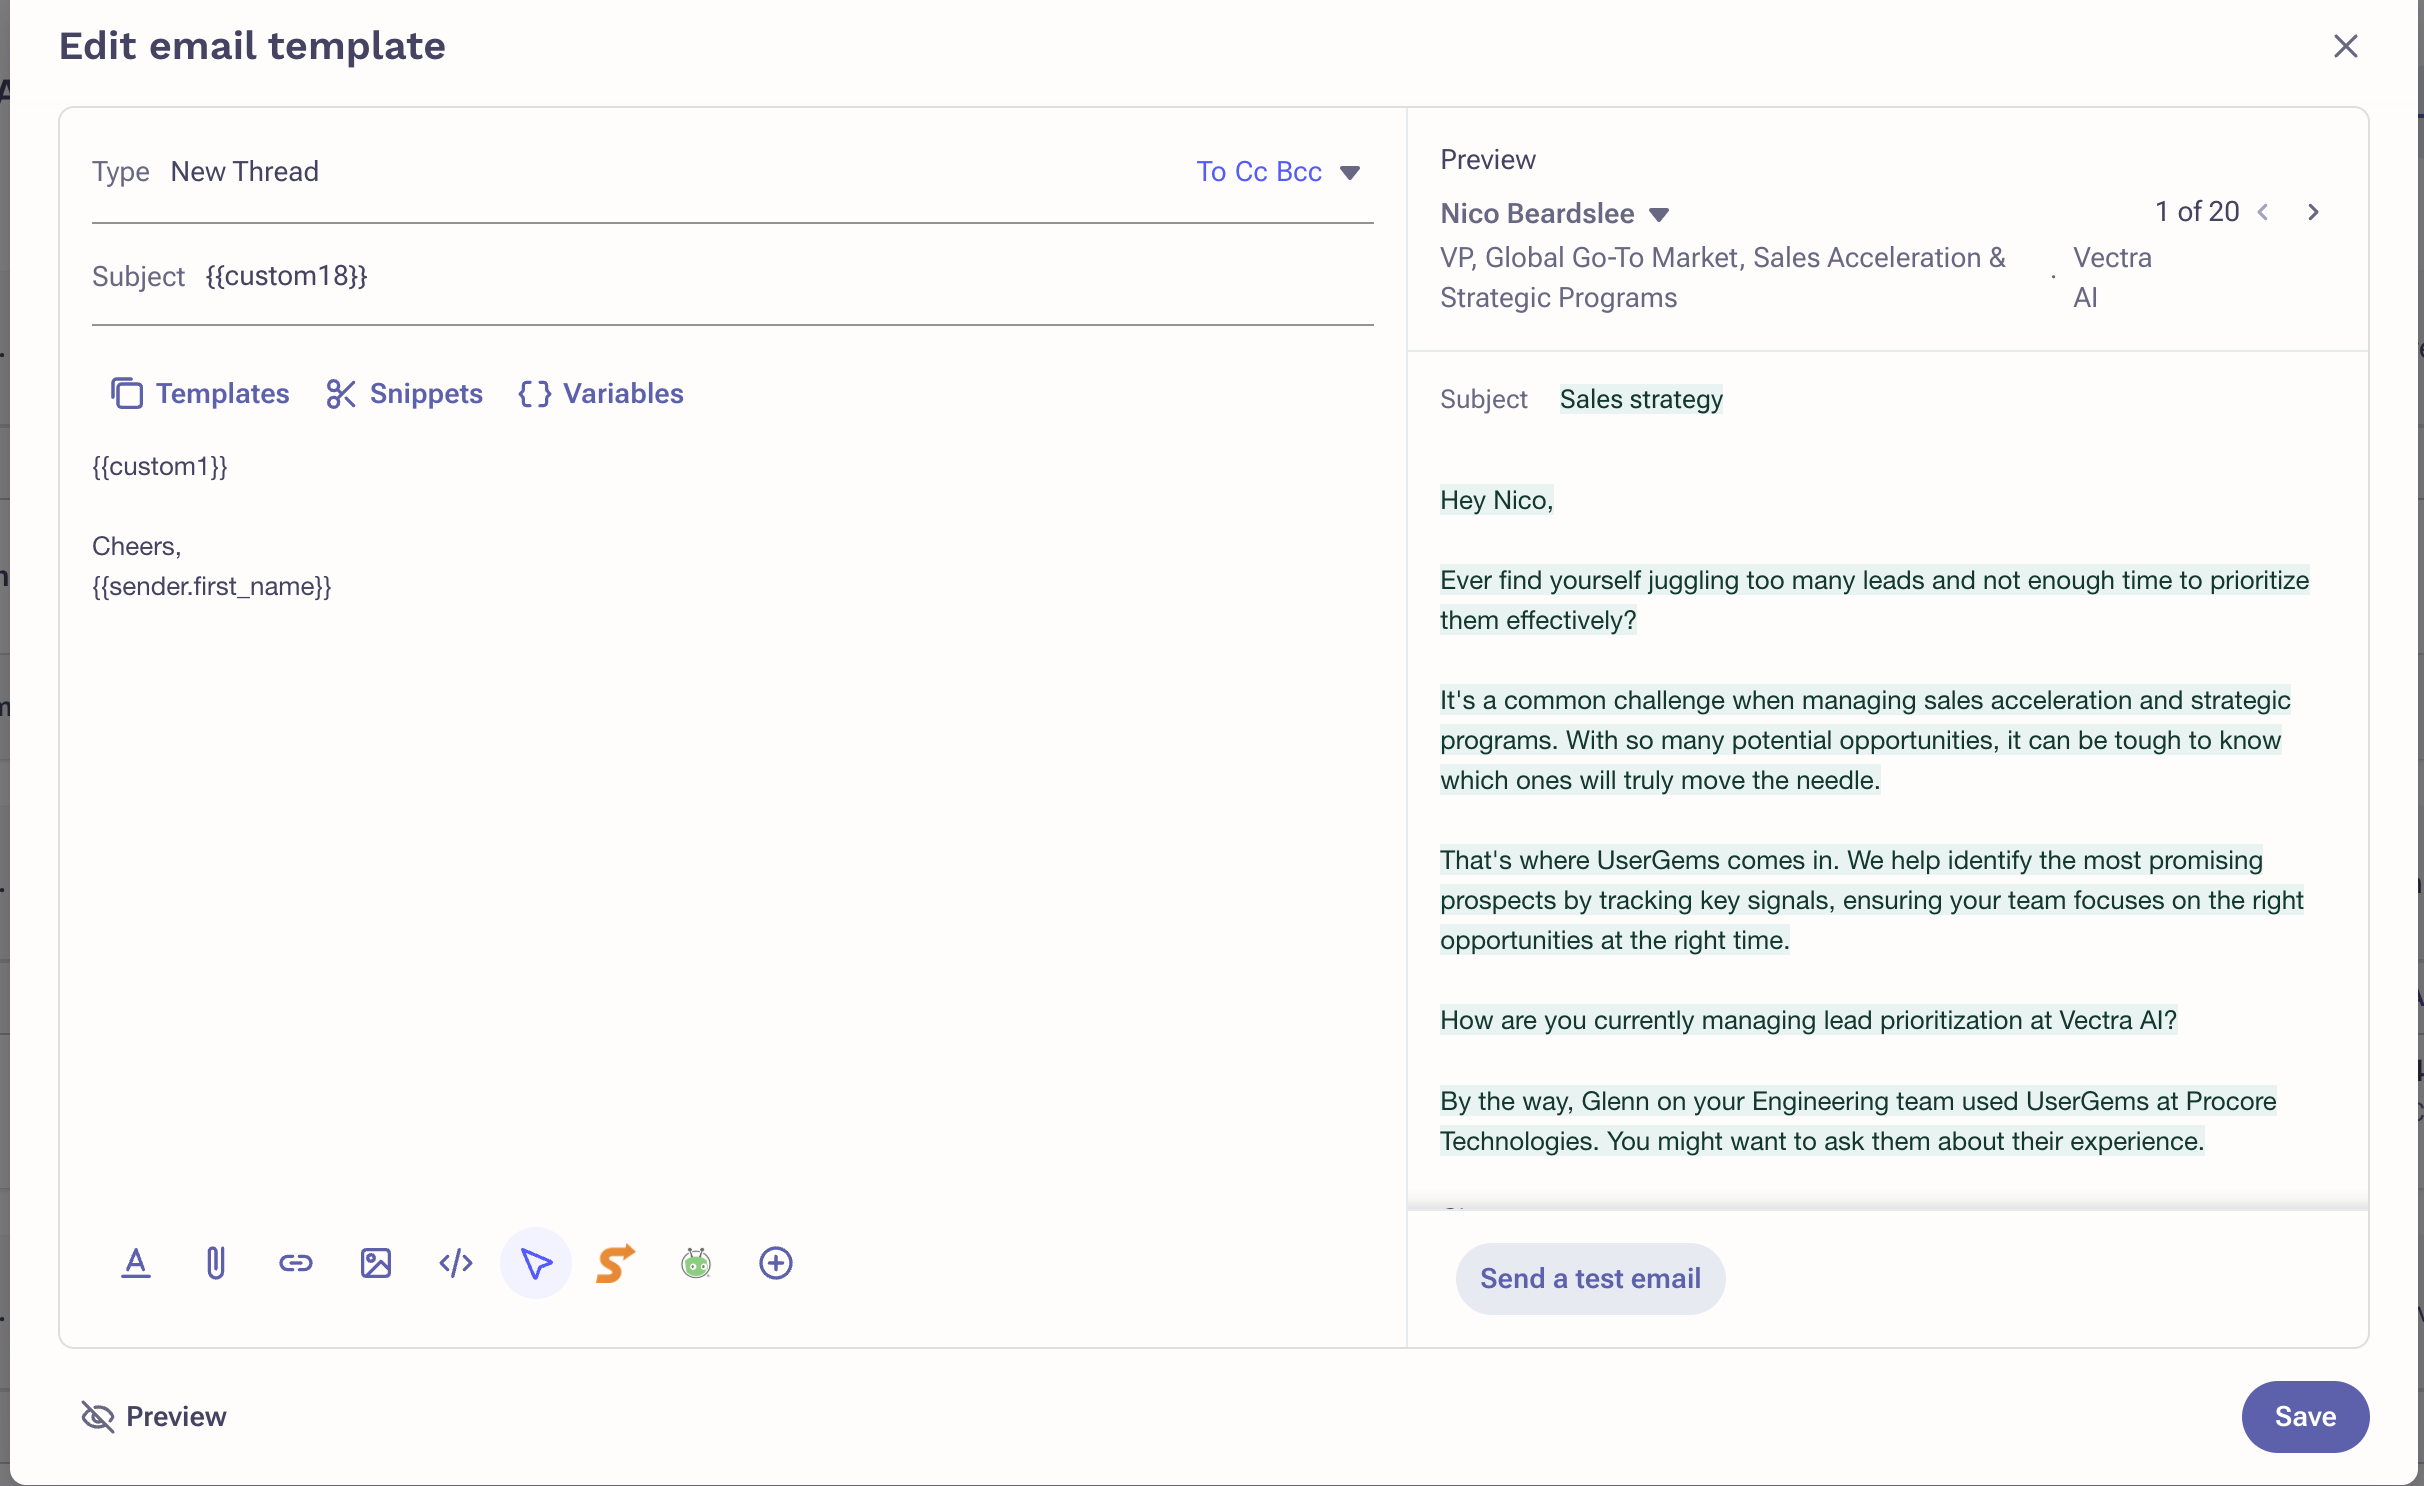
Within Outreach, navigate to Content > Sequences. Click New Sequence or edit an existing sequence.
Use the variables set up in Step 2 for the subject and body of each email step.
Depending on campaign this sequence can then just be duplicated & fine-tuned going forward.
Example sequence structures are included below:
Co-pilot (High Touch) template for past champions:
Co-pilot (High Touch) template for everyone besides past champions:
Autopilot (low touch) template:
Outreach will return the number of the custom field mapping you created, so if it says something like {{custom4}} that’s ok! Just make sure to preview the content before activating!
####
For Non Gem-E Sequences
Optionally, you can sync UserGems-recommended sequences to Outreach from the Engagement page,creating templates you can use to automate UserGems playbooks based on job change signals and other criteria. To do this, select the Sequences you want to sync > click "Send templates to Outreach" at the bottom right.
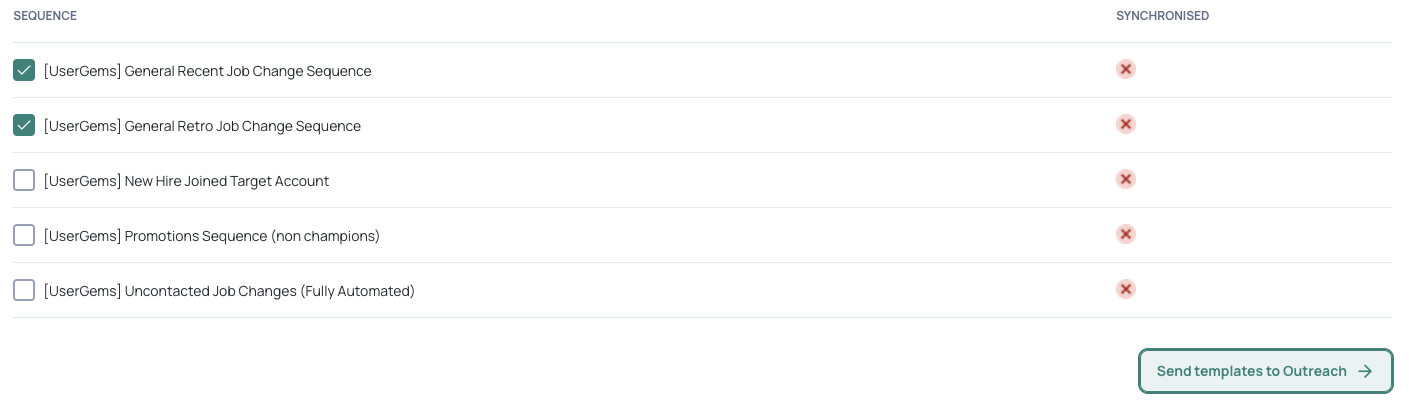
When searching for these sequences in Outreach, ensure all filters are cleared from your search and search "[UserGems]" without the quotation marks.
6. Activate your sequences!
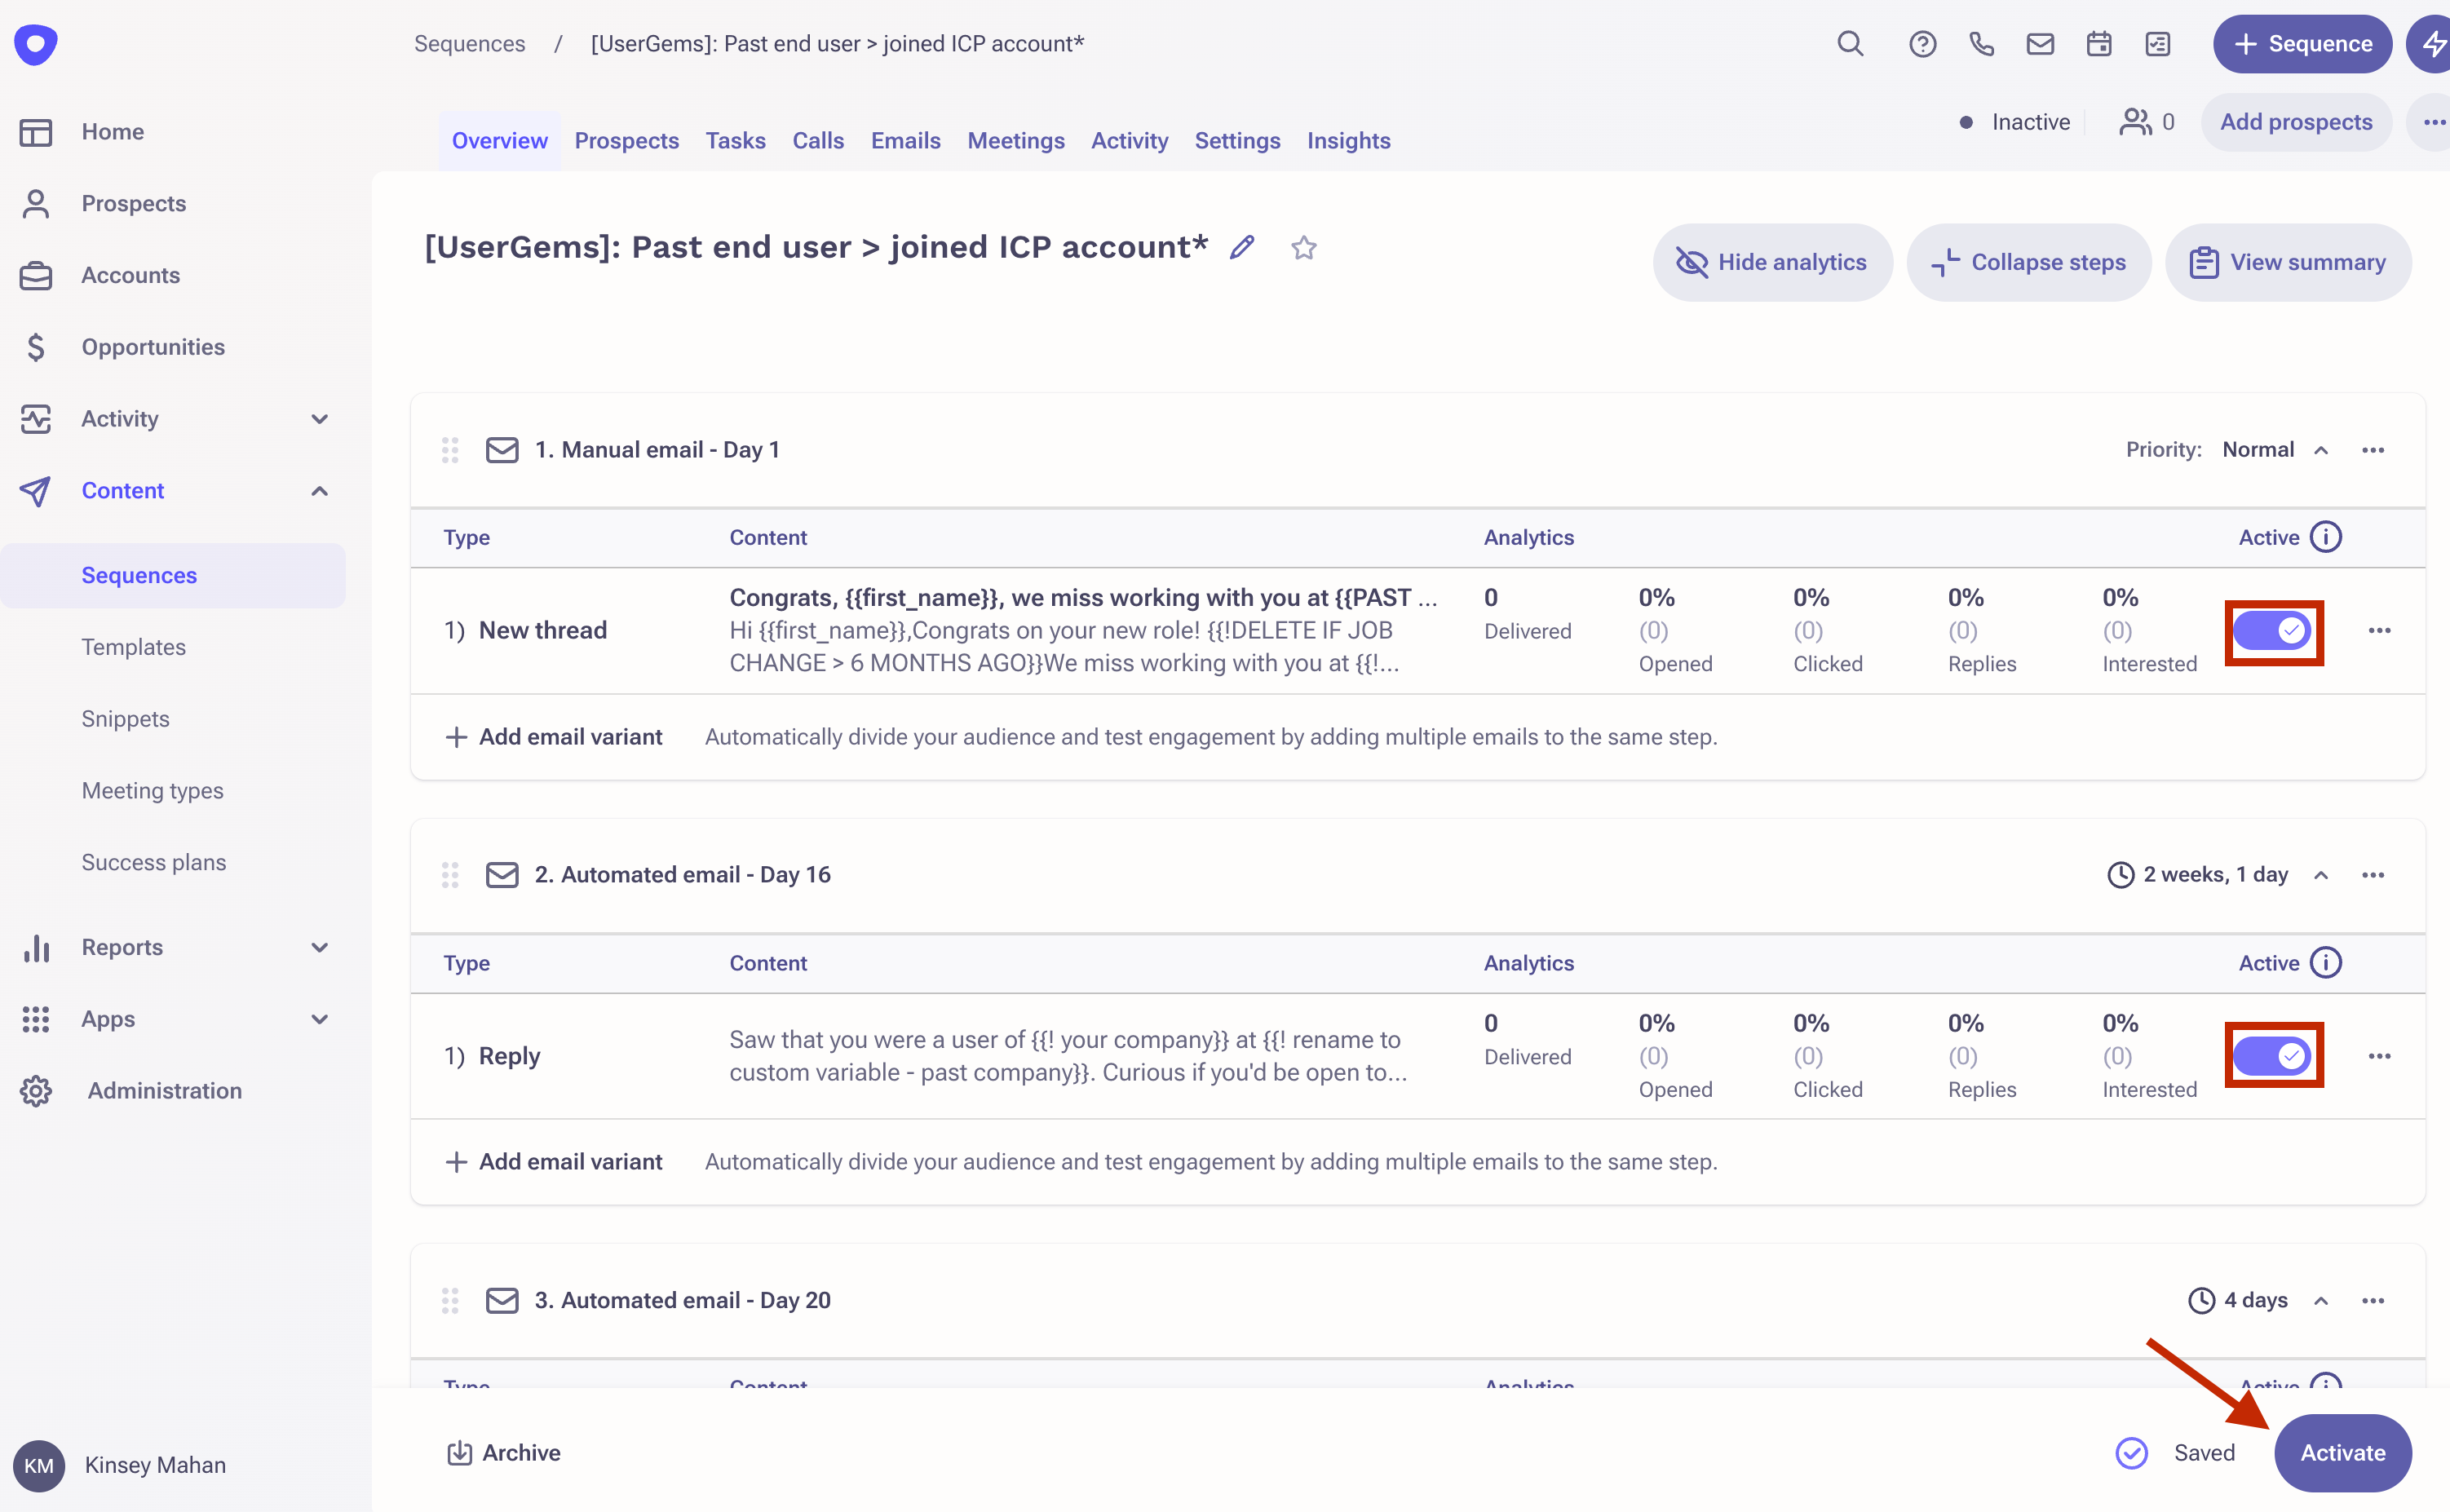
After adding the custom UserGems variables and making any additional (optional) customizations to your sequences, you're ready to activate them!
In every UserGems sequence, toggle each individual step to Active > click Activate at the bottom of the page.
Important: Simply clicking "Activate" will not turn on the sequences - each step needs to be switched to Active as well.
Want to learn how to preview messages in Outreach? Visit this article.
Troubleshooting
If a record is missing in Outreach, do the following to debug:
- Click "Administration" -> click "Integrations" -> click "CRM" -> click "Contact" (or "Lead")
- Click "Test Sync" (top right) & select the record that should be synced -> click "Import"
- Example related issues we’ve seen:
- A company created a UserGems specific “Lead Status” in Salesforce but in the sync between “Lead status” (SFDC) & Stage (Outreach) it hadn’t checked on the “Create” permission. Therefore Outreach tried to create a UserGems record with Lead Status UserGems but failed since Stage UserGems didn’t exist and it couldn’t create it. (CRM -> Lead status)