
Introduction & Background
Thank you for your interest in UserGems! This guide will take you through the configuration of UserGems New Hires & Promotions signal, which automatically adds missing key new hires and promotions to your CRM.
You will be partnered with a dedicated Customer Success Manager for the duration of your contract. You can expect a smooth and fully supported onboarding experience where we will cover everything in the guide below and more, including:
- Connecting a UserGems Integration User
- Adding Key Account Reports
- Configuring Personas
- Salesforce Settings
- Testing & QA
- Full team training run by UserGems (or we can train-the-trainer)
- Go-live & ongoing program management
Step 1 - Determine Your Salesforce Integration Strategy
- If you are an existing Customer using Champion Job Change tracking, you are likely already connected to UserGems with an integration user and can skip to Step 2
- If you are not utilizing the Champion Job Change signal yet, then your CSM will provide you with a signup link that you can use to connect your Salesforce Integration user to UserGems. UserGems will need read access to your Users, Leads/Contacts, Accounts, Opportunities, & Reports as well as write access to the Lead/Contact fields that you would like to set for the records that we deliver.
Step 2 - Configure Key Account Reports & Personas
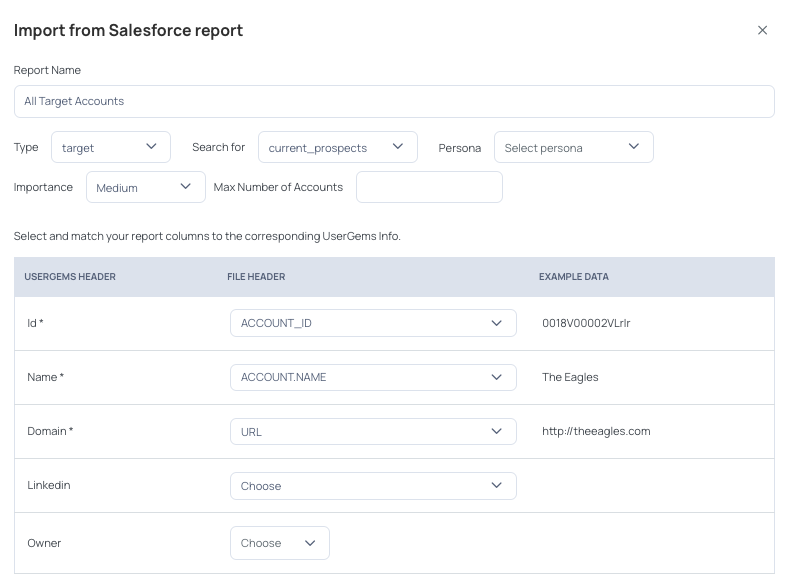
Create Salesforce Reports of Key Accounts
- Columns needed: AccountId, Account Name, Website
- Ensure that report is saved in a folder the integration user has access to (cannot be in any user’s private folder)
Upload Key Account Reports to relevant Categories in the UserGems Web App
- Provide Report Id
- Configure Report Settings
- Map AccountId, Account Name, and Website to the related UserGems headers
Configure Persona(s) in UserGems and map them to Key Account Reports (more here on configuring Personas)
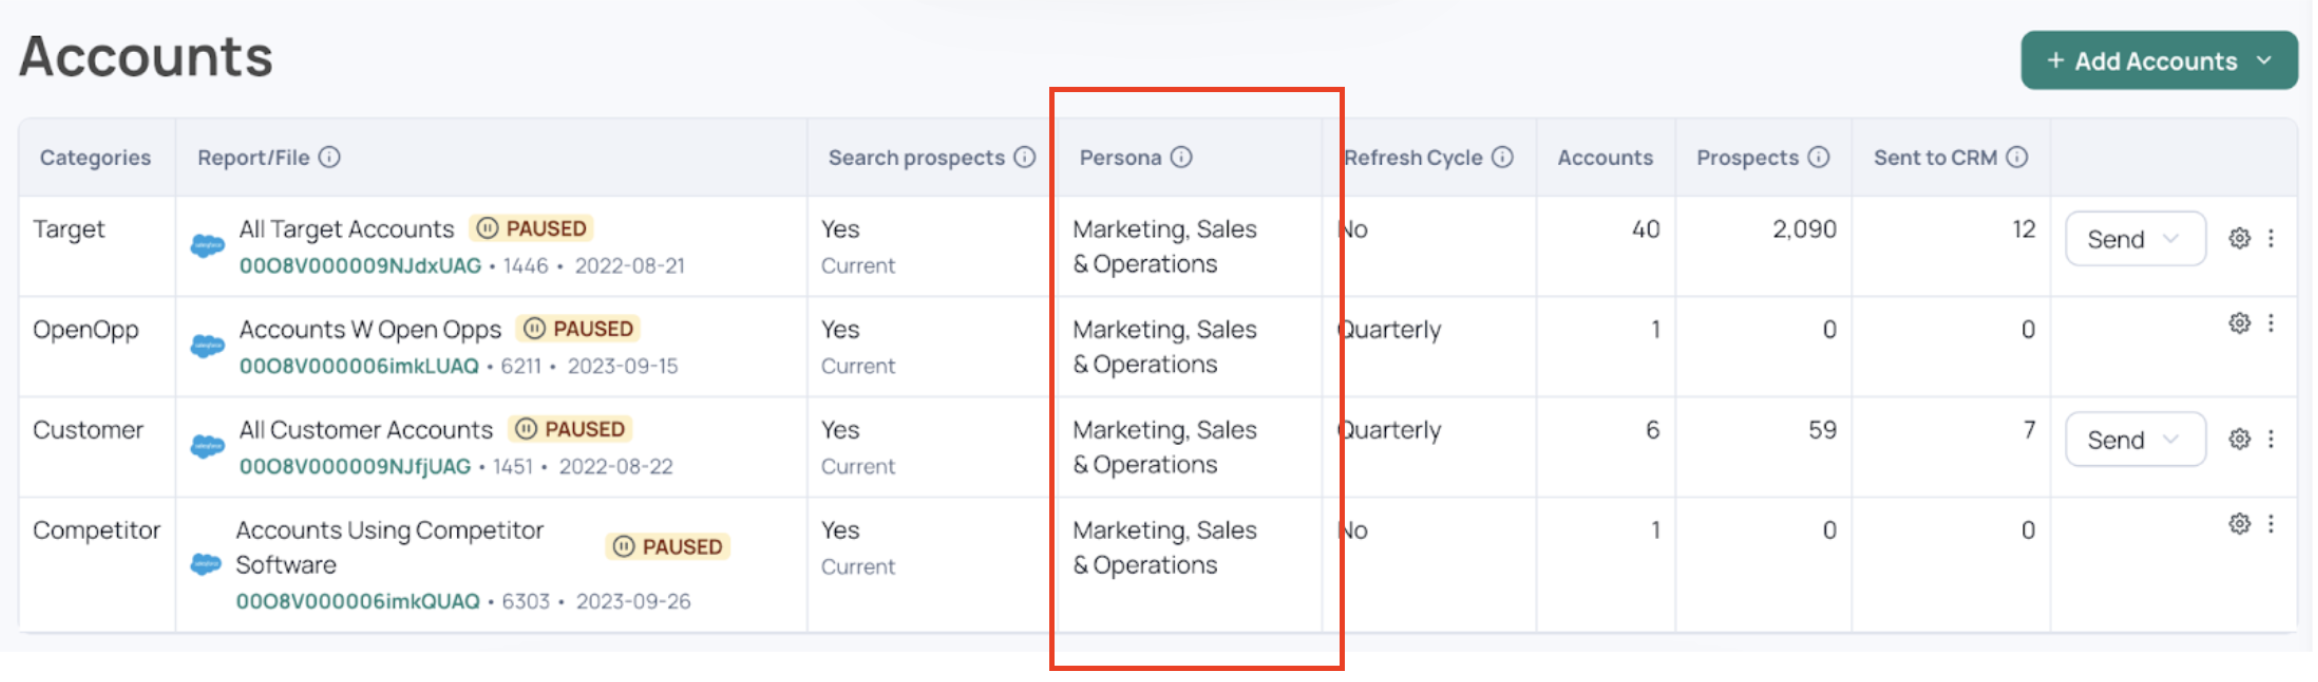
For each account list, admins configure refresh intervals, limits, and default ownership for new leads/contacts(generally assign to account owner)
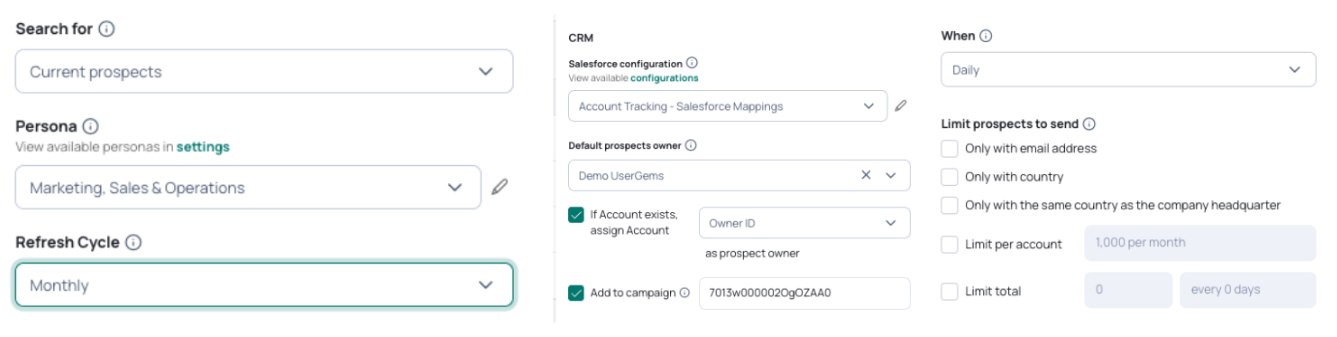
Step 3 - Configure Salesforce Mappings
Decide how records are created and which fields are updated when UserGems surfaces a new persona-matching contact to a key account.
##### Navigation: Account Tracking -> Settings -> Salesforce -> "Add new configuration"

Step 4 - Decide Your Rep Handoff Strategy and Create Workflows
Out of the box, we will generally assign new hires & promotion contacts to the existing account owner. However, admins can also optionally build powerful workflows directly in the UserGems web app for these contacts to help with things like:
- Advanced/situational routing
- Field updates
- Email and/or Slack notifications
- Auto-sequencing to Salesloft or Outreach